Maintenance
8447−1/A1
Winterthur Gas & Diesel Ltd.
3/ 5
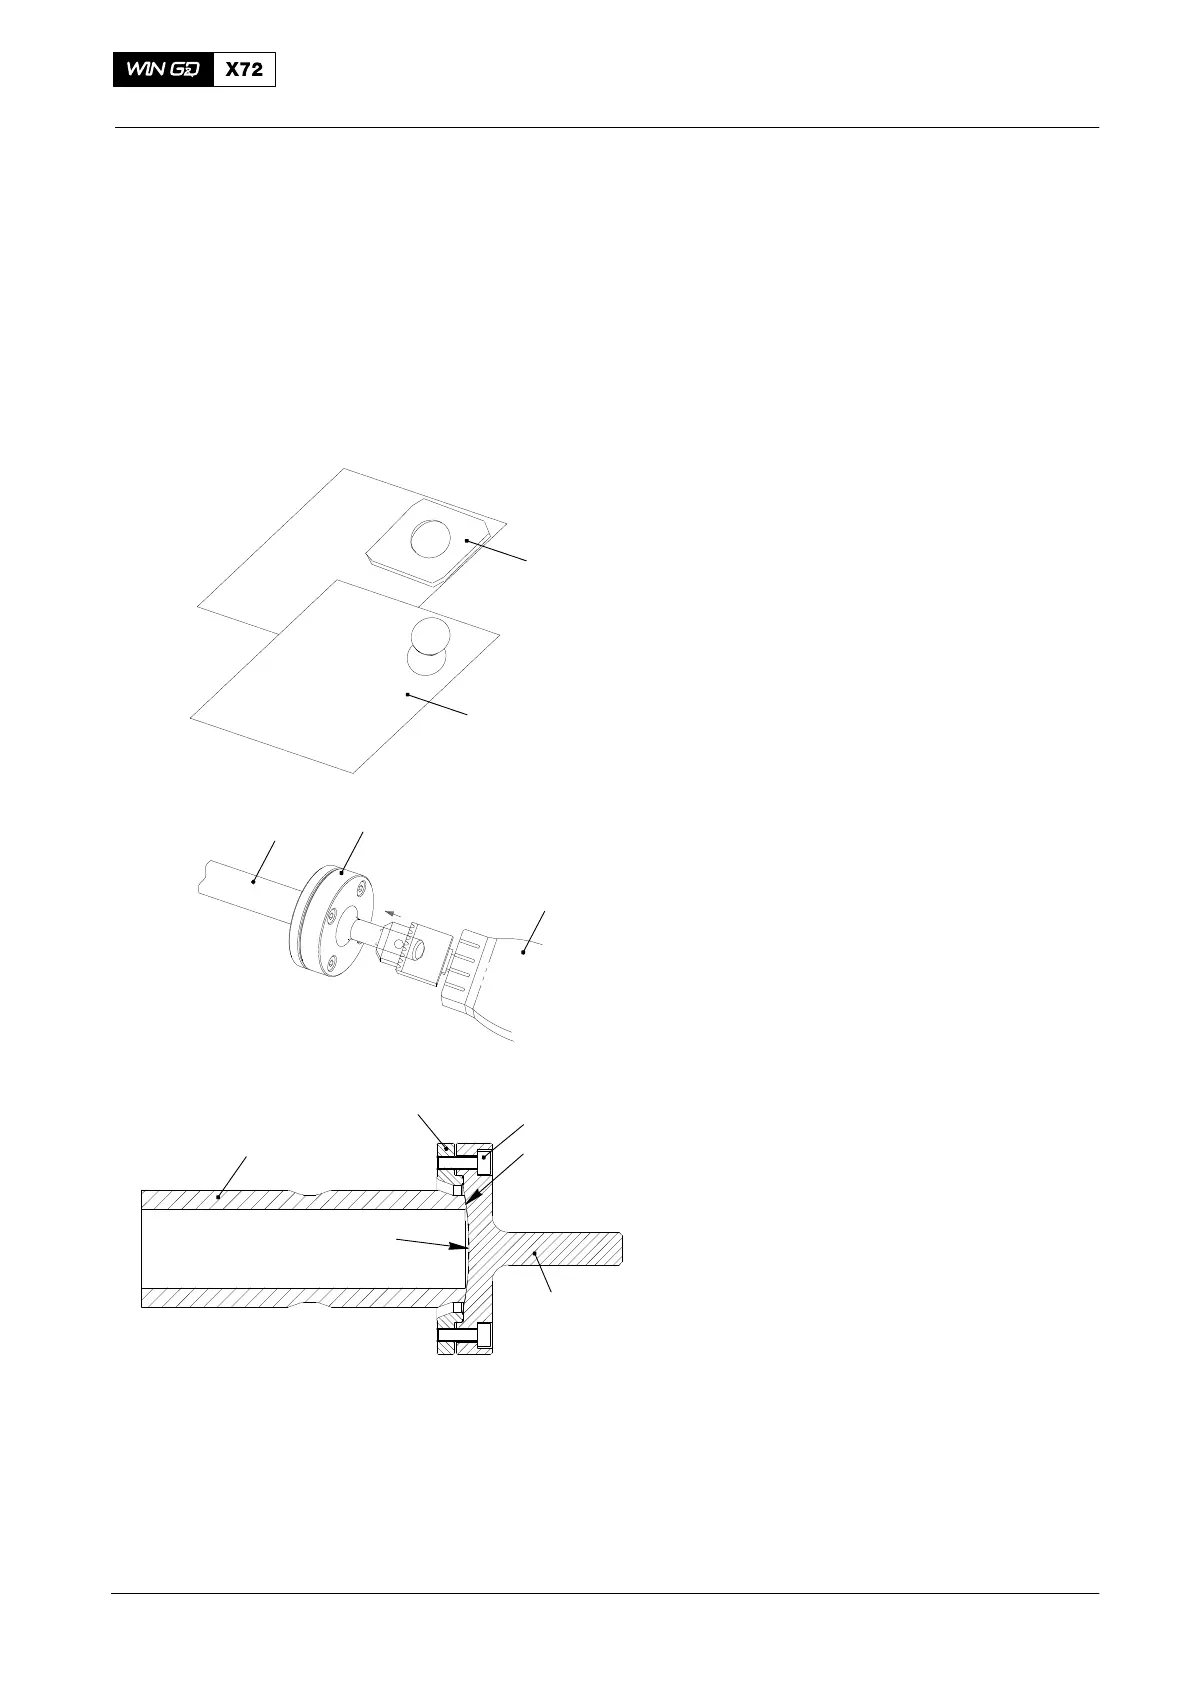
15) Loosen the two screws (9, Fig. 2) on the intermediate piece (8).
16) Remove the four screws (6) from the flange (7).
17) Move the flange (7) up.
18) Remove the four screws (2) from the flange (1).
19) Carefully remove the HP servo oil pipe (3) from the valve housing (5).
20) Apply protection to the sealing faces (SF) to prevent damage.
3. Sealing Faces − Grind
To get a clean and smooth finish on the HP
servo oil pipe, do step 1) to step 20):
1) Put the template (94841A, Fig. 3) on
the back of the emery cloth.
2) Use the applicable grade of the emery
cloth related to the quantity of metal
you want to remove.
3) Use a pencil or a ball pen to make the
inner shape.
4) Cut out accurately the shape.
5) Remove the four screws (T2) and the
grinding tool (94841).
6) Apply Molyslip Copaslip paste to the
threads and faces of the four
screws (T2).
7) Remove the cover (T1).
8) Put the emery cloth you cut out into the
grinding tool (94841).
9) Put the grinding tool (94841), emery
cloth and the cover (T1) in position on
the HP servo oil pipe (1).
10) Torque symmetrically the the four
screws (T2) to 2.0 Nm.
11) Put the HP servo oil pipe (1) in a vice,
as horizontally as possible.
12) Adjust the speed of the hand drill to
between 200 rpm and 500 rpm.
13) Align the hand drill and the grinding
tool (94841) accurately with the HP
servo oil pipe (1) as shown.
14) Use light pressure and start grinding.
15) Regularly remove the unwanted
material from the grinding tool (94841).
2015−06
HP Servo Oil Pipe: Removal, Grind the Sealing Faces and Installation (with Hawe SOP)
Fig. 3
WCH03207
94841A
SF
T2
94841
T1
1
1
94841
Emery Cloth
Hand Drill
Emery
Cloth
 Loading...


