Panel and Connector Arrangement
10
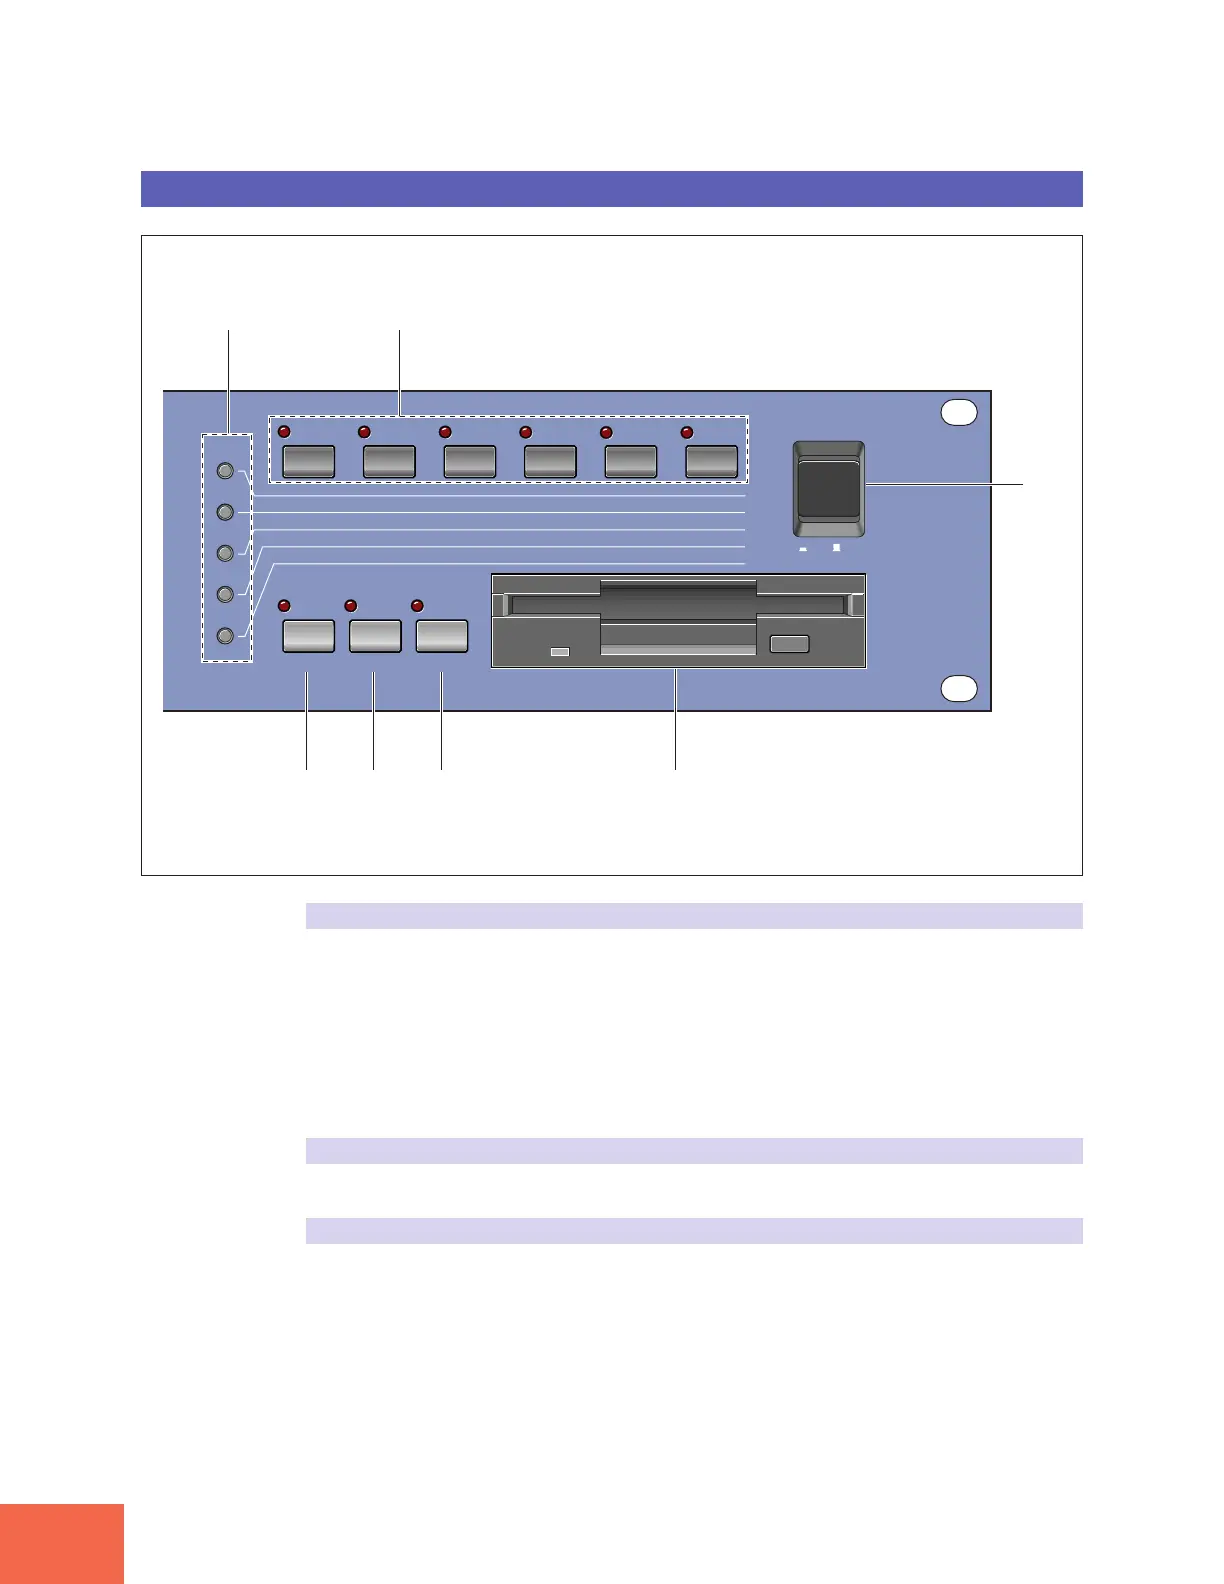
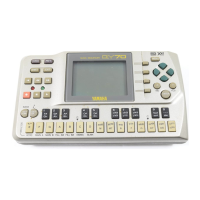
Front Panel (Right Side)
(1) Mode buttons
The A3000 provides five operating modes. You select the mode by pressing the corre-
sponding mode button. The button lamp comes on to indicate that the mode is selected.
Each mode is further divided into six functions. After selecting the mode, you can switch
among its functions by pressing the appropriate function keys.
(The A3000 also uses the button lamps to let you know that it is receiving MIDI data.
Each lamp corresponds to a different MIDI data type, and will continue to blink while
the A3000 is receiving MIDI data of that type. (☞92))
(2) Function keys
Use these keys to switch among the six functions within the currently selected mode.
(3) COMMAND key
You press the COMMAND key to access additional commands relevant to the mode and
function that you are currently working in. (☞91)
PLAPLAYY
EDITEDIT
RECREC
DISKDISK
UTILITYUTILITY
PROGRAMPROGRAM
TRIM/LOOPTRIM/LOOP
RECORDRECORD
PROGRAMPROGRAM
TTOTOTALAL EQ EQ
SAMPLESAMPLE
MAP/OUTMAP/OUT
SETUPSETUP
SAMPLESAMPLE
PPANELANEL PLA PLAYY
EASYEASY EDIT EDIT
FILFILTERTER
METERMETER
SEQUENCESEQUENCE
SEQUENCESEQUENCE
EFFECTEFFECT
EGEG
EFFECTEFFECT
VOLUMEVOLUME
MASTERMASTER
SETUPSETUP
LFOLFO
EXITEXIT CTRL CTRL
DISKDISK
SYSTEMSYSTEM
CONTROLCONTROL
MIDI/CTRLMIDI/CTRL
MONITMONITOROR
IMPORIMPORTT
MIDIMIDI
COMMAND ASSIGNABLE AUDITION
POWERPOWER
ON/ON/ OFFOFF
(1)
(2)
(7)
(6)(5)(4)(3)