139
Chapter 4 PLAY Mode
Chapter 4
CONTROL Function
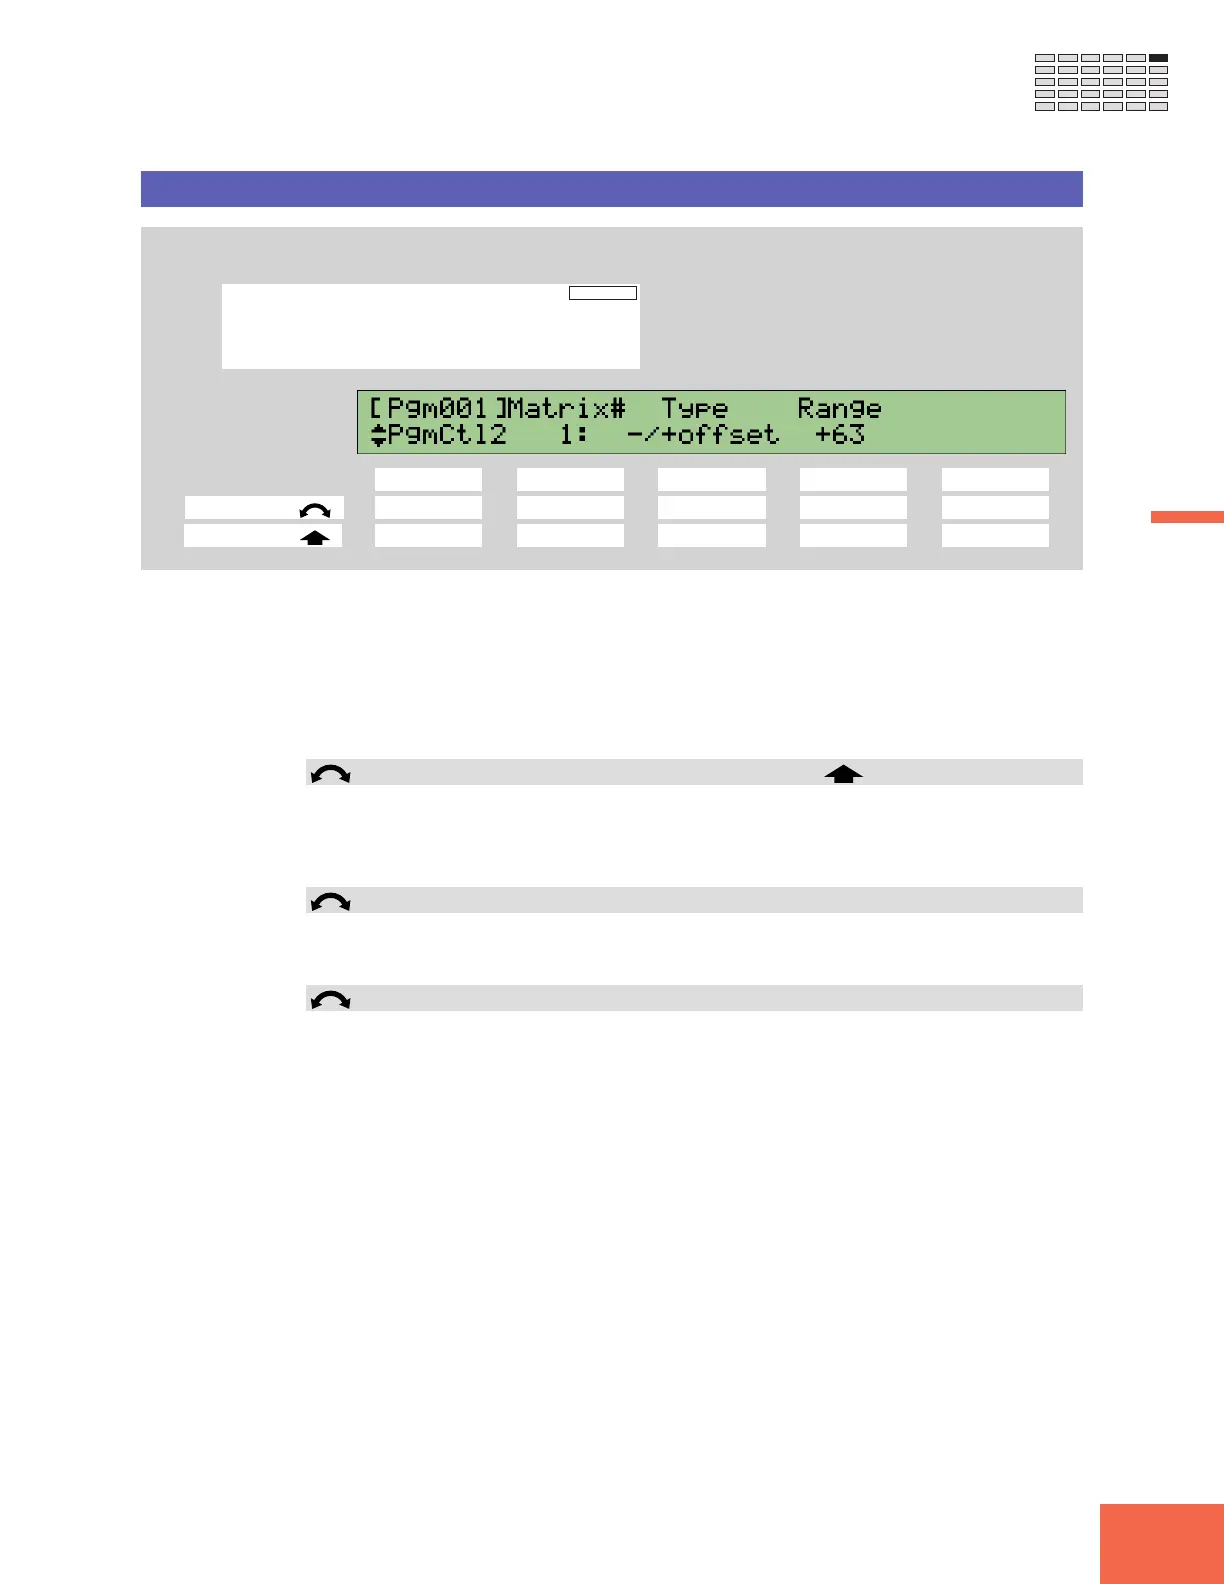
CONTROL - PgmCtl2 (Program Controller Setup 2)
Sets the program’s controller usage.
PROGRAM
TRIM / LOOP
RECORD
PROGRAM
TOTAL EQ
PLAY
EDIT
REC
DISK
UTILITY
SAMPLE
MAP / OUT
SETUP
SAMPLE
PANEL PLAY
EASY EDIT
FILTER
METER
SEQUENCE
SEQUENCE
EFFECT
EG
EFFECT
VOLUME
MASTER
SETUP
LFO
EXT CTRL
DISK
SYSTEM
CONTROL
MIDI / CTRL
MONITOR
IMPORT
MIDI
Turn Knob 1 to select PgmCtl2.
Knob 1 Knob 2 Knob 3 Knob 4 Knob 5
Turn action ✔✔✔✔ -
Push action ✔ ----
You use this page together with page PgmCtl1 to set up the program’s controller matrix.
The matrix determines how selected MIDI controllers operate on the program’s play-
back.
You use PgmCtl1 to set each matrix entry’s Device and Function. You use this page
(PgmCtl2) so set each entry’s Type and Range.
Refer to the explanation of PgmCtl1 (☞135) for a conceptual illustration of the matrix.
Knob 1 Change Page Select P/S
• Turn the knob to change to a different page within the CONTROL function. Available
pages are: PgmCtl1, PgmCtl2 (this page), and Reset.
• Push the knob to move to the Program/Sample Selection screen. (☞95)
Knob 2 Matrix# = 1,...,4
Selects the matrix entry for editing. You can use the matrix to set up four controllers.
Each matrix entry sets up a different controller.
Knob 3 Type = +offset, -/+offset
The setting determines how the A3000 converts and applies the control-change value
received from the controller.
When you move a controller at a MIDI device, the controller transmits a control-change
value indicating the magnitude of the movement. The transmitted values always range
from 0 to 127.
Upon receiving the value, the A3000 converts it as specified here, and then applies it to
the parameter selected by the Function entry (☞138). The conversion determines how
strongly (and in which direction) the parameter changes in response to the controller’s
movement.
Note that the conversion also depends on the “range” value, which you set using Knob
4 (see below).