230
Chapter 6 RECORDING Mode
SETUP Function
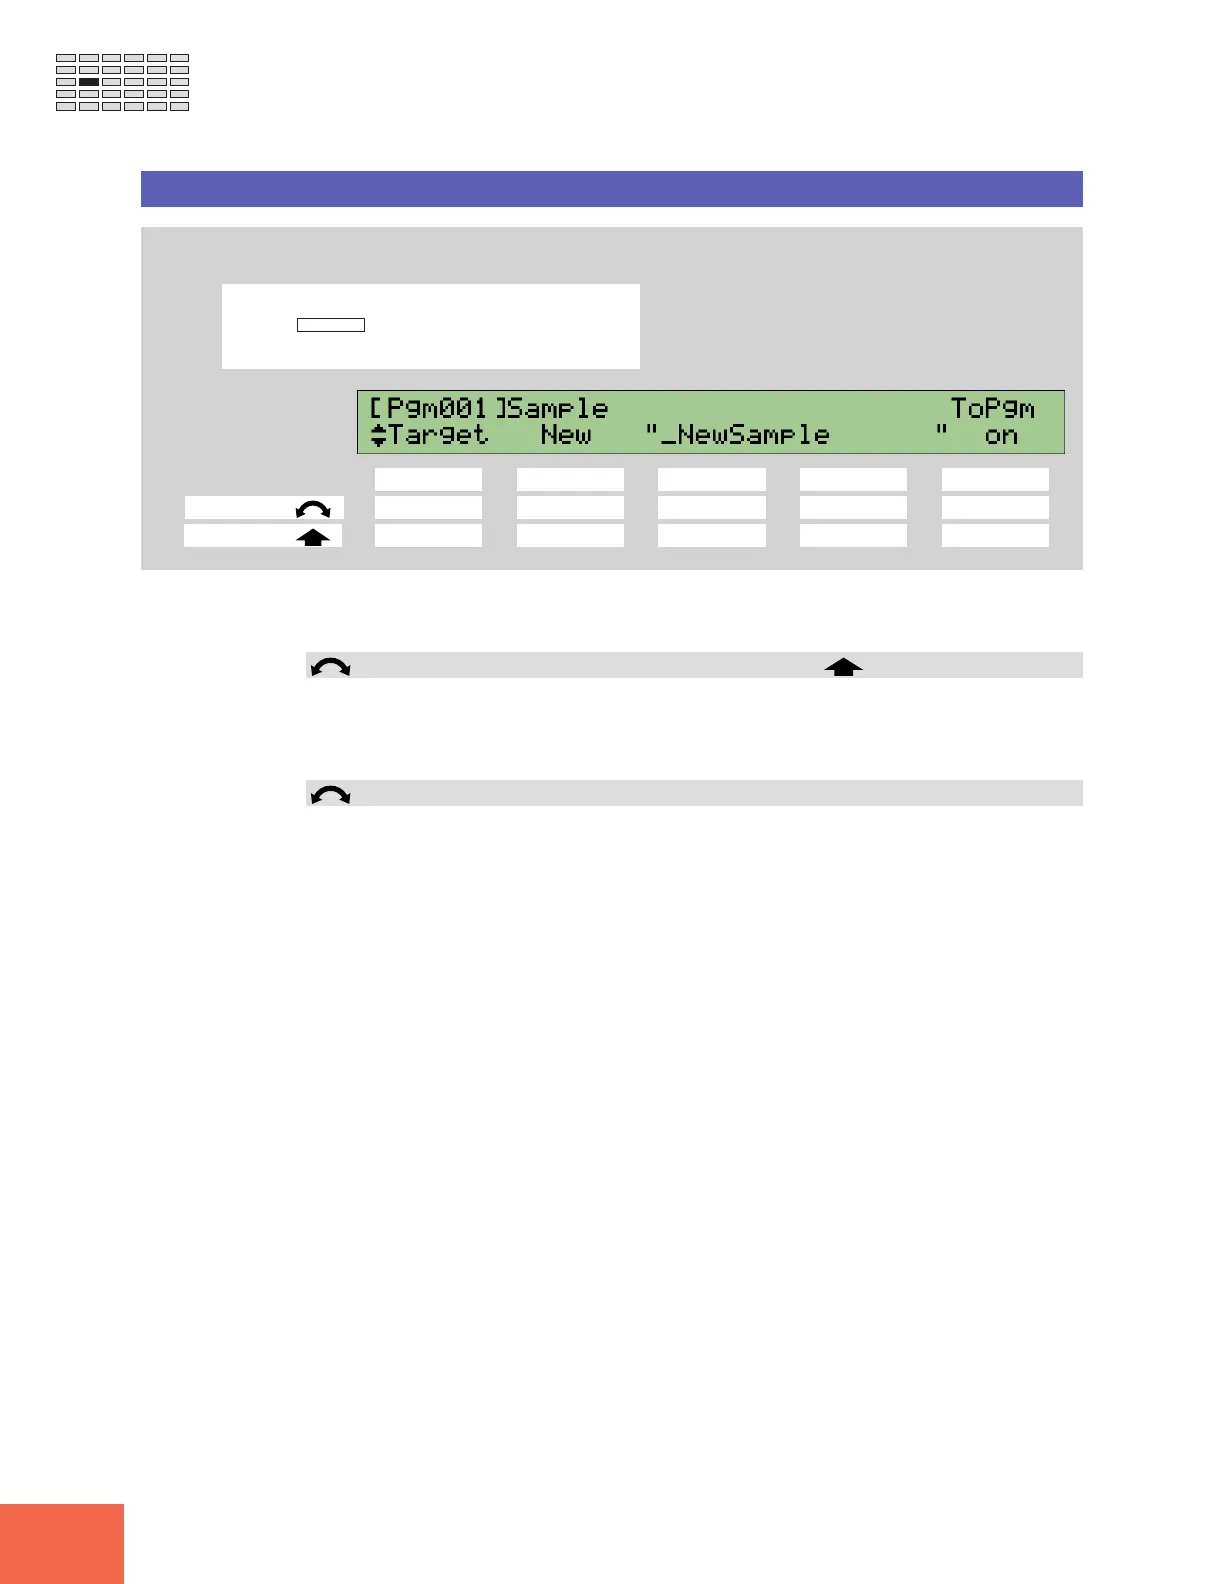
SETUP - Target
Selects the recording method, sets the sample name, and assigns the sample to a program.
PROGRAM
TRIM / LOOP
RECORD
PROGRAM
TOTAL EQ
PLAY
EDIT
REC
DISK
UTILITY
SAMPLE
MAP / OUT
SETUP
SAMPLE
PANEL PLAY
EASY EDIT
FILTER
METER
SEQUENCE
SEQUENCE
EFFECT
EG
EFFECT
VOLUME
MASTER
SETUP
LFO
EXT CTRL
DISK
SYSTEM
CONTROL
MIDI / CTRL
MONITOR
IMPORT
MIDI
Turn Knob 1 to select Target.
Knob 1 Knob 2 Knob 3 Knob 4 Knob 5
Turn action ✔✔ --✔
Push action ✔ - ✔✔ -
Use this page to select the recording method (replacement, new, or serial), set the sam-
ple name, and assign the sample to a program.
Knob 1 Change Page Select P/S
• Turn the knob to change to a different page within the SETUP function. Available
pages are: RecData, Target (this page), KeyRnge, Trigger, and Process.
• Push the knob to move to the Program/Sample Selection screen. (☞95)
Knob 2 Sample = Replace, New, New+
This setting selects the recording method.
Replace Record the new sound directly into the currently selected sam-
ple, overwriting (completely replacing) its waveform data. But
retain all of the existing sample’s parameter settings (key range,
original key, etc.).
New Record a new sample.
New+ Record a series of new samples.
• Note that Replace is not available if you have selected a sample bank rather than a
sample.