Basic Operation
87
Chapter 3 Basics
Chapter 3
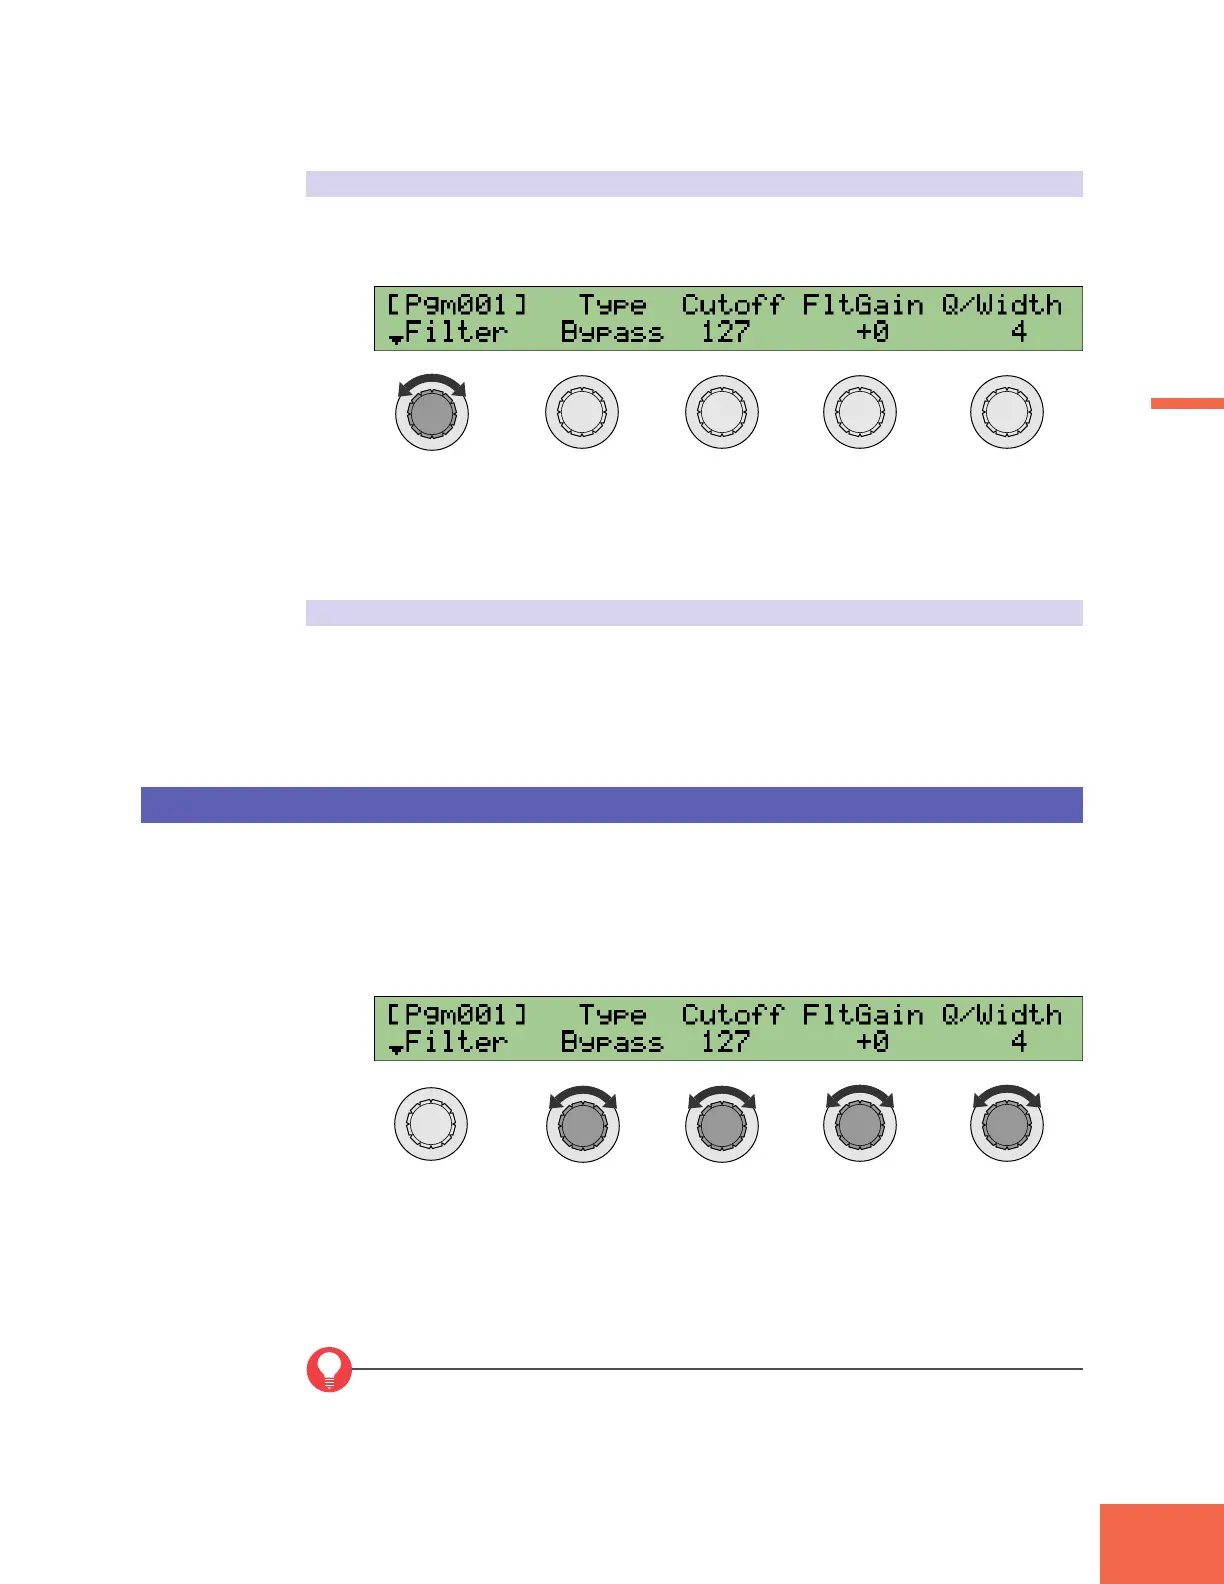
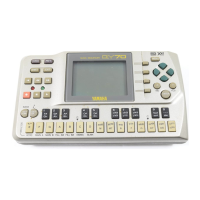
Changing the Page with Knob 1
As mentioned above, you can switch from one page to another (within the same func-
tion) by turning Knob 1. Turn the knob one click to the right to advance to the next
page, or one click to the left to move back one page.
Assume that you have just selected the EDIT mode’s FILTER function and are looking at
the first page (Filter page). Turning the knob to the right will now take through the
function’s second, third, and fourth pages: Filter → FltSens → FltScale → EQ. You could
then move backward through these pages by turning the knob to the left.
Changing the Page with the Function Key
You can also change the page by pressing the function key. Note that you must press the
same function key — the key currently indicated by the illuminated lamp. Each press of
this key moves you ahead one page. Pressing the key when you are at the last page cycles
you back to the first page. In the case of the FILTER function, the sequence would be:
Filter → FltSens → FltScale → EQ → Filter → FltSens..., and so on.
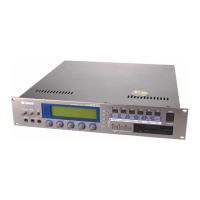
Changing the Settings
You use Knobs 2 to 5 to change the settings on each page. In most cases, the parameter
names appear on the top line of the screen, with the current values appearing on the
second line. Turning the knob changes the value displayed directly above the knob posi-
tion.
Again, assume that you are working at the Filter page of the EDIT mode’s FILTER func-
tion. Your screen looks something like this:
You can change the filter type by turning Knob 2. Turn the knob as necessary to select
the appropriate Type value. The choices are: Bypass, LowPass1, LowPass2, HiPass1,
HiPass2, BandPass, and BandElim.
In the same way, you can use Knob 3 to set the cutoff frequency, Knob 4 to set the filter
gain, and Knob 5 to set the “Q/Width” value.
FYI
In some cases two adjacent knobs are assigned to the same parameter. In these cases
you can use either knob to set the value.