243
Chapter 6 RECORDING Mode
Chapter 6
MONITOR Function
MONITOR Function
This function sets up the monitoring feature, so that you can monitor the input signal
as you record it. You can also use this function to generate a metronome click that you
can use to help time your recording.
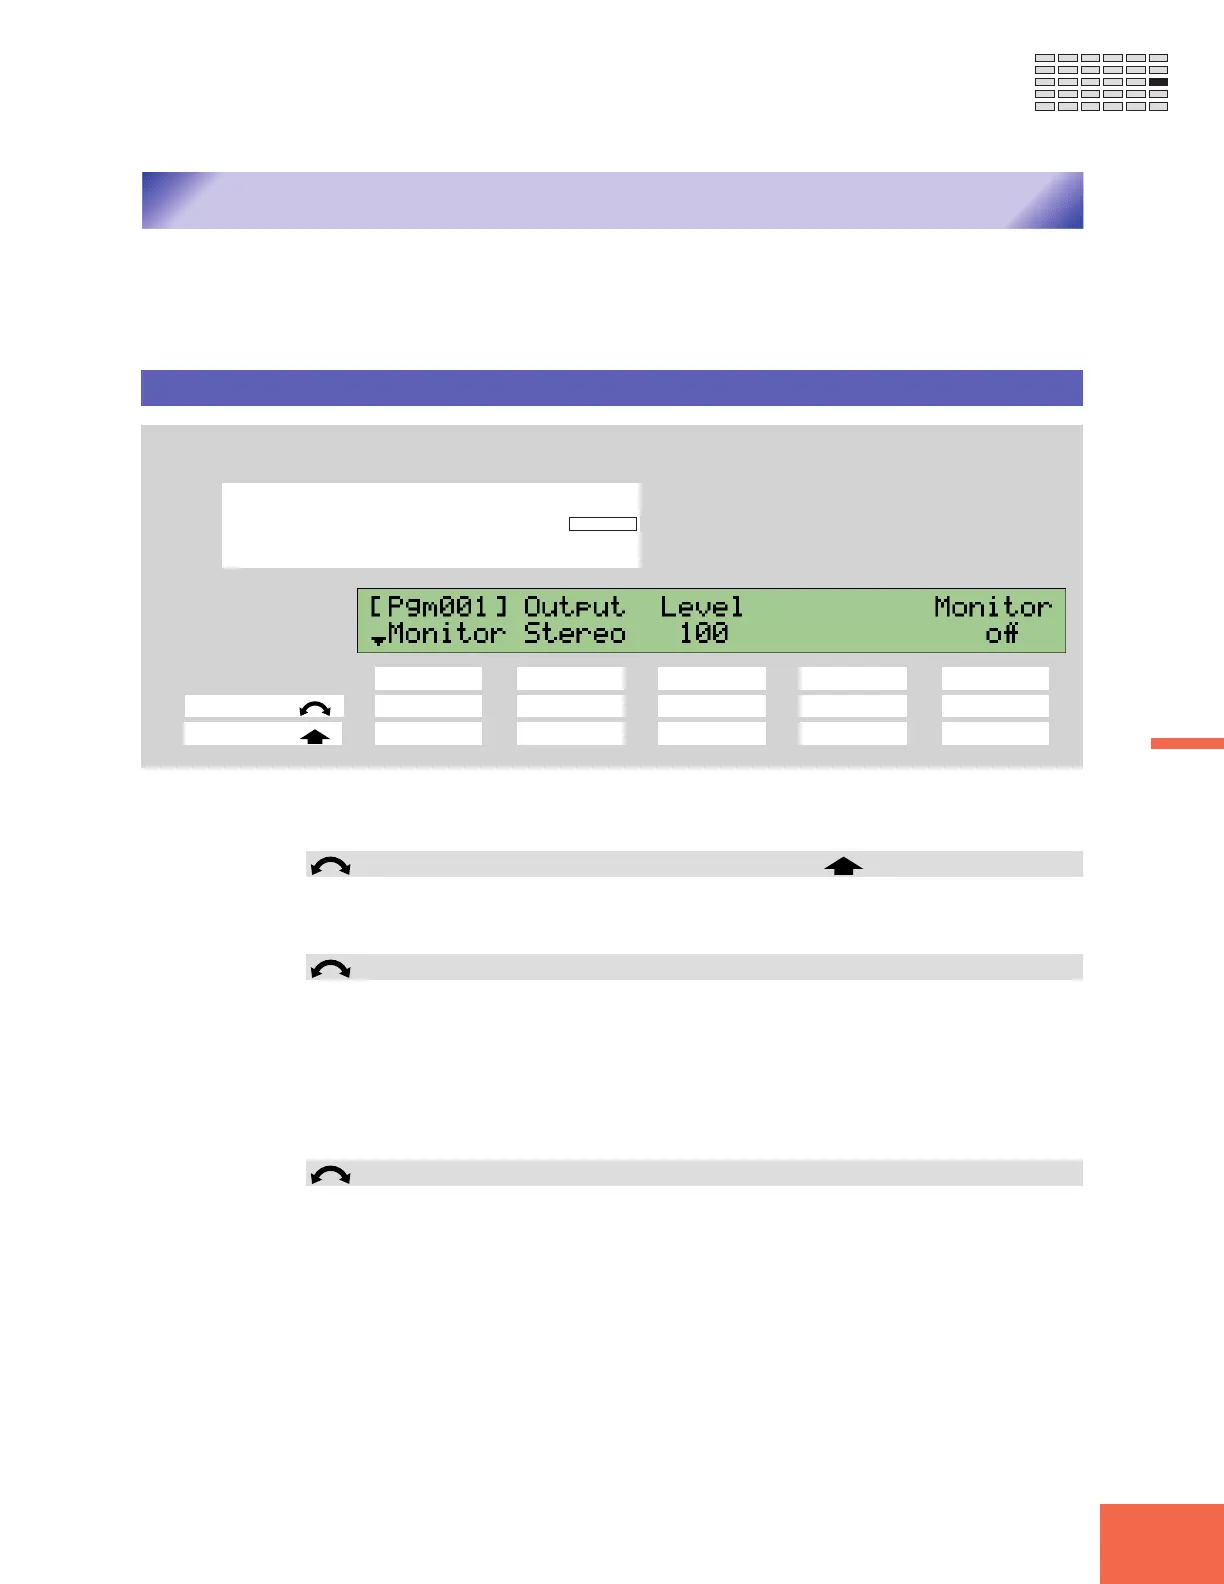
MONITOR - Monitor
Sets up the input monitor.
PROGRAM
TRIM / LOOP
RECORD
PROGRAM
TOTAL EQ
PLAY
EDIT
REC
DISK
UTILITY
SAMPLE
MAP / OUT
SETUP
SAMPLE
PANEL PLAY
EASY EDIT
FILTER
METER
SEQUENCE
SEQUENCE
EFFECT
EG
EFFECT
VOLUME
MASTER
SETUP
LFO
EXT CTRL
DISK
SYSTEM
CONTROL
MIDI / CTRL
MONITOR
IMPORT
MIDI
Turn Knob 1 to select Monitor.
Knob 1 Knob 2 Knob 3 Knob 4 Knob 5
Turn action ✔✔✔ --
Push action ✔ ---✔
Use this page to switch monitoring on or off, to select the monitor output, and to set the
monitor level.
Knob 1 Change Page Select P/S
• Turn the knob to switch between the function’s Monitor and Click pages.
• Push the knob to move to the Program/Sample Selection screen. (☞95)
Knob 2 Output = Stereo, ASL&R, AS1&2, AS3&4, AS5&6, DIG&OPT
• Turn the knob to select the output location for the monitor signal.
• Note that the AS1&2, AS3&4, AS5&6, and DIG&OPT settings are effective only if
you have installed the optional AIEB1 expansion board.
• This setting is forced to Stereo if the A3000 is taking its input from the DIGITAL or
OPTICAL connector (if the Input setting in the RecData page (☞227) is set to DIGITAL
or OPTICAL).
Knob 3 Level = 0,...,127
• Turn the knob to set the monitor’s output level. (This setting does not affect the level
of the input signal.)
• Note that you cannot adjust this setting if using OPTICAL or DIGITAL input.