235
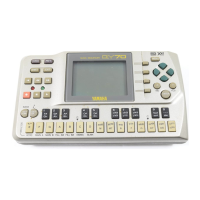
Chapter 6 RECORDING Mode
Chapter 6
SETUP Function
SETUP - Process
Selects whether to apply automatic normalization.
PROGRAM
TRIM / LOOP
RECORD
PROGRAM
TOTAL EQ
PLAY
EDIT
REC
DISK
UTILITY
SAMPLE
MAP / OUT
SETUP
SAMPLE
PANEL PLAY
EASY EDIT
FILTER
METER
SEQUENCE
SEQUENCE
EFFECT
EG
EFFECT
VOLUME
MASTER
SETUP
LFO
EXT CTRL
DISK
SYSTEM
CONTROL
MIDI / CTRL
MONITOR
IMPORT
MIDI
Turn Knob 1 to select Target.
Knob 1 Knob 2 Knob 3 Knob 4 Knob 5
Turn action ✔✔ ---
Push action ✔ ----
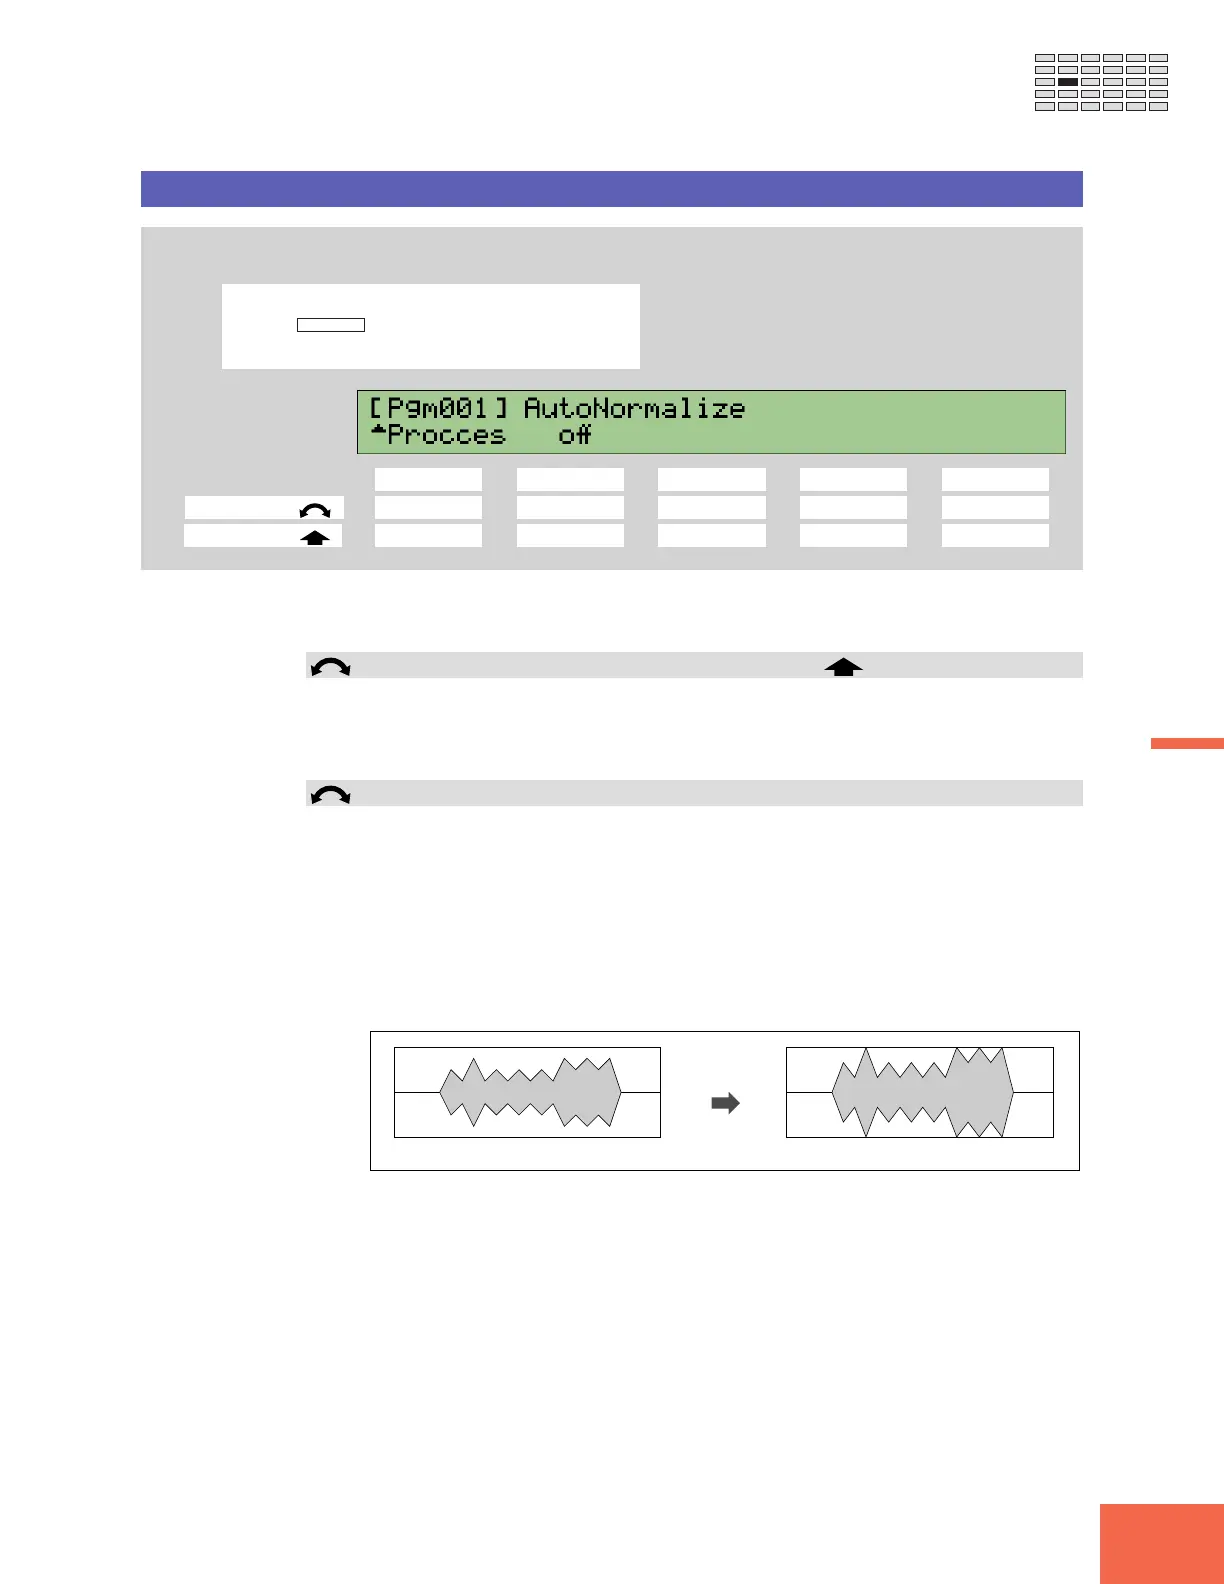
Use this page to select whether the A3000 normalizes samples immediately after record-
ing them.
Knob 1 Change Page Select P/S
• Turn the knob to change to a different page within the SETUP function. Available
pages are: RecData, Target, KeyRnge, Trigger, and Process (this page).
• Push the knob to move to the Program/Sample Selection screen. (☞95)
Knob 2 AutoNormalize = on, off
• Set this on if you want the A3000 to normalize each new sample immediately after
recording it.
• If you select on, the A3000 automatically adjusts the recorded waveform by propor-
tionately raising all levels such that the highest level comes to just below the clip
point, as illustrated below. (The “clip point” is the maximum level appropriate for
digital processing.)
• Note that you can normalize a sample at any time using the EDIT mode’s NORM
command. (☞150)
Recorded sample
Normalize