Installing an Internal Hard Disk
326
Appendix
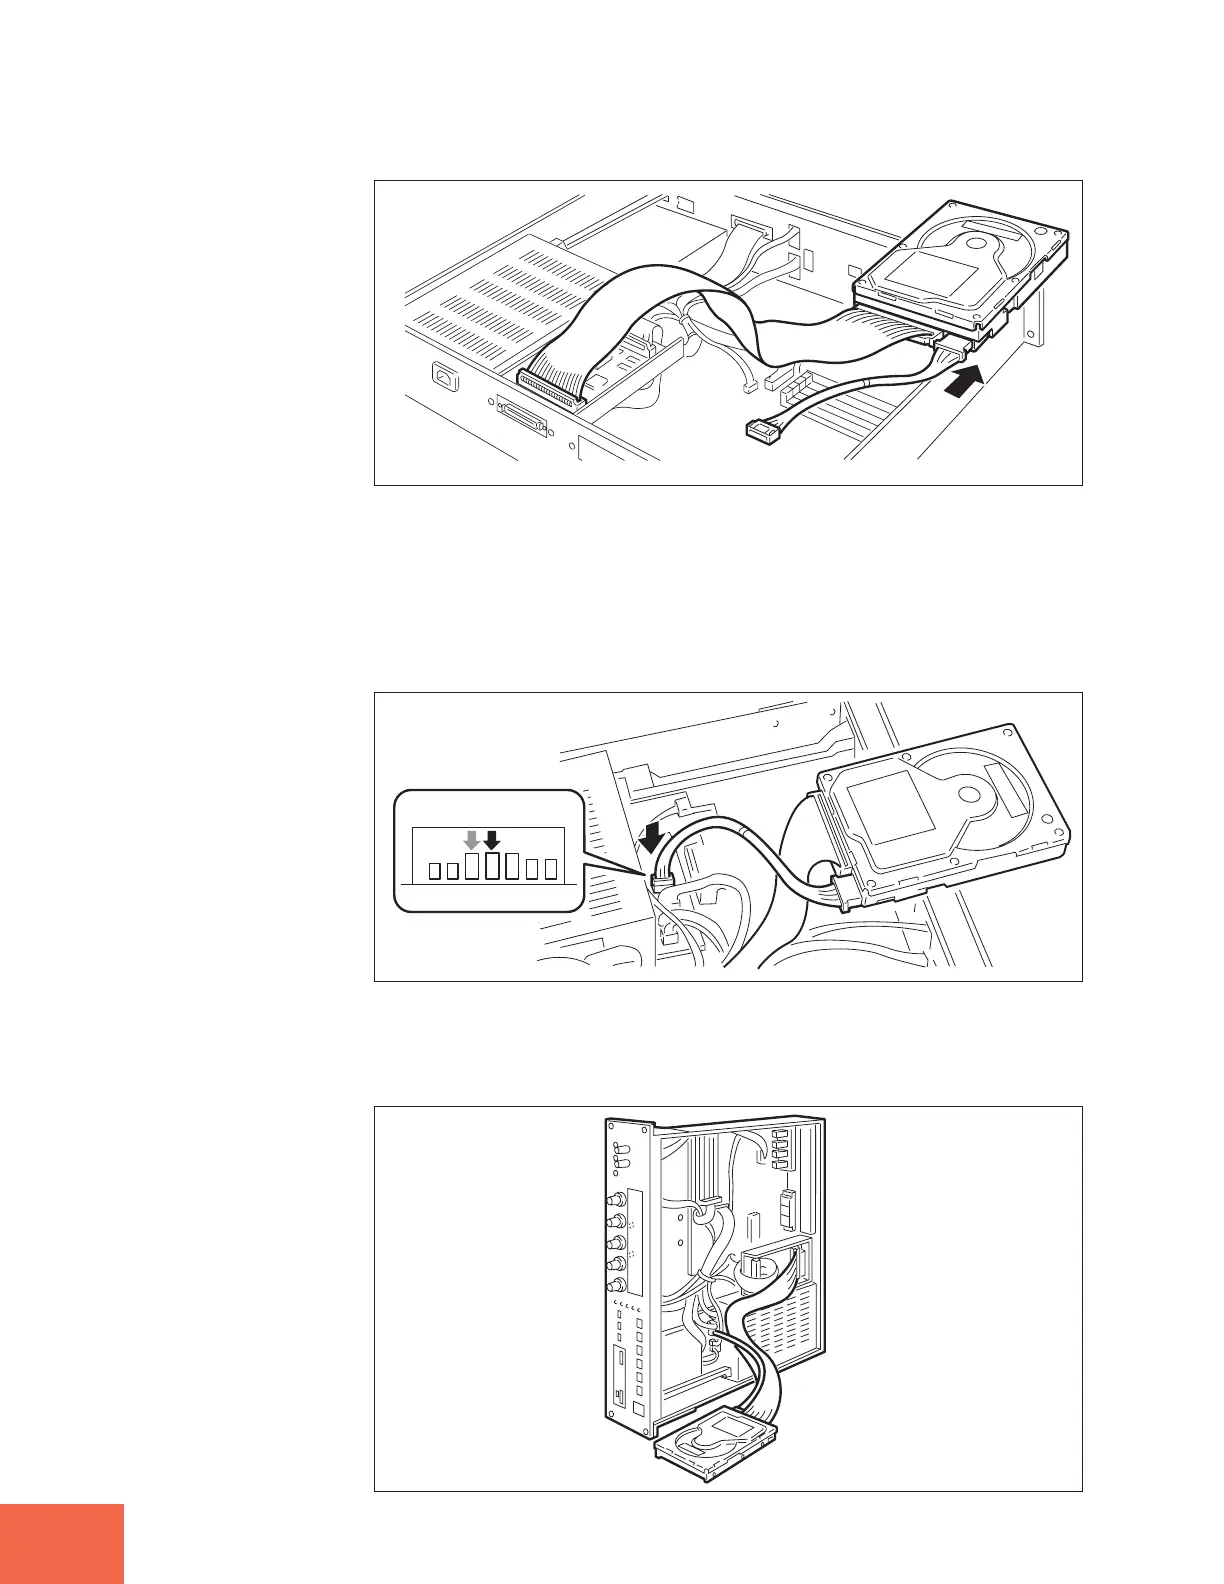
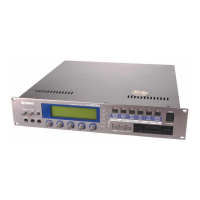
Now connect the other end of the cable into the connector indicated in the drawing. If
you do not have an AEIB1 I/O expansion board installed, you can connect to either of
the free connectors. Note that the connection can be made in one direction only; make
sure that the direction is correct and do not try to force the connector in.
* If for some reason you later need to disconnect this cable, be sure to press on the
connector’s tab when pulling the connector out. Pulling without pressing may cause
the connector to break.
9.
Install the hard disk.
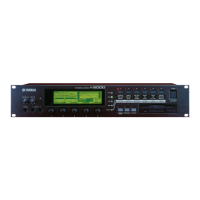
Temporarily rest the disk unit on the workbench to the right of the A3000 (viewing from
the front panel). Now carefully stand the A3000 up onto its right panel (see drawing),
while taking due care to keep the hard disk from falling out.


 To Next Page