Basic Operation
90
Chapter 3 Basics
Setting Values from a Remote MIDI Device
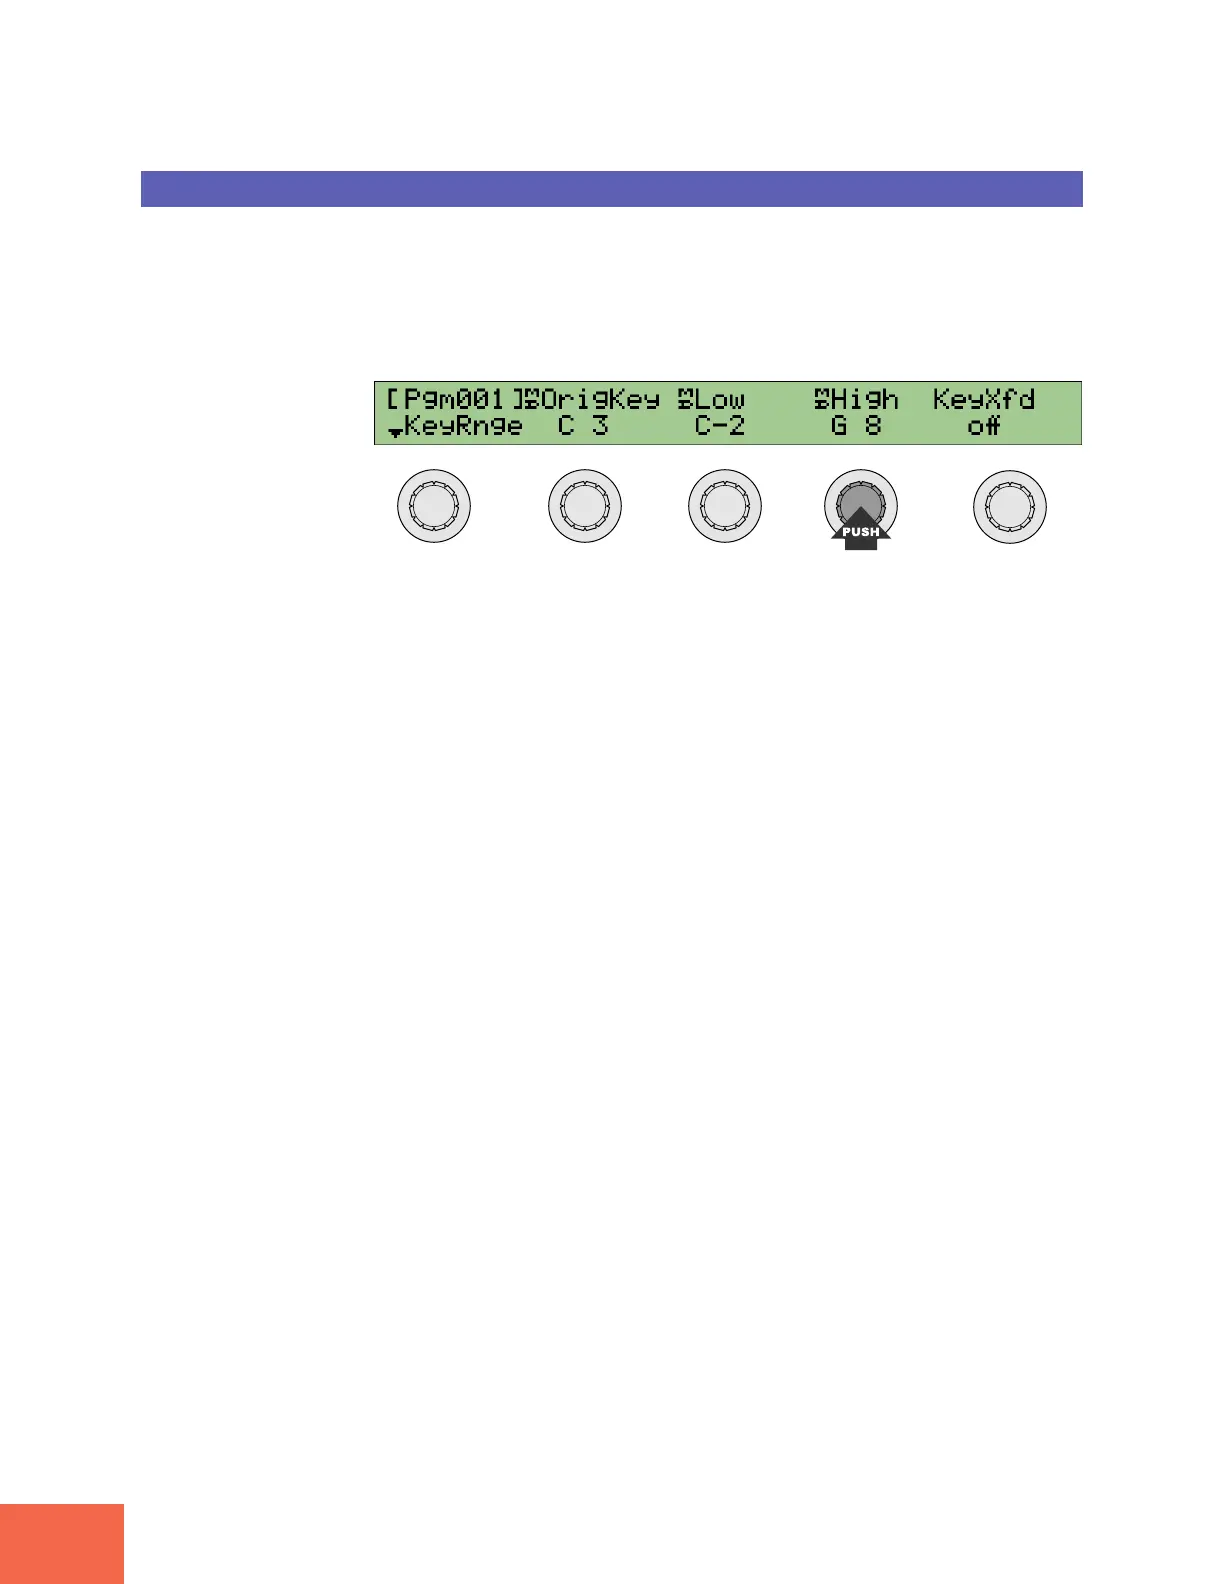
You will notice that an “MD” mark precedes some of the parameter names along the top
line of the screen. This mark means that it is possible to set the parameter value from a
remote MIDI device. To enable remote setting, you must first press the corresponding
knob, so that the push indicator begins to blink.
For example, the “MD” mark appears before the OrigKey, Low, and High parameter
names on the KeyRnge screen (EDIT mode, MAP/OUT function), as shown below.
To set the High value from your MIDI keyboard, you first press Knob 4 so that the
indicator lamp above the knob begins blinking. The blinking indication means that the
A3000 is ready to set the value in accordance with the input received at the MIDI IN
connector. You can now make the setting by striking the appropriate key at the key-
board.
To register the new setting, press the knob again so that the lamp comes on solid (or
else press a different knob to select another “MD” parameter).