SERVICE POINTS
Drive sprocket removal
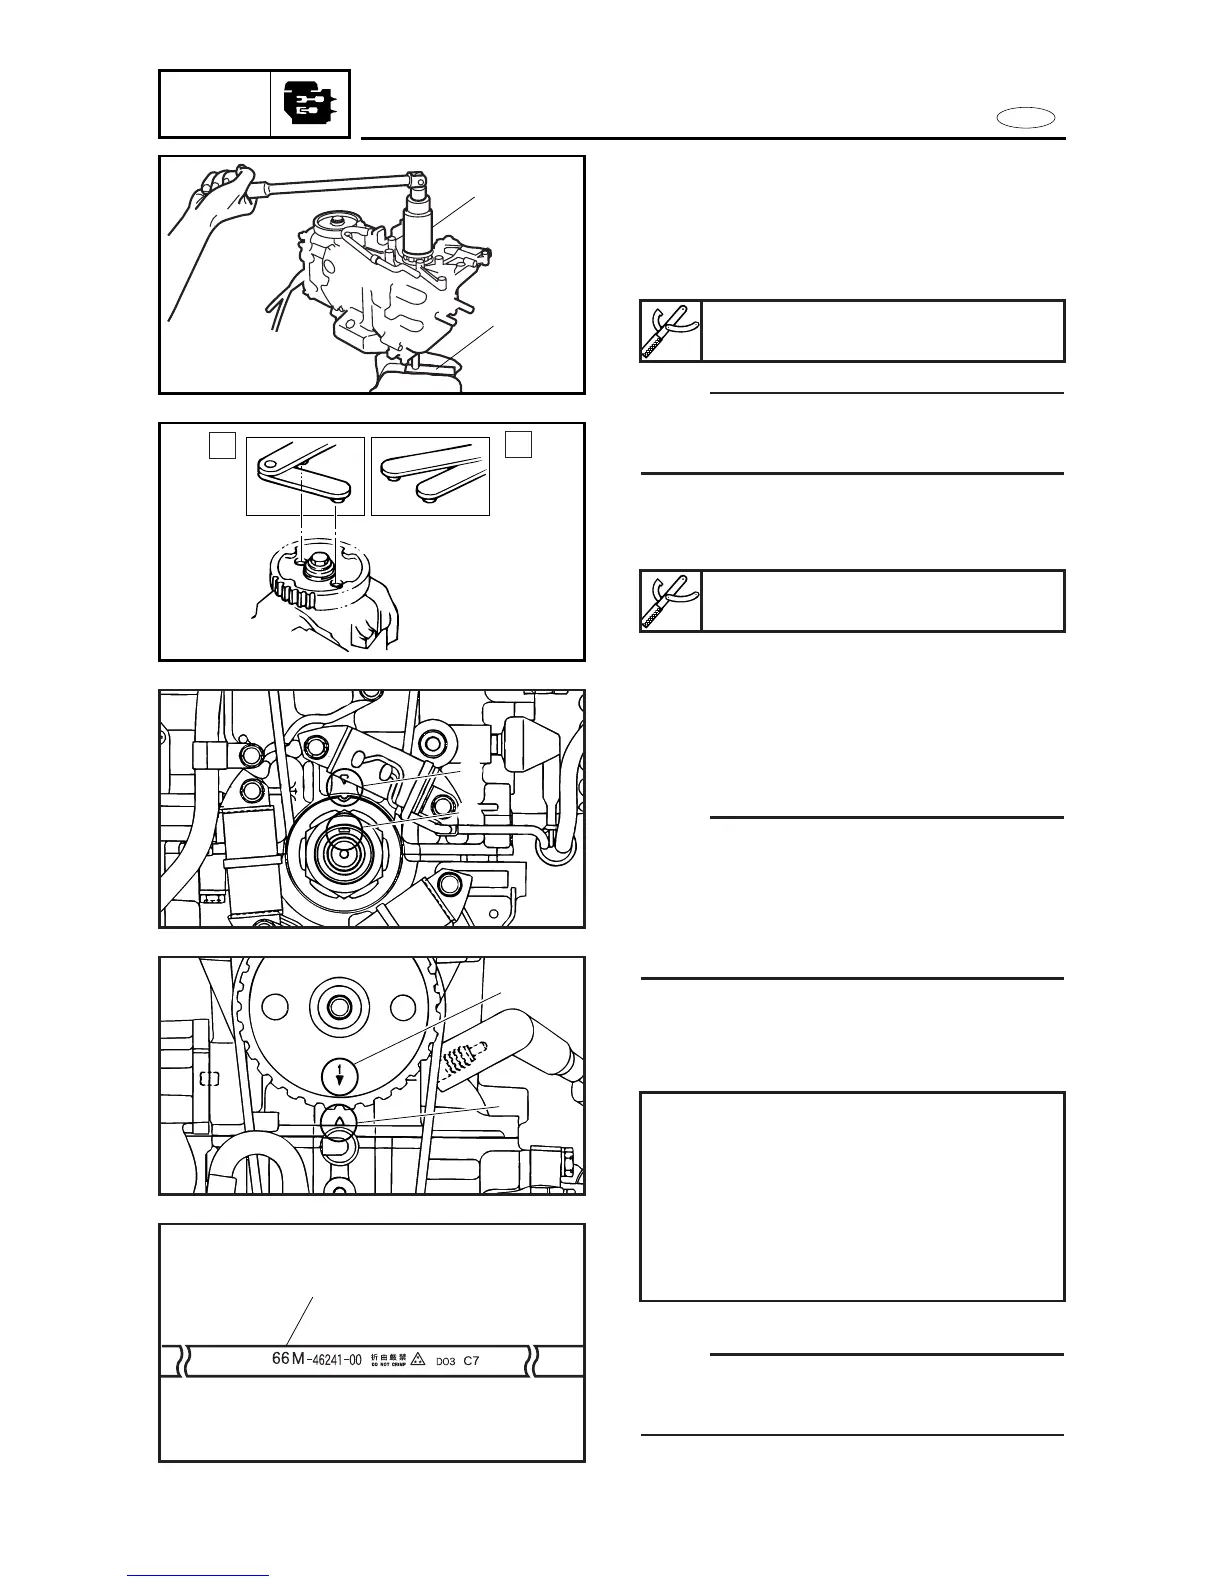
1. Remove:
9 Timing belt
9 Drive sprocket
NOTE:
Loosen the sprocket nut with a 36 mm
deep socket 2.
Driven sprocket removal
1. Remove:
9 Driven sprocket
A For USA and CANADA
B Except for USA and CANADA
Timing belt installation
1. Position:
9 Drive sprocket
9 Driven sprocket
NOTE:
9Align the woodruff key hole a on the
crankshaft with the “∆” b on the
crankcase.
9Align the “∆ or 1” c on the driven sprock-
et with “∆” d on the cylinder head.
2. Install:
9 Timing belt
NOTE:
Install the timing belt 1 with the part
name facing up.
5-14
Shaft holder 1:
NA/90890-06069
Flywheel holder:
YB-06139/90890-06522
Installation steps:
8 Attach the timing belt to the drive
sprocket.
8 Install the timing belt onto the driven
sprocket. Alternately push down on
the drive and then the driven sprock-
et until the belt is properly seated.
A
B