Piston installation
1. Install:
9 Piston
cC
9 Make sure the upper oil ring’s end gap is
positioned correctly, then install the pis-
ton.
9 Install the piston with the “UP” mark on
the piston crown facing towards the fly-
wheel side.
A For USA and CANADA
B Except for USA and CANADA
E
CRANKCASE AND CRANKSHAFT
POWR
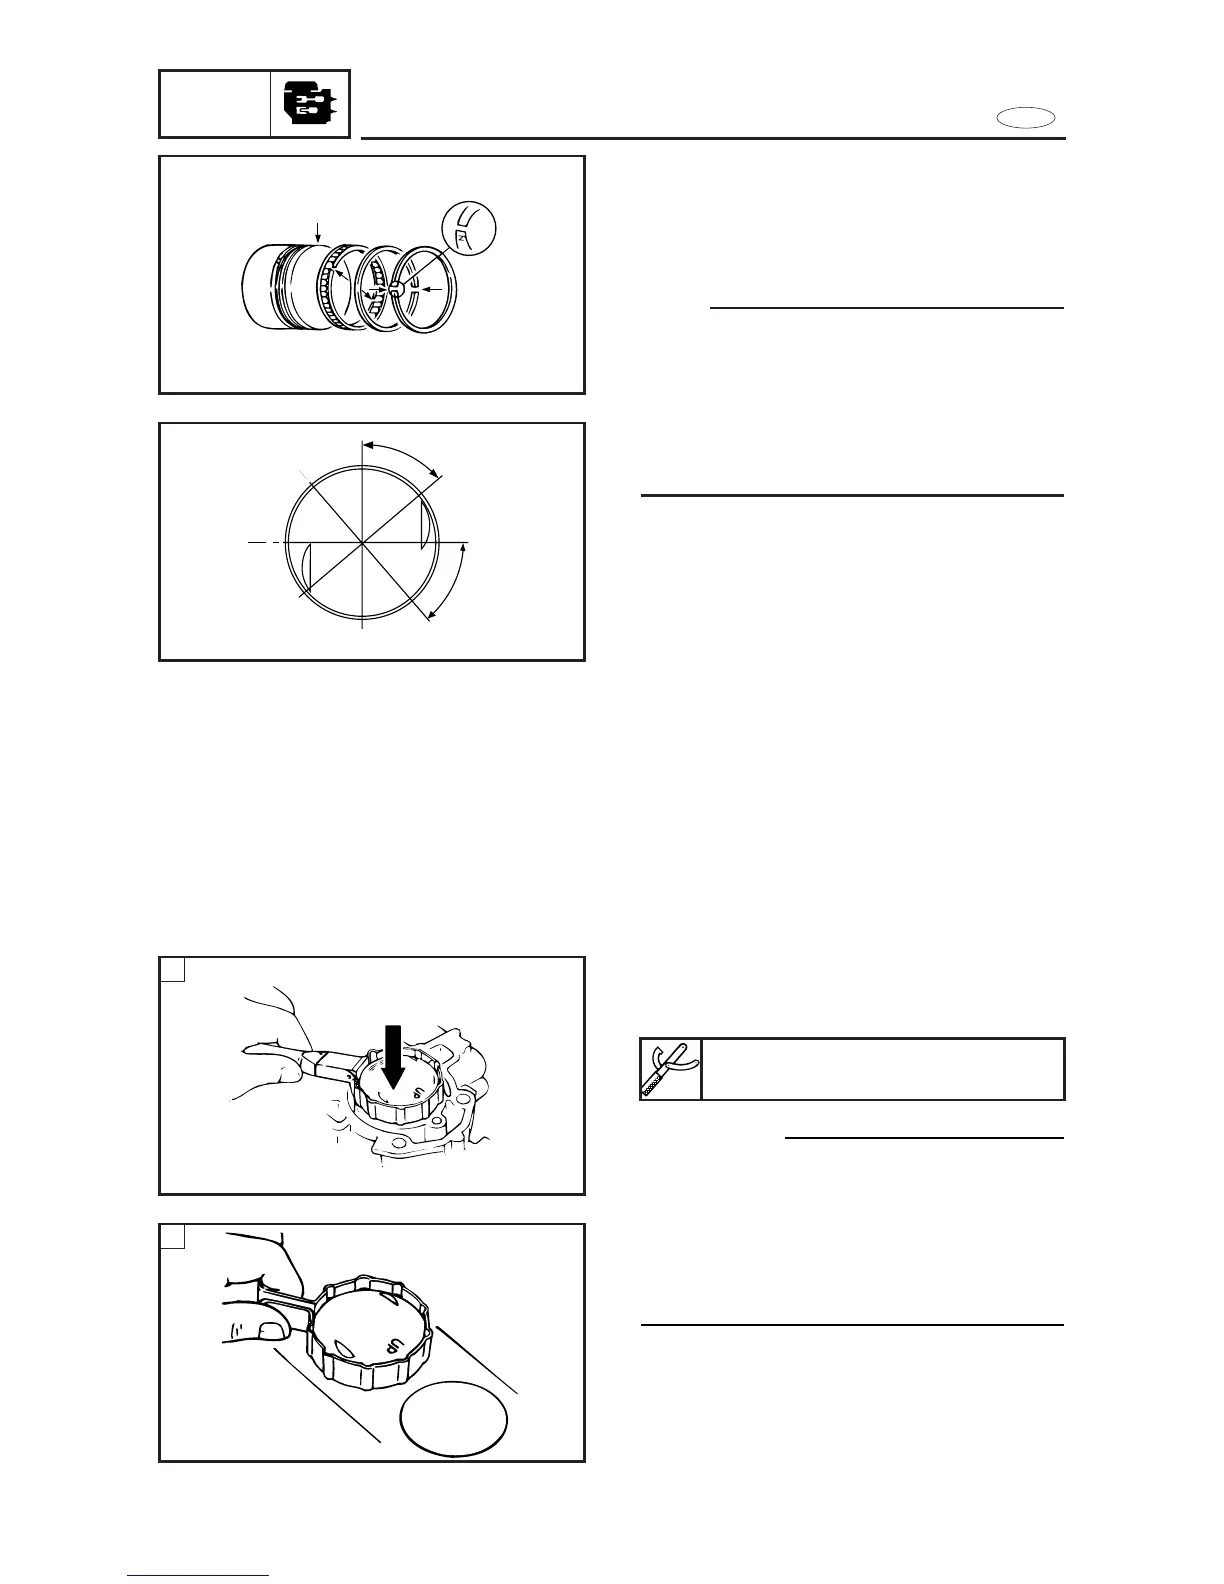
Piston ring installation
1. Install:
9 Oil ring 1
9 2nd piston ring 2
9 Top piston ring 3
NOTE:
9 Make sure the “N” mark on the piston
ring faces upward.
9 When installing the oil ring, first install
the expander ring and then the side rails.
9 After installing the piston rings, check
that they move smoothly.
2. Offset the piston ring and oil ring end
gaps as shown.
9 Oil ring end gap (lower rail) a
9 Oil ring end gap (expander ring) b
9 Oil ring end gap (upper rail) c
9 2nd piston ring end gap d
9 Top piston ring end gap e
5-44
Piston slider:
YB-34454/90890-06529
A
B