ACU-RITE MILLPWR
G2
183
8.1 Milling and Drilling
Circle helix
The circle helix can only be performed with a 3 axes system.
A helix is defined by one of two ways:
By the radius, depth and pitch
By the radius, depth and number of revolutions
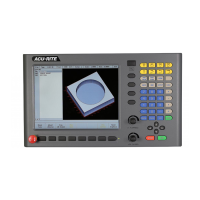
To program a helix:
From the PGM screen, press the CIRCLE key to access the Circle
popup Menu.
Select Helix from the popup Menu.
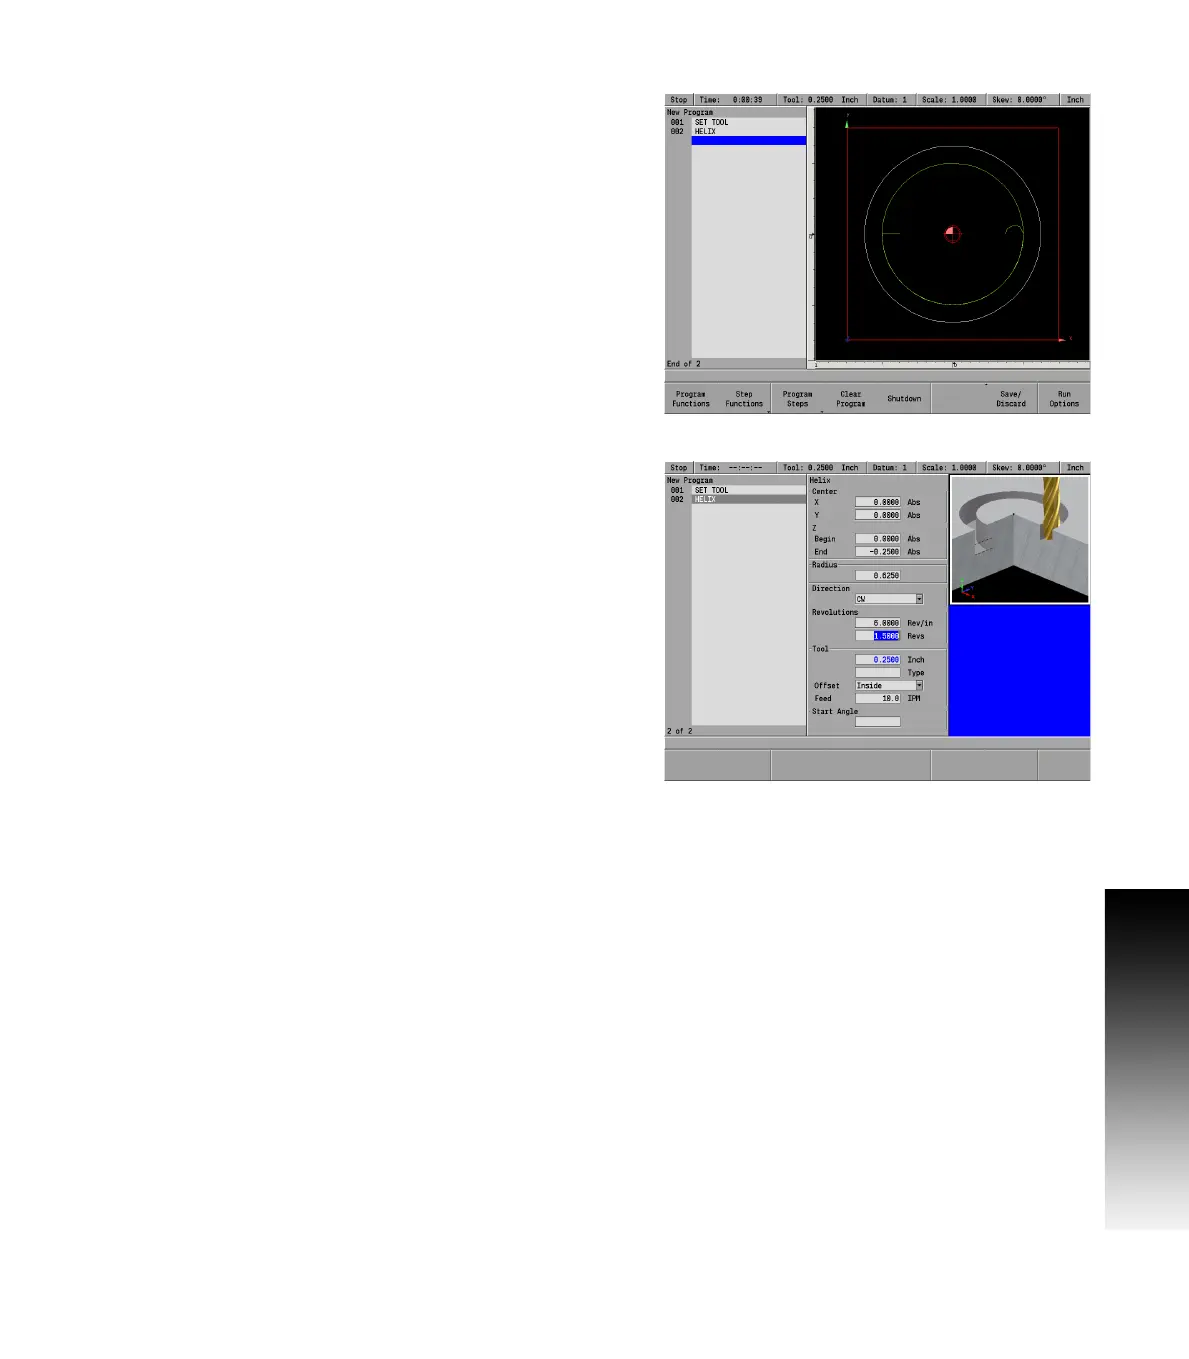
Entering data
In the Center field enter the X and Y axes coordinates for the center
of the helix using the ARROW DOWN key to enter the data, and move to
the next field.
Enter the Begin and End depths for Z.
In the Radius field enter the radius.
For Direction, press either the CW soft key for a clockwise cutting
direction or the CCW soft key for a counter-clockwise cutting
direction.
In the Revolutions fields, enter either the pitch (number of
revolutions per Z travel) or the total number of revolutions. The
other field will automatically be filled in.
The Tool field will default to the current tool selected.
In the Offset field select Inside for a external helix, or Outside for an
internal helix.
Enter the Z axis Feed Rate. The last feed rate used previously in the
program will be displayed.
Start Angle (optional). Enter the angle where the helix begins
(3 o’clock position is 0 degrees; 12 o’clock position is 90 degrees).
Press the USE key.
If the tool size and type listed in the Tool field are incorrect, change the
tool settings before running your program.