194 8 Milling and Drilling
8.2 Additional Milling Functions
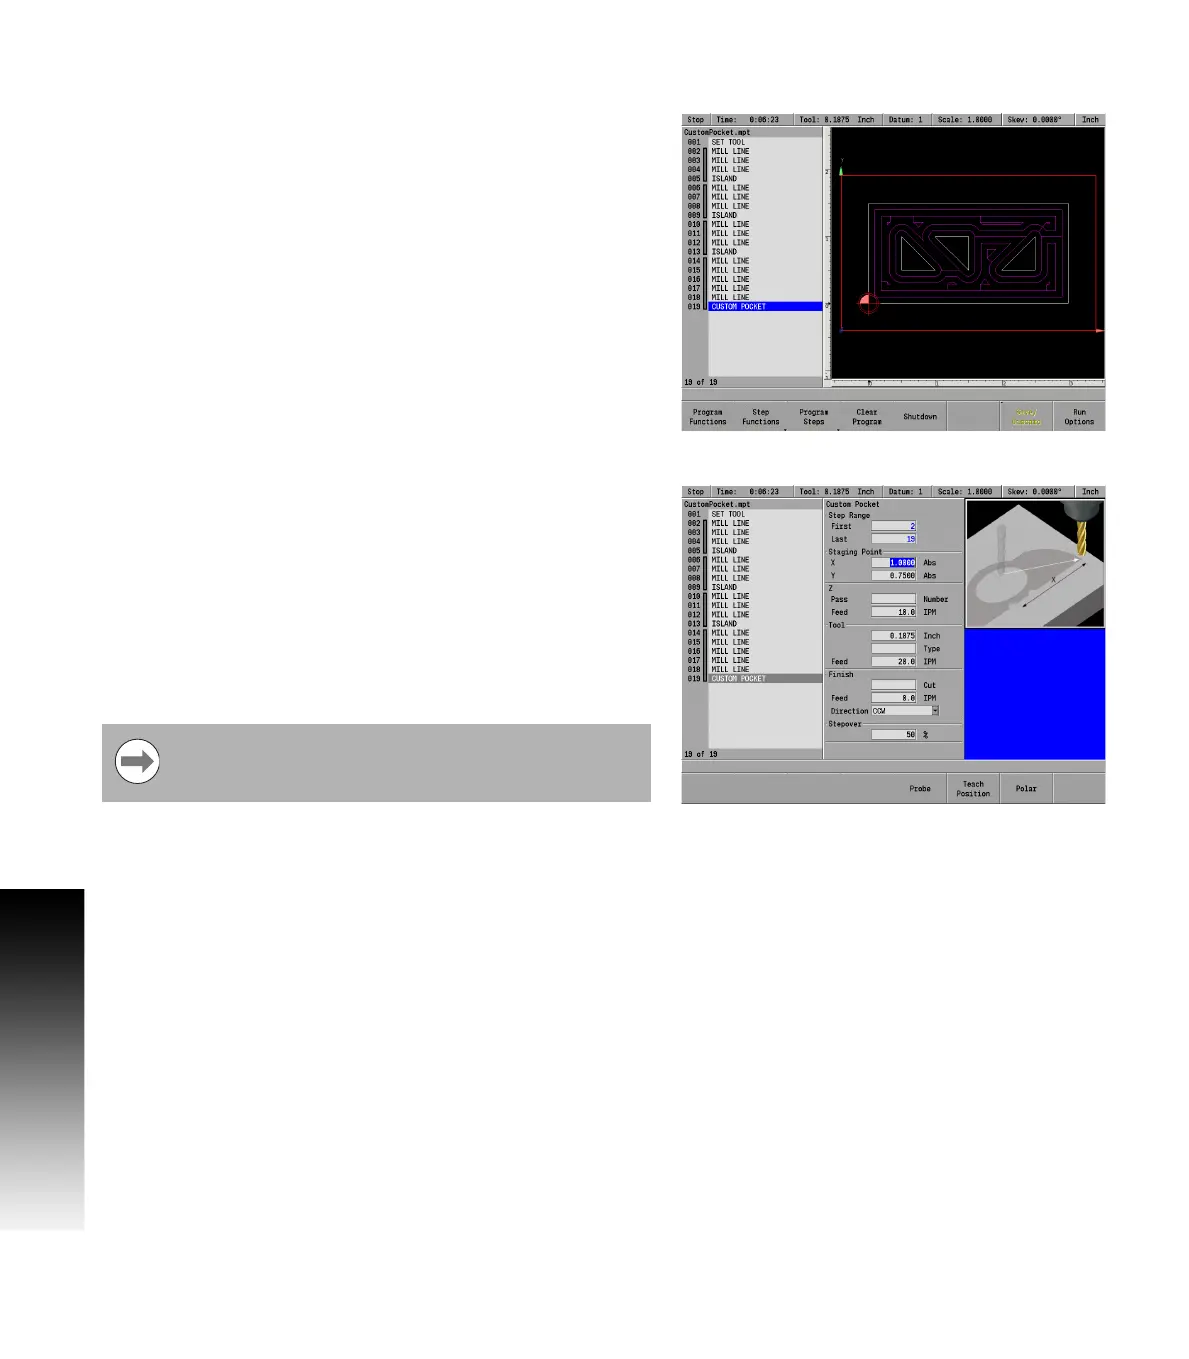
Custom pockets
A custom pocket step must immediately follow a closed contour.
You can create a custom pocket from any closed contour. A closed
contour is any shape consisting of lines, arcs, and/or blends (or
chamfer), where the last step ends at the same point where the first
step begins. MILLPWR
G2
will indicate a closed contour with double
lines to the right of the applicable steps in the program list.
The Custom Pocket step must be placed immediately following the
last step of the closed contour. MILLPWR
G2
will automatically fill in
the step range for you. You’ll still need to fill in the "Staging Point" and
set the feed rate for the custom pocket.
If a finish cut is specified, the system will mill the central portion of the
pocket first, leaving the finish amount on the bottom and side. It will
then mill the bottom pass followed by the side pass.
Custom pocket
Create a closed contour.
Position the cursor immediately below the closed tool path contour.
Press the Program Steps soft key.
Press the Custom Pocket soft key and select Custom Pocket.
MILLPWR
G2
will automatically fill in the step range for you.
Enter the X and Y axes coordinates for the Staging Point. The tool
retracts and moves to the staging point before and after machining
the pocket. The tool will also retract and move to this location
between roughing and finish cycles. Choose a staging point that
helps avoid interference with fixturing.
Enter either the number of passes or the distance between each
pass. Pass refers to the cuts that are used to machine the pocket to
its End depth. What is shown on the dialogue is what was selected
in JOB SETUP.
Enter the feed rate for the Z axis.
Enter the table’s feed rate.
In the Finish field enter the amount of material to be removed during
the finish Cut.
Enter the feed rate for the finish cut.
For Direction, press either the CW soft key for clockwise or the CCW
soft key for a counter-clockwise direction. The direction is applied to
both the bottom and side finishes.
Enter the stepover percentage (how much you want your tool to
overlap on each pass).
Press the USE key.
The staging point is not the location at which the tool will
enter the pocket material. Entry points are determined at
run-time based on the pocket and tool geometry.
 Loading...