ACU-RITE MILLPWR
G2
167
8.1 Milling and Drilling
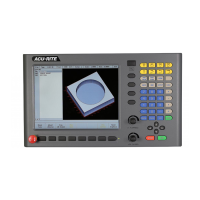
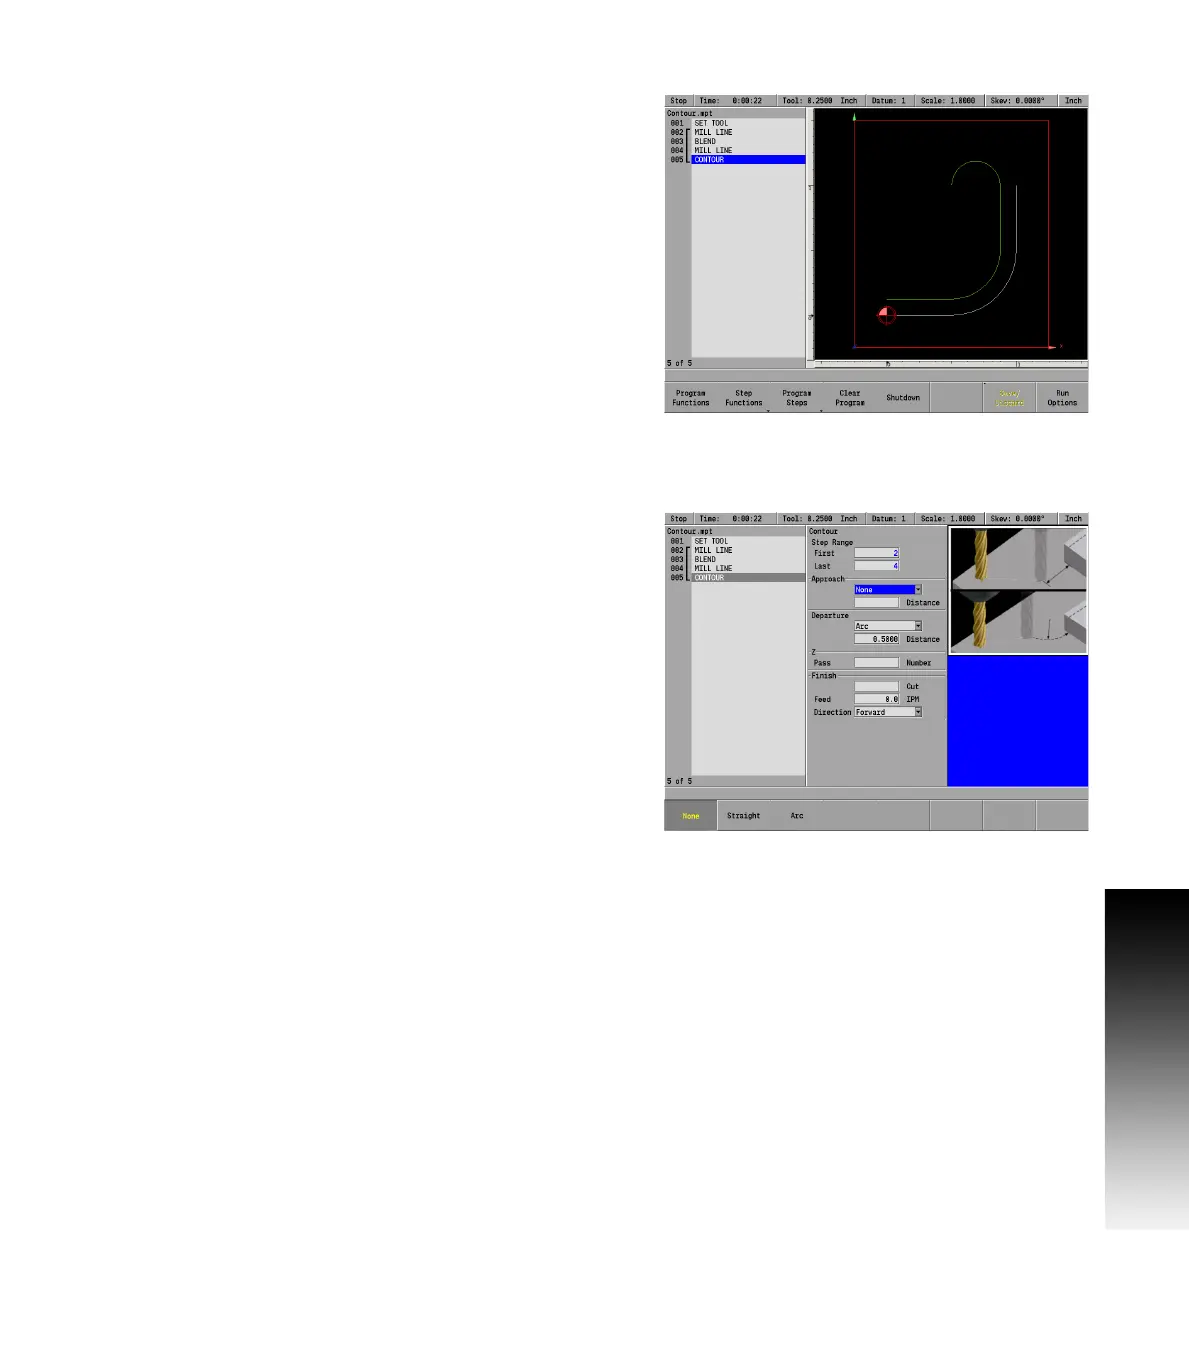
Contour
The Contour step enables you to approach and/or depart from your
part on a straight line or with an arc.
The contour step must immediately follow the contour steps.
Contours can only be associated with lines, arcs, blends and
chamfers. By adding contours before and/or after a continuous tool
path, you'll avoid starts and stops striking against the workpiece
edge.
With an arc approach/departure, the tool will take a rounded turn as it
nears or exits the workpiece.
With a straight approach/departure, the tool path is extended away
from the workpiece.
The step range can include one or more steps. If you're planning to
add a contour to an individual step, the first and last steps in the range
will be the same.
Because the approach and departure fields are independent of each
other, you may select one or both for the step range you've chosen.
Select None as the type for whichever option you don't want.
To program a contour:
From the PGM screen, highlight the step below the last step in the
continuous contour.
Press the Program Steps soft key.
Press the Position / Milling soft key.
Select Contour from the popup menu.
First and Last in the Step Range field will be filled in.
If you wish to program an approach, select the Straight or Arc soft
key, or use the drop down menu as your approach type. Otherwise,
press the None soft key.
Enter how far from the part you want the approach to begin in the
Distance field.
To program a departure, select the Straight or Arc soft key, or use
the drop down menu as your approach type. Otherwise, press the
None soft key.
Enter how far from the part you want your tool to travel in the
Distance field.
If you would like to program a Finish cut, enter the amount of
material to be removed during the finish cut.
Enter the Feed Rate.
Select either Forward or Reverse for the direction of the finish pass.
With Forward selected, the finish pass is made in the same direction
as previous passes. With Reverse selected, the finish pass is made
in the opposite direction.
Press the USE key.