56 3 DRO Mode and Calculator
3.1 DRO Manual Data Input
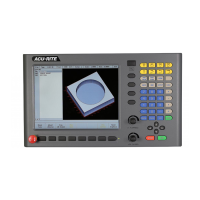
Zeroing an axis
Pressing the Zero X, Zero Y, or Zero Z soft keys will zero the
incremental position for those axes.
A datum must be set to establish the point from which all absolute
dimensions are based.
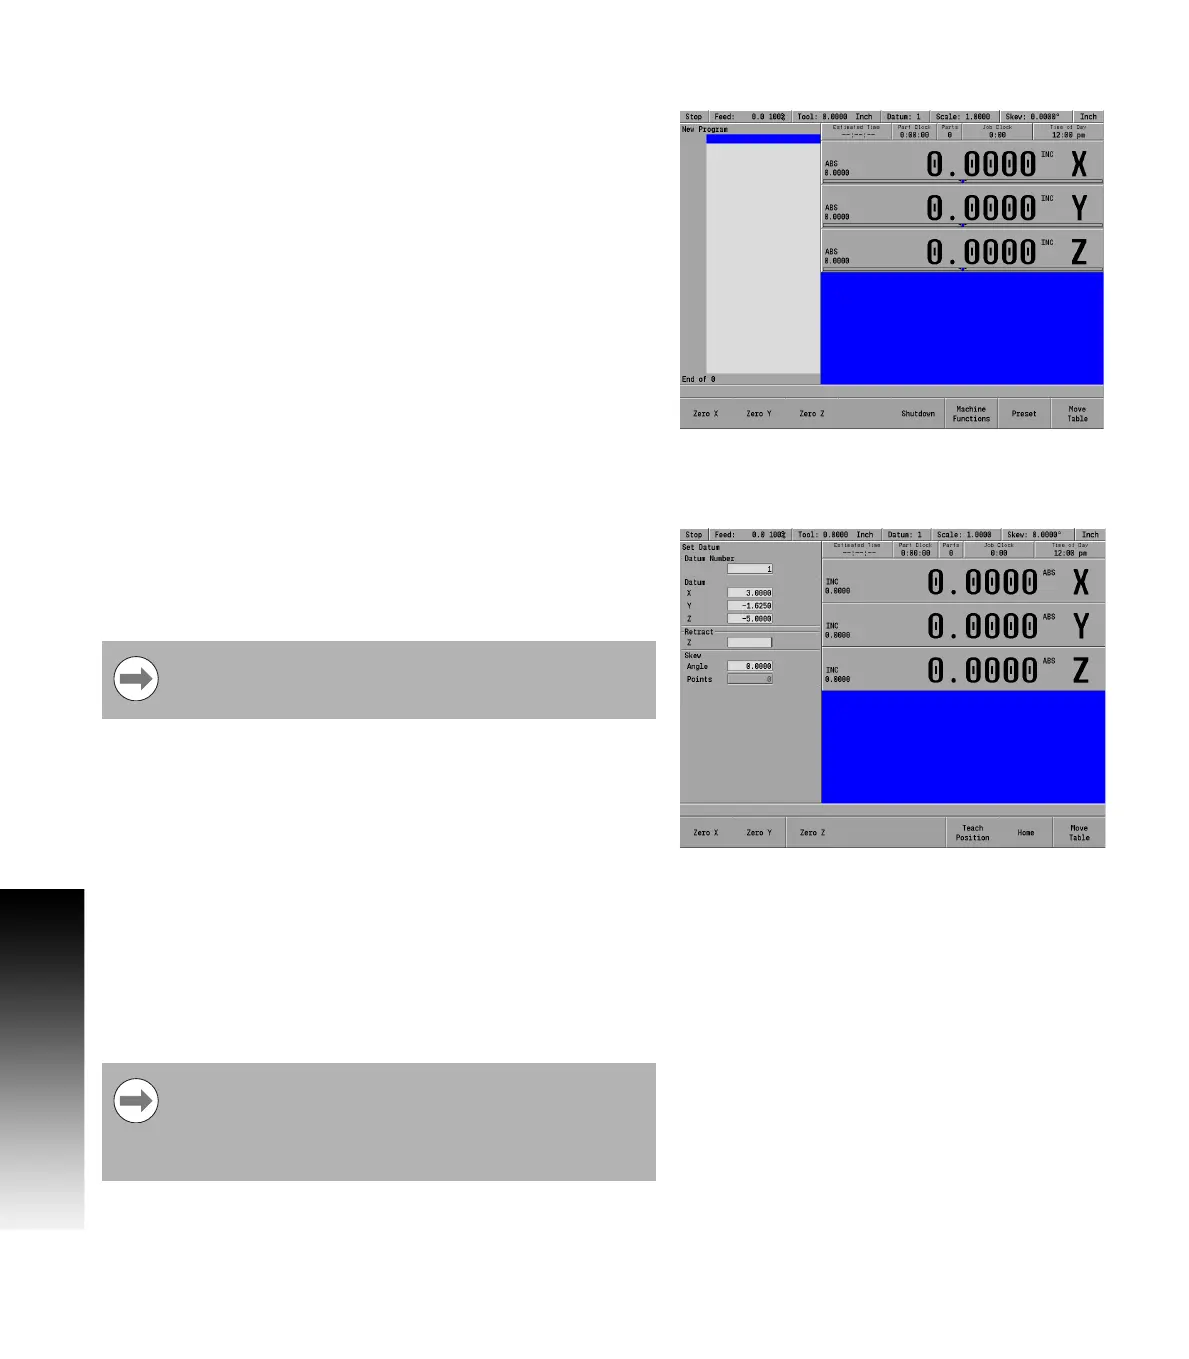
Teach position
Whenever X, Y or Z coordinates are being entered, the Teach Position
soft key will appear, enabling MILLPWR
G2
to be in teach mode and to
use the current coordinate(s). MILLPWR
G2
will base each coordinate
on the current absolute position, and enter that position into the field
that is highlighted.
To teach the MILLPWR
G2
a coordinate (while programming a milling
function e.g. Rectangle Pocket):
Use the ARROW keys to highlight the X, Y, or Z axis fields.
Move your tool, indicator, or electronic edge finder to the position
you want to teach.
Press the Teach Position soft key to enter that location then press
the ENTER key.
The numeric keypad, and calculator functions can be used to adjust
the number.
Repeat the steps for each axis and each location that will be used to
teach the MILLPWR
G2
.
Press USE to accept the dialogue or press CANCEL to cancel the
dialogue.
While programming, the MILLPWR
G2
can switch between
the DRO and PGM screens without losing the program
that is either being created, or being edited.
Whenever the Teach Position soft key is available, the
Probe soft key is also available. This probe feature allows
the location of an edge or midpoint (centerline) to be
entered into the coordinate using the edge finder. Refer to
Chapter 6 "Using an electronic edge finder" on page 108.