70 4 Tool Table
4.1 Tool Table
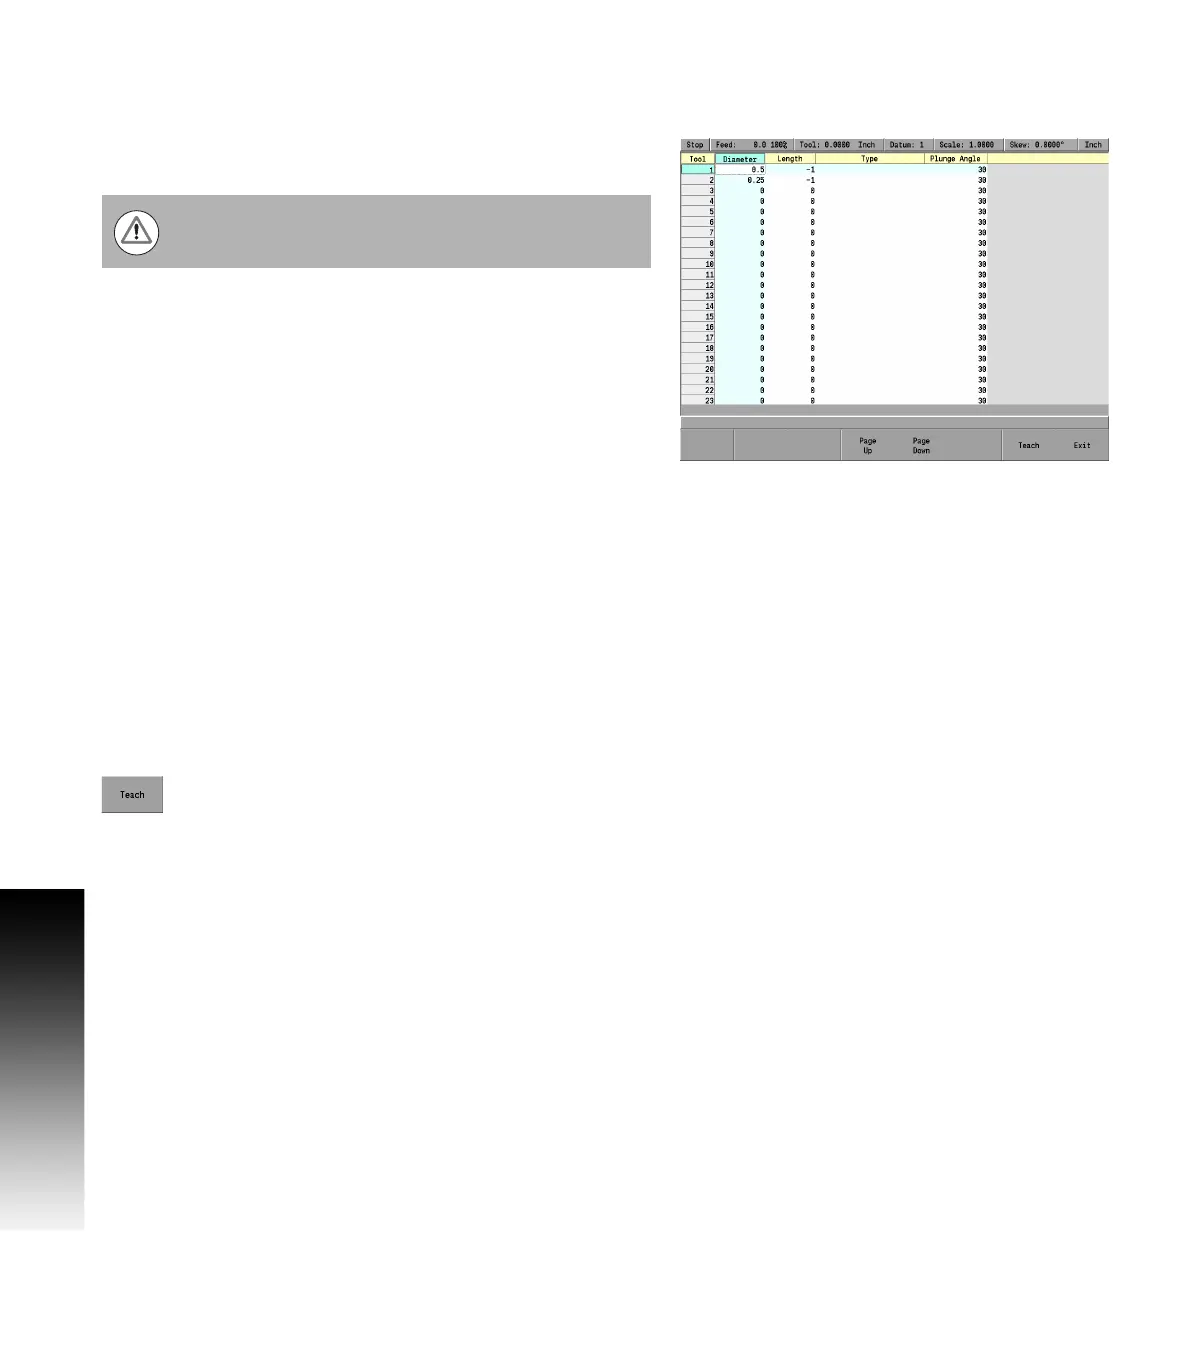
Tool table
Editing the tool table
When the tool table is open, a new tool can be added, or an existing
tool can be edited by changing the existing information for that tool.
To enter a new tool, a blank numbered row will need to be selected.
Using the ARROW keys, highlight the next available blank row number.
Highlight the Diameter field, and using the numeric keypad, enter
the tool diameter.
Press the ENTER key.
ARROW over to the next field and enter the tool Length if it is to be
used.
Press the ENTER key.
ARROW over to the Type field and press the ENTER key. The Type is
only for informational purpose.
From the drop down menu, ARROW down to select the description of
the tool that is being added (e.g. flat end mill).
Press the ENTER key.
Arrow to the next field and enter the plunge angle. When ramping
into a pocket, this is the angle at which the tool will enter the
material.
Press the ENTER key.
Continue to add additional tools as necessary.
When all tools have been added, press the Exit soft key, or USE key
to save changes to the tool table.
Press the Teach soft key. The MILLPWR
G2
calculates
the tool length offset for the selected tool putting the
data to the length column.
It is necessary to first select the unit of measurement
before entering values into the tool table.