58 3 DRO Mode and Calculator
3.1 DRO Manual Data Input
Skewing
The skew function automatically compensates for the offset angle of
the part when it is not perfectly parallel with either the X or Y axis.
Press the DRO/PGM key to place the MILLPWR
G2
in DRO mode.
Press the ABS/INCR key to place the MILLPWR
G2
in ABS mode.
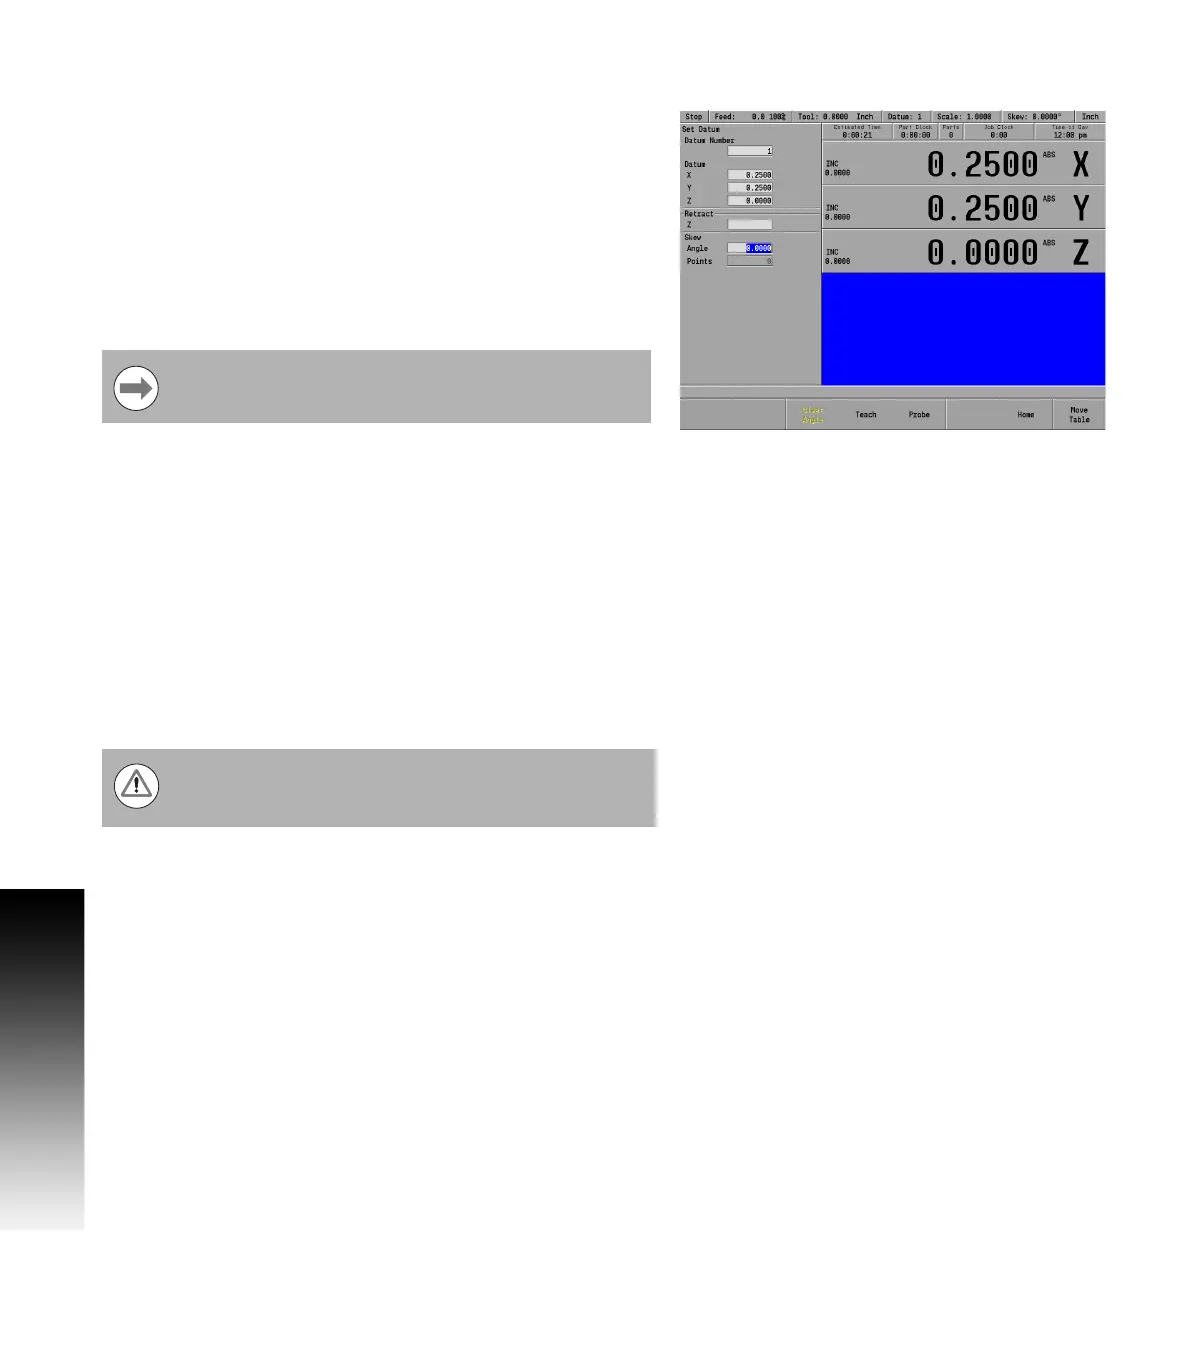
Press the Datum soft key to open the Set Datum dialogue.
Enter the Datum Number in the DATUM NUMBER field.
Enter the Skew Angle in the SKEW ANGLE field.
Press the CANCEL key at any time to cancel and exit the Set Datum
dialogue.
To compensate for the skewed part, touch off on two or more points
along one axis, either X or Y. Use an electronic edge finder or a
mechanical indicator. At each point selected, press the Teach
Position soft key to enter the data.
Always choose a line that you want to make parallel with the table’s X
or Y axis, do not enter coordinates along a curve, along two different
lines or along a line that’s positioned at a true 45 degree angle.
MILLPWR
G2
will calculate the skew angle based upon a straight line
between the points you’ve entered.
If you’re working with a part that has a rough edge, it’s best to enter
multiple points along the straightest edge so that MILLPWR
G2
can
more accurately calculate the skew angle.
Each datum has its own skew angle. When a new datum
is selected, that datum’s skew angle will be used.
The skew feature does not work with G-code programs.
Remove any skew angle prior to running a G-code
program.