Anatel A643a - Anatel A643a Maintenance 161 of 220
RPS - June 2007 - Edition 12
Anatel Operator Manual
13.4.2 Replacing the UV Lamp
In hot water (>50 °C) applications, allow the instrument to cool for 15 minutes before
proceeding with the UV Lamp Replacement procedure.
To replace the UV Lamp:
1) Turn the Anatel A643a Analyzer OFF and disconnect the AC power cord from its supply
source.
2) Stop sample water flow to the instrument.
3) The UV Lamp is located at the Water I/O end of the Anatel A643a. Disconnect the
water inlet (9/16" nut) and outlet (7/16" nut) tubing. It is not necessary to remove the
inlet prefilter assembly from the WATER IN port.
4) The UV Lamp is located at the Water I/O end of the A643a TOC Analyzer. While
holding the Water I/O Cover, remove it as outlined in “Preparatory Maintenance
Procedures” on page 157 to access the UV lamp assembly.
5) Continue to support the Water I/O Cover and disconnect the Ground Wire spade
connector. Then squeeze the tabs on the Sample Valve Connector to disconnect the
Sample Valve cable. Also unscrew the WATER IN and WATER OUT tubing connection
nuts. Separate the Water I/O Cover from the instrument. Place the Cover aside with
the metal bracket down to prevent damaging components.
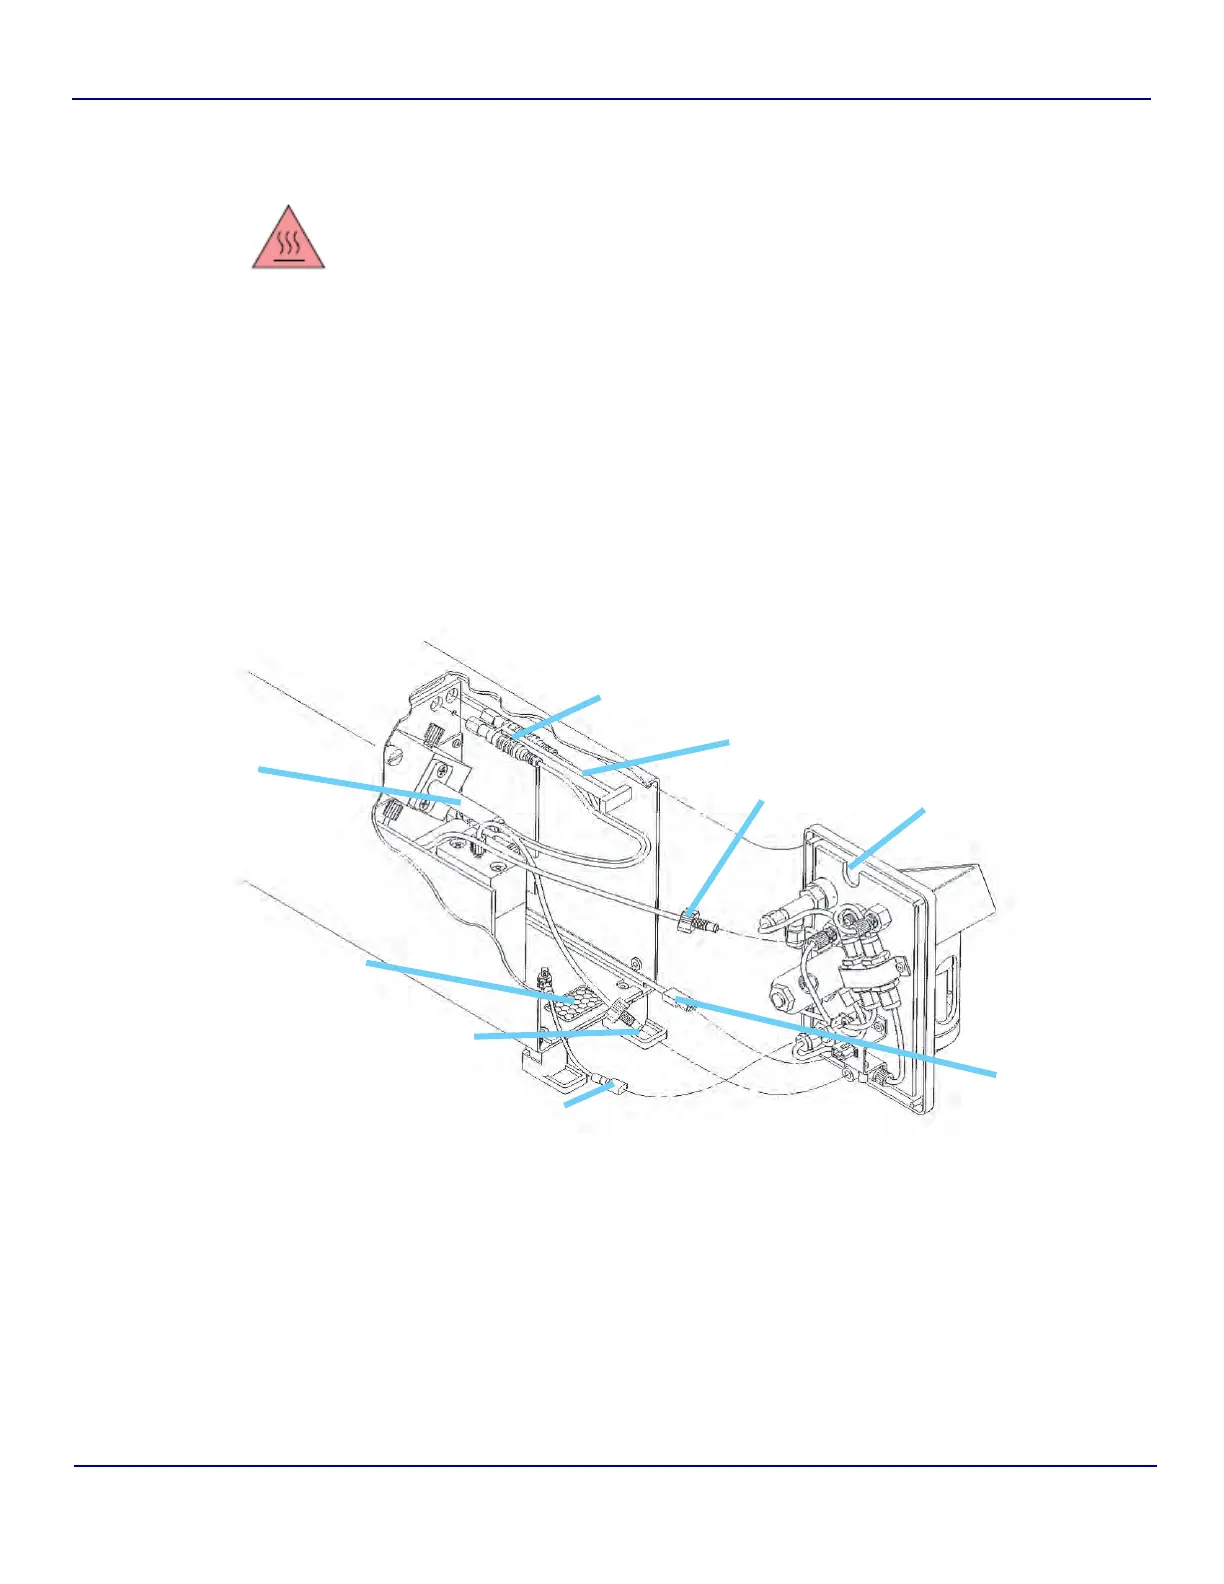
Fig 13-6 : Anatel A643a UV Lamp Replacement Diagram
Ground Wire
Water Out
Water In
Water I/O
Cover
Air Filter
Lamp
Connector
Plugs
Sample
Valve
Connector
Lamp
Connector
Stem
UV Lamp