Getting Started
At first glance ATEM Mini might seem intimidating with all the connectors and buttons, however
the unit is actually very easy to set up and use. Each feature serves a specific function and it
won’t take long to get familiar with ATEM Mini and know exactly what each feature does.
This section of the manual will show you how to get started with your ATEM Mini, including how
to connect power, connect an HDMI video source, connect a microphone and plug into your
computer so you can start broadcasting online.
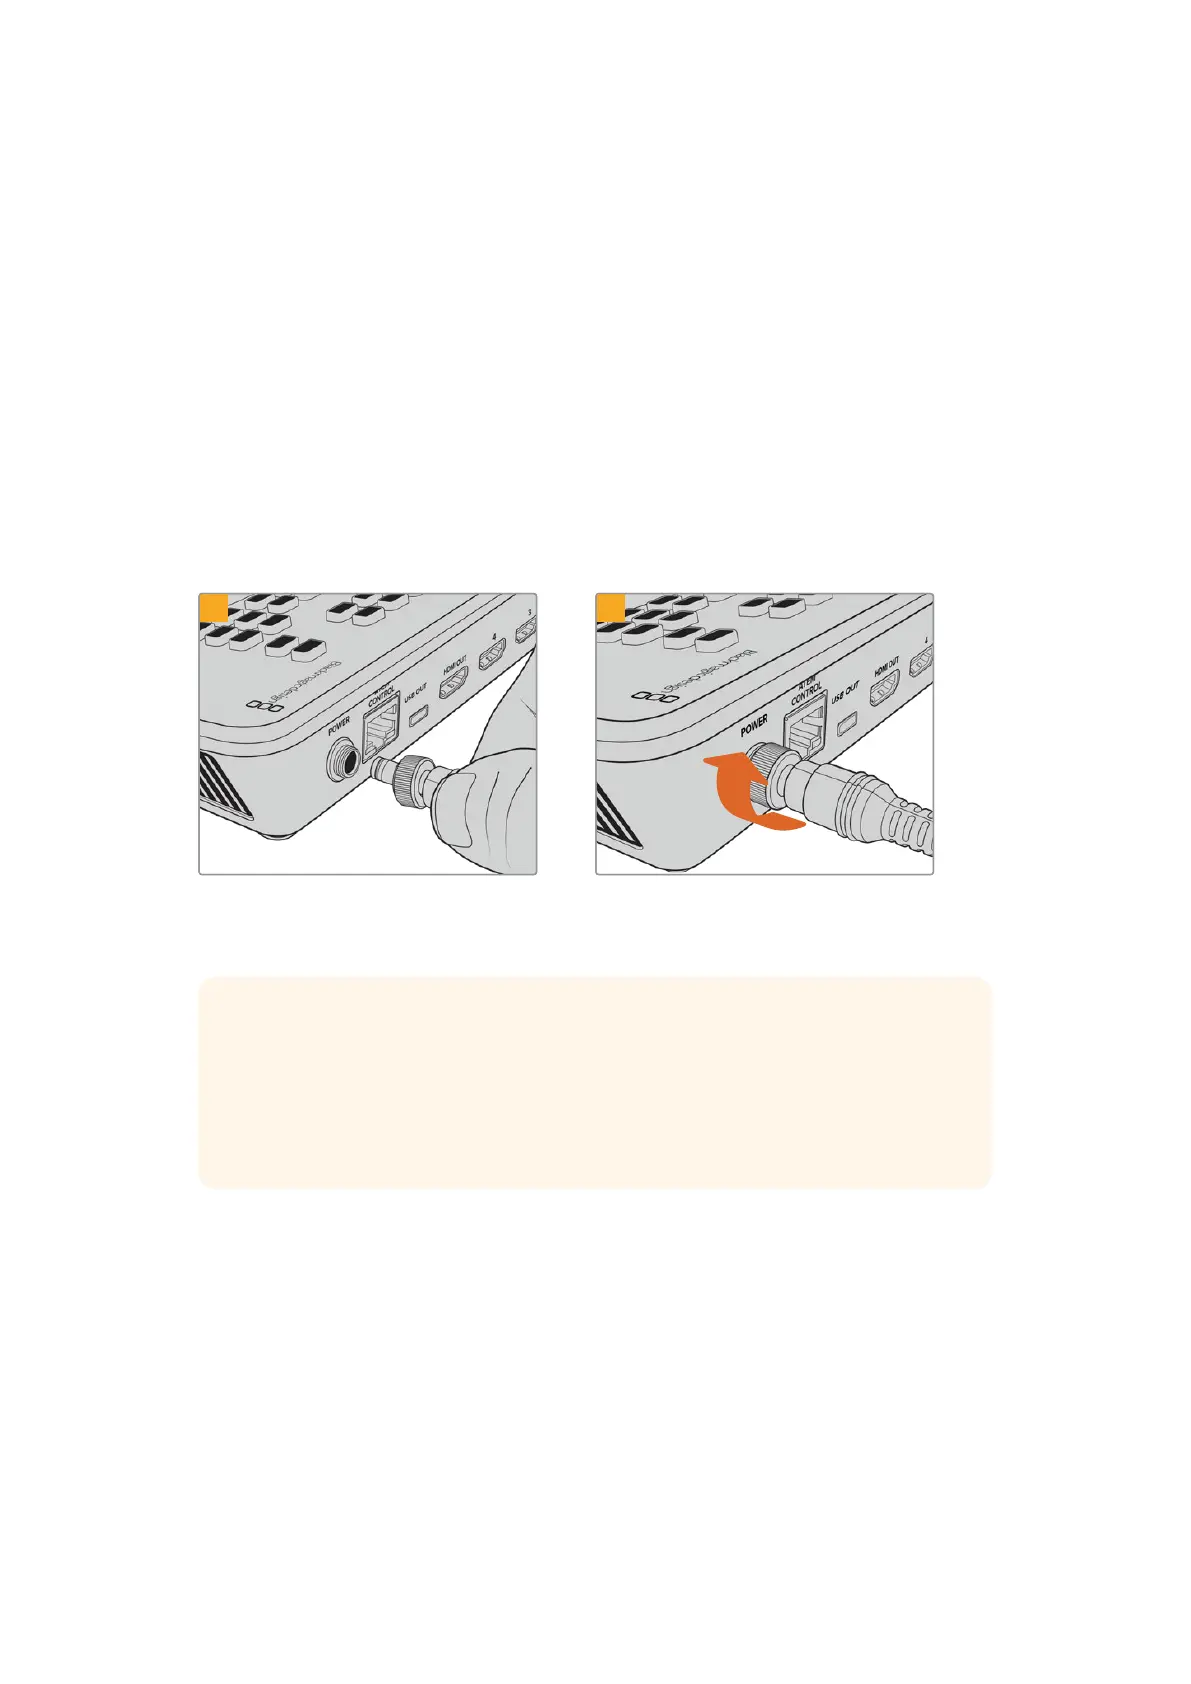
Plugging in Power
The first step to getting started is to plug in the mains power supply using the supplied power
adapter. If your power supply has a locking ring, secure the connection to ATEM Mini by
tightening the connector to the unit. This locks the power cable to ATEM Mini preventing it from
being accidentally removed.
1 2
Connect power to ATEM Mini’s power
input using the supplied cable
Secure the connector to ATEM Mini by
tightening the connector screw
TIP It’s important to note that the power supplies for ATEM Mini are different as the
ATEM Mini Pro and Extreme models use a little more power so its power supply can
provide more current. However they are both 12 volts. So this means it’s important to
use the power adapter supplied with each unit. If you have different models of ATEM
Mini then it might be a good idea to label each power adapter so you know which
adapter is for each unit.
6Getting Started
 Loading...