Test Procedures 165
Motor Continuity Test Procedure
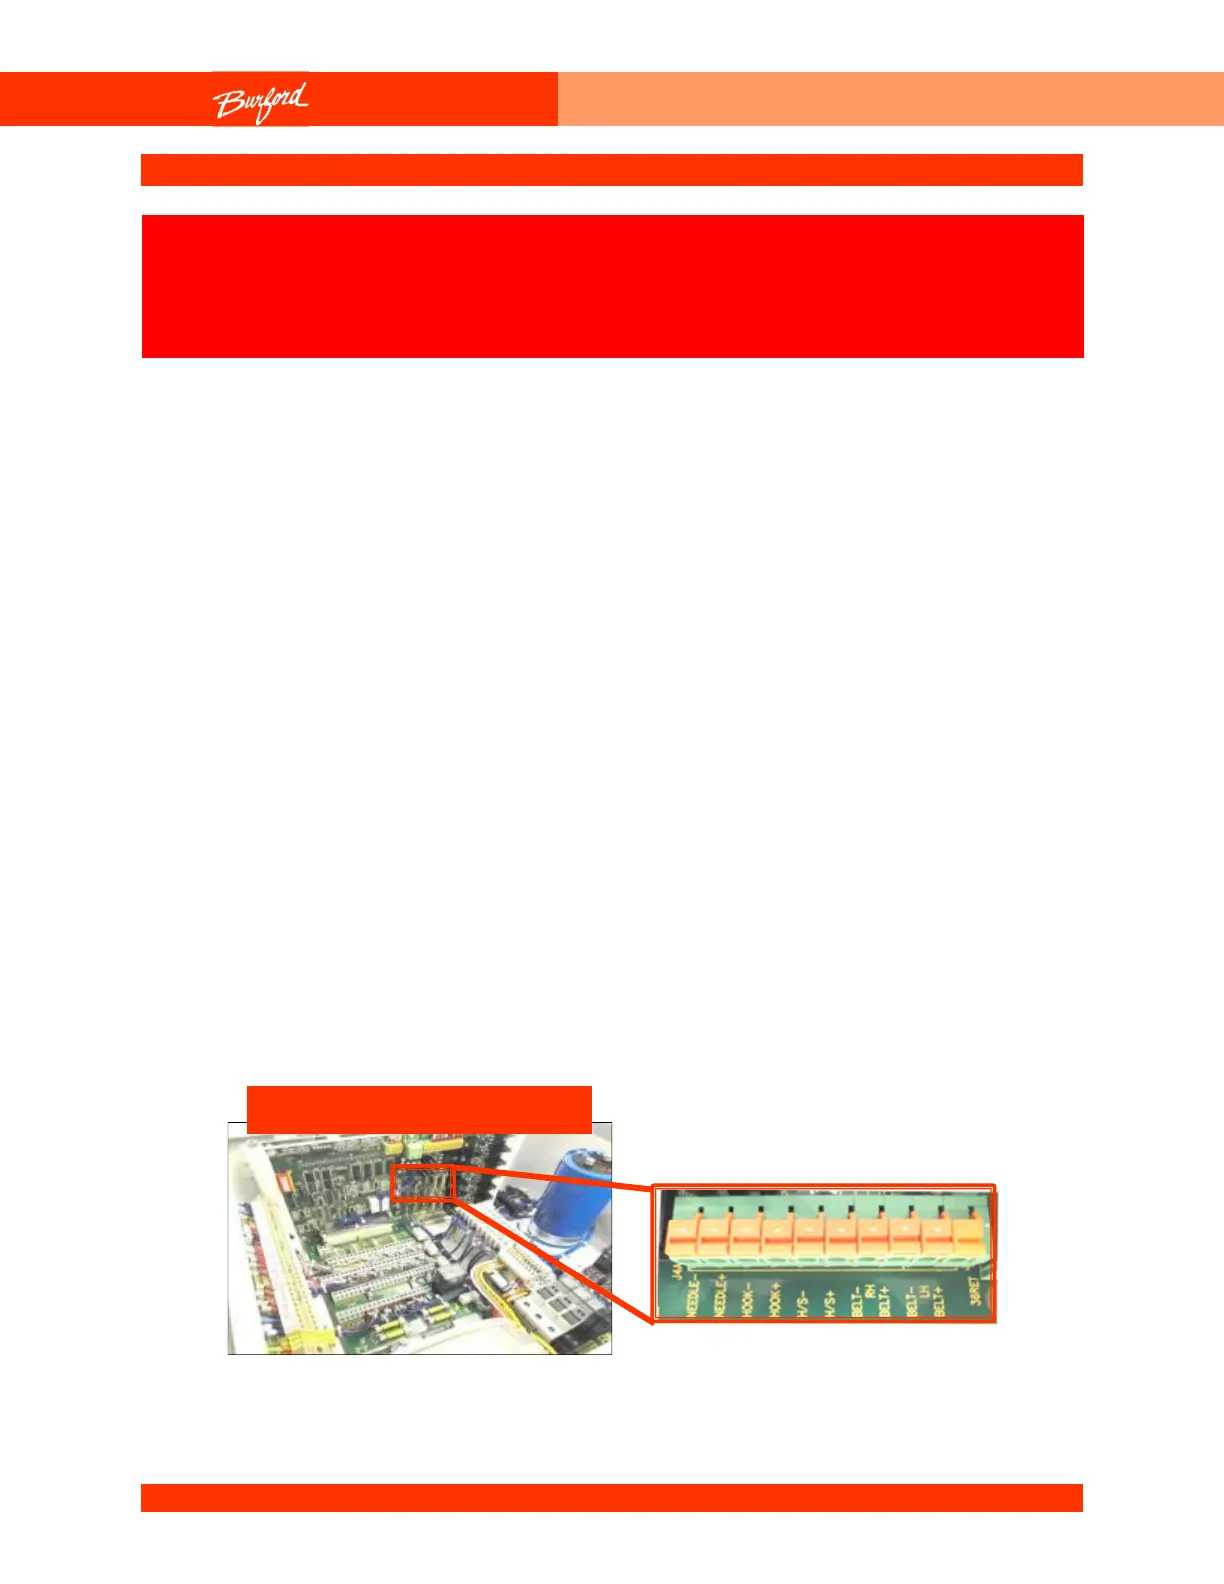
The servo motor leads are attached to the connector on the edge of the Auxiliary Board.
A motor can be tested for continuity by following these steps.
18. Turn the disconnect switch located on the Main Enclosure to “OFF”.
19. Note the location and wire numbers of the motor to be tested. Disconnect the wires
of the motor from the Auxiliary board.
20. Attach ohmmeter leads to the motor wires. The ohmmeter reading should be 1 ohm
or less. If not, go to Step 5.
21. While continuing to measure the resistance, wiggle the motor connector that goes
into the bottom of the Servo Tyer. If your meter reading changes drastically while
you are wiggling the connector, disconnect the connector and check for motor pins
that are arcing or not making good contact. Sometimes, the pins in the connector
tend to get pushed out of the connector when it is connected to the Servo Tyer.
22. If the test in Step 3 indicates an open circuit, disconnect the motor connector that
goes into the bottom of the Servo Tyer and determine whether the break in continuity
is in the cable or on the motor side of the connector. Check for motor pins that are
arcing or not making good contact. Sometimes, the pins in the connector tend to get
pushed out of the connector when it is connected to the Servo Tyer.
The following procedure may require that tests are made with the
electrical enclosures open and power turned “ON”. These tests
should only be conducted by authorized personnel who are aware
of the electrical and mechanical hazards present.