©2024 Comba Telecom. All Rights Reserved.
568 Gibraltar Drive, Milpitas, CA 95035 | +1 408 526 0180
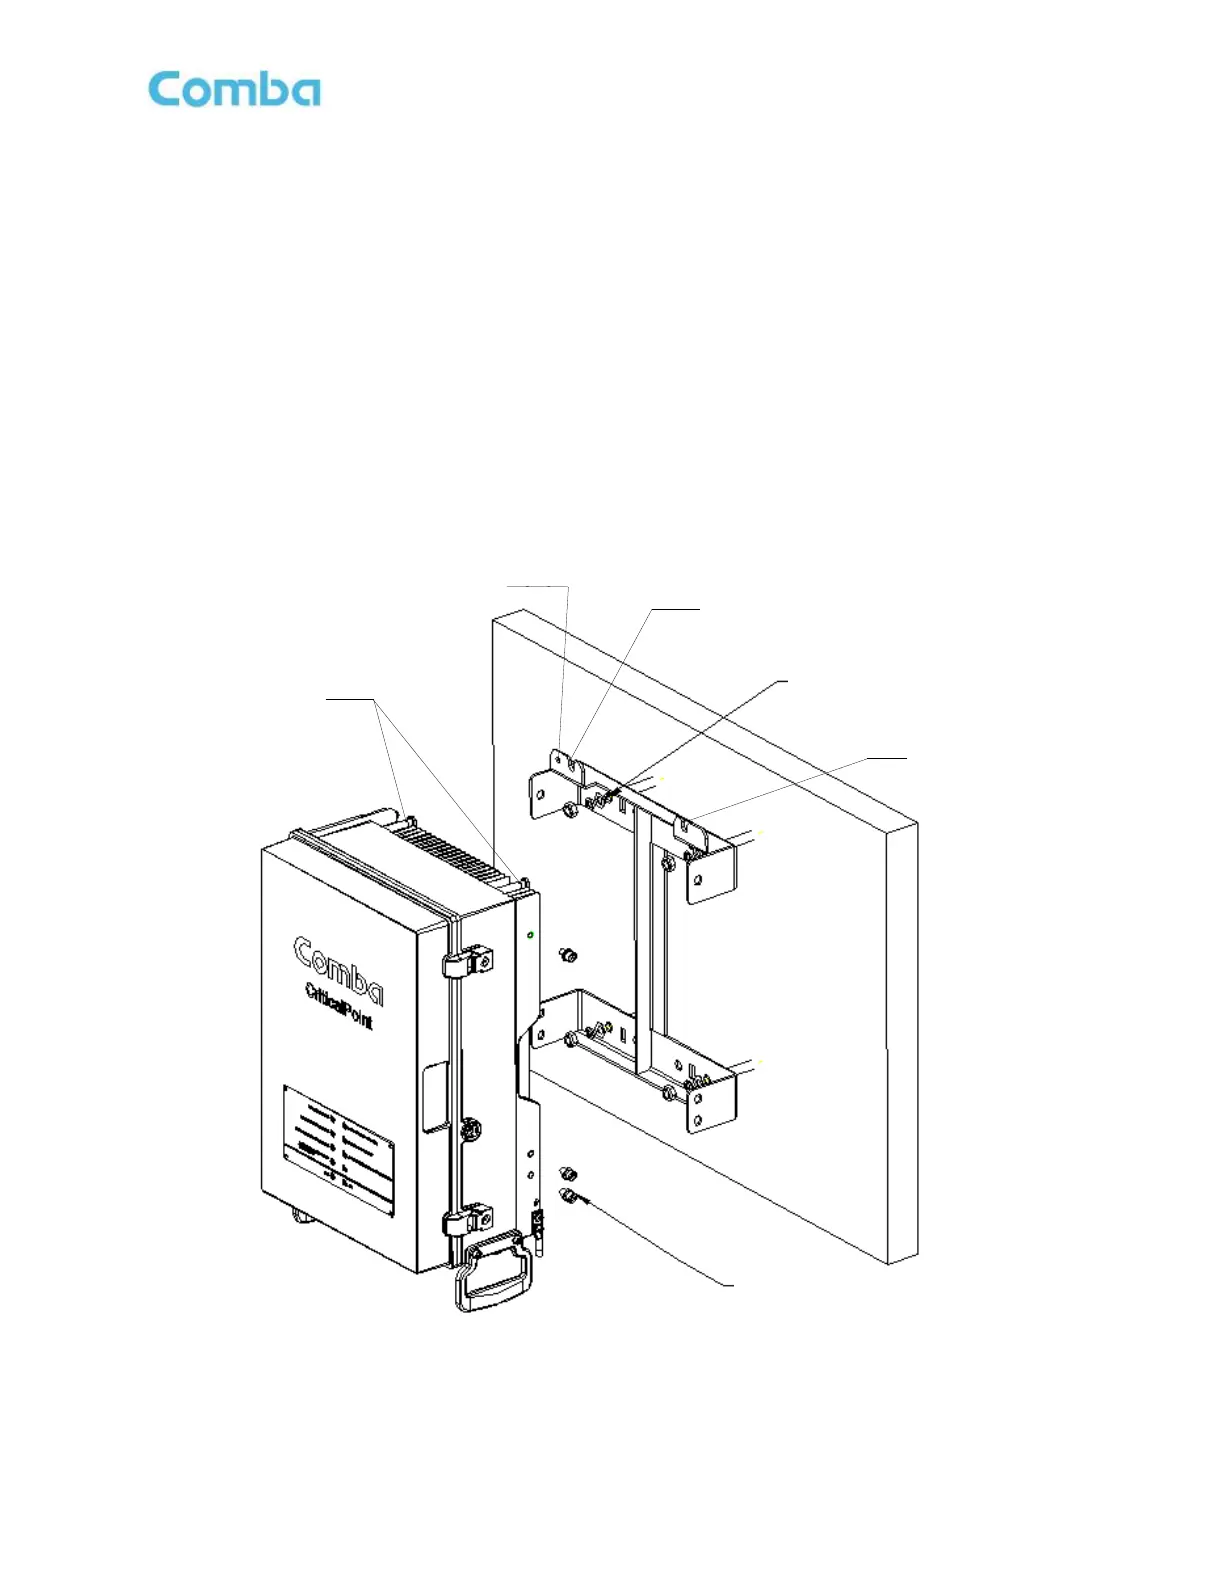
2.8 V3 BDA/MU/RU WALL MOUNTING
• Drill four holes on the wall/plywood using the position of four holes on the mounting bracket as a guide.
• Install the mounting bracket on the wall. It is recommended to use 3/8” x 1-1/2” lag screws and fender
washers when mounting to 3/4” fire treated plywood. If mounting to a concrete wall, DIN Rails, or any
other materials, refer to the local building code. Secure the mounting bracket.
• Hang the cabinet on the mounting bracket by using the two cabinet hanger pins. Lift the cabinet into
position and gently drop onto the hanging points. Ensure the device is secure before letting go. It is
recommended to have a second person assisting/observing the hanger pins position to help guide the
installer. Secure the enclosure to the bracket with the 6 x M8 bolts which are provided with the unit.
• Open the door on the cabinet and install the tamperproof security bolt through the hole in the top left
corner of the cabinet. Secure the cabinet to the mounting bracket.
Figure 26: V3 BDA/MU/RU Wall Mounting