©2025 Copeland LP.
026-1803 R13 Supervisor I&O User Guide 4 - 1
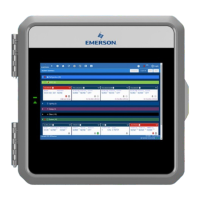
4 Supervisory Controller Basic Navigation
Log into Supervisory Controller by clicking the Login icon in the upper right part of the screen. For the Main Menu, click the gear
icon and the panel will slide open. Click the gear icon again or to the right of the panel to close.
Six icons at the first row along the top of the screen are the Back Arrow, Main Menu, Home, Refresh, Control Inventory, and
Schedule and Events. Refer to (Table 4-2) for icon descriptions.
4.1 Menus and Submenus
1. Login - Logs you into the Supervisory controller. Click
and enter your username and password. Once logged in,
clicking Logout will log you back out of the system. (You
will automatically be logged out of the system after a
specified period of idle time.) Enter your Username/
Password (default user/pass) and click Login. Then
update your password to the minimum complexity
requirements and click Save.
2. Home - Returns you to the set Home screen. Click the
Home icon to return to the Home screen from anywhere
in the system.
3. Summaries & Dashboards - Three submenus will
display: Case Defrost Schedule, Network Summary, and
System Summary. Click each selection or drop-down
arrow (caret) to expand. Note that if Peer Network is set
up, the area controllers will display under the Summaries
menu under Area Controllers.
• Case Defrost Schedule Summary - Takes you to the
Case Defrost Schedule Summary page where edits to
case defrost schedules can be managed.
• Network - The network shows the status of all network
devices associated with this Site Supervisor.
○ Online - The device is online and communicating
normally.
○ Offline - The device is not communicating (dropped off
the network, has not been commissioned, is not functional,
or is not powered up).
○ Unknown - Unable to communicate with the device.
○ This Supvr - Represents the current Supervisory
controller you are using; therefore, only one entry in the list
can show this status.
• System - Returns you to the home screen.
4. System Logs & Statistics - Contains controller system
information for technical personnel-level users. Setpoint
files can now be printed. Select Setpoint Report. This
report can be downloaded, saved, or printed. Select
Service Log for Clean Out and Reset buttons. Clean
Out will return the controller to factory defaults. The
controller will reboot after a clean out with all
programmed applications, logs, and other data erased.
CAUTION: A clean out will erase all programmed
parameters from memory. The Reset button only restarts
and reboots the controller.
5. Configure System - Contains navigation to Logging
Groups, Alarm Communications, File Management &
Licensing, General System Properties, Manage Users
(performs account creation and role assignment for
system users, view, edit, and remove users) and My
Profile (allows you to create or edit your personal profile
page, create keyboard shortcuts, set localization and
engineering unit settings and more). Click the drop-down
arrow (caret) to expand.
• Logging Groups - Allows you to view log parameters,
add new logging groups, edit parameters of existing
logging groups, and delete logging groups.
• Alarm Communications - View, edit, or delete alarm
notices from this page. Enable All to view all notices in the
system.
• File Management & Licensing - File Management
opens the File Management screen where you can view
ADF part number, install and delete application
description (ADF) files, backup and restore system
configuration, install and delete floor plans, add/delete a
license, view application licenses in the system, add a
Feature Set, and upgrade firmware.
• General System Settings - Contains a drop-down menu
that includes these submenus: COM Ports (COM Ports
and baud rate settings), Network Settings (Internet,
subnet mask, DNS, MAC Address, Email (SMTP), Text
messaging (SMS) and more), Localization (language and
engineering unit settings), and System Values (general
setup parameters, Web server and UI setup).
6. Advanced - This menu is visible when a user’s profile
menu is set to Basic. If the user profile menu is set to
Advanced, the button will not be visible. To configure, go
to the gear icon > Configure System > My Profile >
Select User View Level > choose Basic or Advanced.