©2025 Copeland LP.
026-1803 R13 Supervisor I&O User Guide 6 - 7
Related Application/Devices lists all applications or devices
that can be associated with the Smart Alarm. If one or multiple
applications or devices are selected, they will work with the
Smart Alarm together.
• In View Mode, the selected applications or devices will
display as links. If a link is clicked, it will open the Details
screen of the selected application or device.
• In Edit Mode, these related applications or devices will
display as checkboxes.
When the trigger conditions of the Smart Alarm are complete,
a Smart Alarm will be generated and displayed in the Active
Alarms screen.
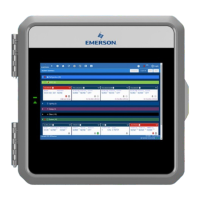
Active Alarms Screen:
• If alarms display as a table in the Active Alarms screen, a
light bulb icon will appear beside the Smart Alarm’s
Description column.
• If alarms display as a card in the Active Alarms screen, a
light bulb icon will appear at the top right corner of the
card; its color will change depending on the alarm type.
History Alarms Screen:
• If alarms display as a table in the History Alarms screen, a
light bulb icon will appear beside the Smart Alarm’s
description column.
• If alarms display as a card in the History Alarms screen, a
light bulb icon will appear the top right of corner of the
card.
Note: The alarm indicators (icon and border color) in the
Main Header, Main Menu, and Site Summary screens are
always displayed even when there are no Smart Alarms
in the system.
In the Filter Alarms screen, the Smart Alarm checkbox can be
selected under Category to filter Smart Alarms. The Smart
Alarm checkbox is always displayed when there are no Smart
Alarms in the system.
6. The Critical Alarm screen will display if a Smart Alarm in
the Active Alarms or History Alarms screen is selected. A
light bulb icon will appear beside the dialog header.
There are three actions for Smart Alarm: Acknowledge,
Reset, and Mute - their functionalities are similar to
normal alarms. If the user is not logged in or has not
configured the History Alarms screen, the Actions area
will be hidden.
For Smart Alarm
• Four properties - Explanation, Possible Cause,
Suggesting Actions, and User Defined Message display
at the top of the Details list.
• Originator, Report Value, and Limit Value properties
may have multiple items.
• Report Value and Limit Value properties are always
displayed.
• The View Graph button appears on the right side of the
Details list header. The log graph of the current Smart
Alarm will appear if the View Graph button is clicked.
For devices with small screens, the Details list of the Smart
Alarm will be compressed. If there is not enough space to
show the graph, use the horizontal scrollbar to adjust.
6.7 Peer Alarming
Peer Alarming enables both the E2 and the Supervisory
Controller to transmit the alarms to the alarm annunciator
controller in a peer group. The general operations for the
integrated alarms can then be handled in one controller
making it more convenient for users to manage and deal with
all the alarms in only one annunciator in one peer group. For
more information about Peer to Peer setup, go to Appendix
E: Peer to Peer Network Setup for Mixed Sites (Two
Supervisors and One E2).
6.8 Generic Alarms
Generic Alarms enable users to custom-assign alarms in the
controller for any analog or digital output and allows users to
set custom high-low alarm setpoints for both occupied and
unoccupied building states. Up to 10 generic alarms can be
created for each application. Each alarm is configurable with
options of Disabled, Notice, Non-Critical, or Critical. For each
alarm the standard Advisory parameters are also available.
Generic Alarms must first be enabled in the General System
Properties > System Values tab. To set up Generic Alarming in
any application, go to the application’s Generic Alarms tab.
To add a Generic Alarm, select an output from the drop-down
list and then click + Add Generic Alarm. Each added alarm
will be named Generic Alarm, enumerated from 1-10, and
followed by the name of the output to which it is assigned.
Each alarm’s parameters will be hidden beneath the first row.
Click the chevron to access all the alarm parameters. The
alarm will be generated when the value of the output
exceeds the setpoint after the programmed alarm delay is
satisfied. Removing a Generic Alarm can be accomplished by
clicking the X at the end of its first row.
6.9 Alarm Types
For a list of alarms in the Supervisor, please see Appendix A:
Alarm Advisories