©2025 Copeland LP.
026-1803 R13 Supervisor I&O User Guide 6 - 2
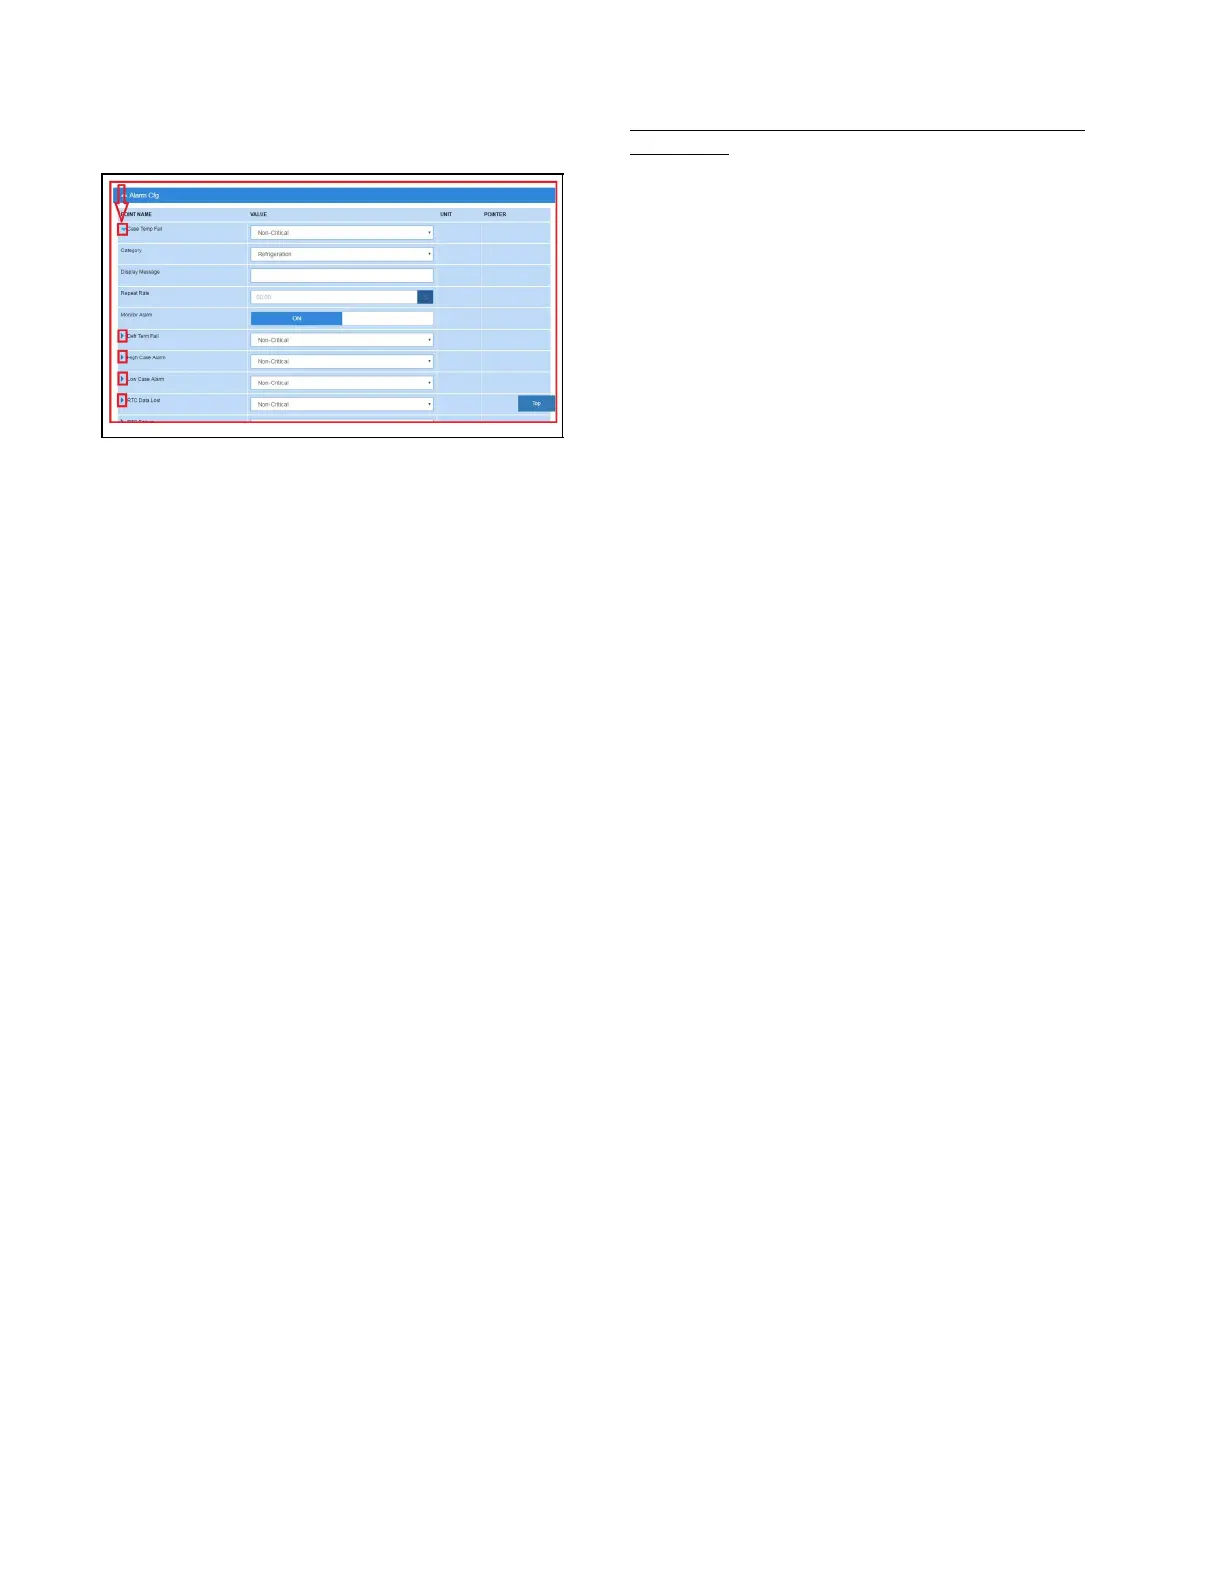
6.1 Alarm Configuration
1. For alarm configurations, scroll down to the Alarm Cfg
parameter section.
2. On the Alarm Cfg parameter section, click the arrow
beside the name of the parameter to configure other
settings for alarming.
• Alarm descriptions can be overridden from this page.
Enter the name of each application alarm you wish to
appear in the alarm log. If no name has been entered, the
default alarm message will display in the alarm log.
• Each alarm type (urgency level) can be categorized as
Non-Critical, Critical, or Notice (the least urgent).
• Each alarm category (where it is categorized in the
supervisory controller) can be set under the Category
field: Refrigeration, HVAC, Lighting, Energy, or Other.
• Set the repeat time for the alarm on the Repeat Rate field,
which is the time the advisory is next scheduled to repeat
if not acknowledged. A repeated advisory will re-queue
to the system as if it had just been generated. However, it
will not create a new instance; it will only update the
existing instance with the next repeat time. All other
processing and propagation will act as a new instance of
an advisory.
• Set the Monitor Alarm field to ON (if the alarm will go to
the call center for monitoring) or OFF (for no call center
monitoring).
3. Once configurations have been set, select Save on the
upper right side of the screen.
6.2 Alarm Communications
To enable and disable alarms, go to the specific alarm
application.
Use Alarm Communications for sending a person or group of
people alarm notifications per category instead of by specific
application alarms. To enable and disable alarms, go to the
specific alarm application.
Alarms in the supervisory controller can be generated from
different sources including external networked devices,
applications, value-added applications, and subsystems.
Alarm configuration, transmission, and history settings can be
defined by the user. From here, schedule alarm
communications to specific users during specific times. For
example, if you would like to get alarms for the Refrigeration
category, Mon-Fri from 8pm to 5am, this is where the setup
would take place, and not the times when alarms are "active."
Schedules are set up in Time Schedules.
Step 1: Verify you have a Schedule set up in Time Schedules.
This will be the schedule you associate in the Schedule tab
and use to schedule the alarm communications.
Step 2: To begin, click the plus sign + to Add an Alarm Notice.
Click Edit in the top right corner to change the name if
desired.
Step 3: Set up your alarm communication parameters using
the tabs.
• Choose the Category of all the alarms being
communicated. Set one category to ON and to others to
OFF.
• Next, choose the Alarm Type of all the alarms being
communicated. Set one to ON and others to OFF.
• Now choose the Resolution type for all the alarms being
communicated. Set one to ON and others to OFF.
• And select the Schedule to be communicated. This will
be displayed in the Associations tab.
• Set the Recipients of the alarm information by clicking the
plus sign by RECIPIENTS+ and enter the information in
the window. Click Save. Click Edit in the upper right to
edit information already on the page.
• Under Settings, choose Email or SMS for the
communication method.
Figure 6-6 - Configuring Alarms