©2025 Copeland LP.
026-1803 R13 Supervisor I&O User Guide 6 - 3
6.2.1 Alarm Communications Setting
Configure alarm communications setting on Alarm
Communications screen for SMTP (emailing), and texting
alarms.
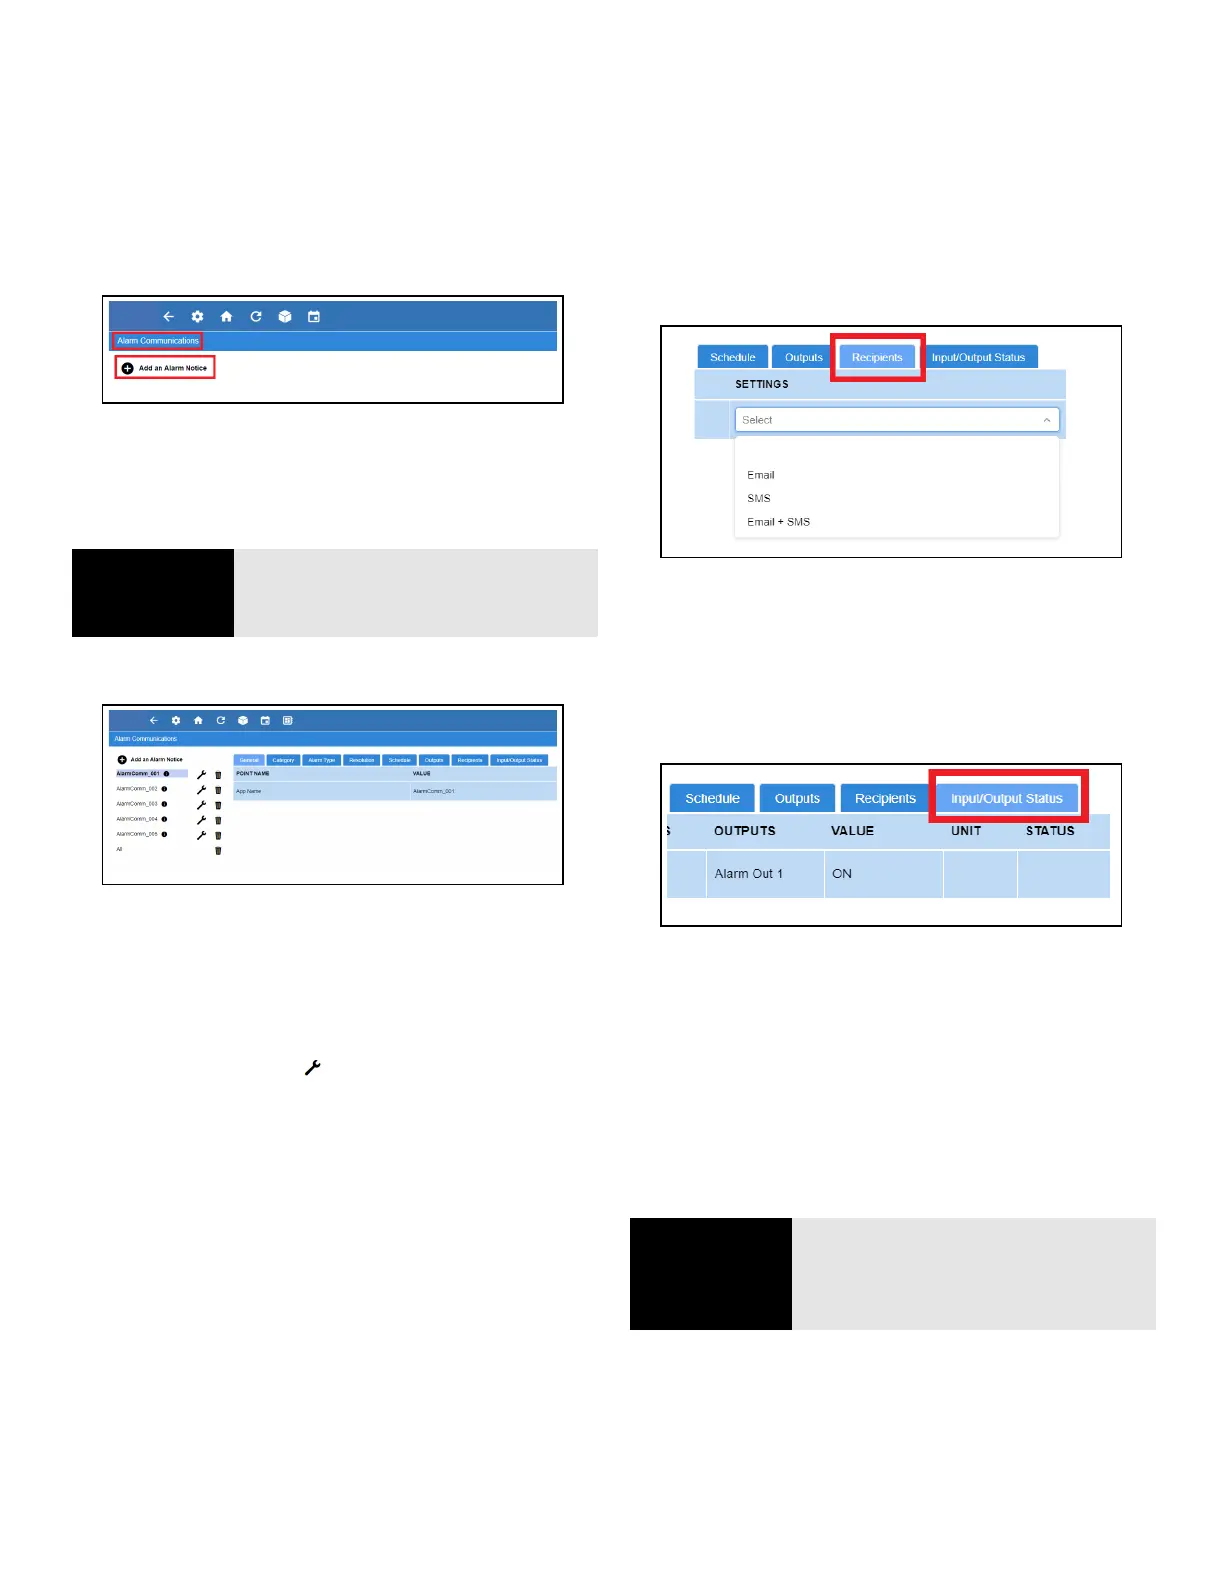
From the Home screen, navigate to Main Menu > System >
Alarm Communications and click Add an Alarm Notice at
the top.
The Alarm Communications screen creates a custom
notification of alarm conditions or set default values for as
many as 20 notifications for each device.
When creating a new alarm notice, there are three steps on
the Alarm Communications page:
Step 1: Enter a unique name
• Click the wrench icon beside the a larm notice to
view the tabs then click Edit located on the upper right
side of the screen. Name the alarm notice by entering a
unique identifier under App Name in the General tab.
Step 2: Select all of the desired options under each tab
• Category – Select ON or OFF for the following category
menu options: Refrigeration, HVAC, Lighting, Energy,
Other, System, and ProAct.
• Alarm type – Select ON or OFF for the following alarm-
type menu options: Critical, Non-Critical, and Notice
(least urgent).
• Resolution – Select how the alarm notice should be
handled. Select ON or OFF for the following resolution
menu options: Acknowledge, Reset to Normal, and
Return to Normal.
• Schedule – Select an option from the drop-down list.
• Outputs - The output menu options are the
following: Alarm Out 1 Config (Audio), Alarm Out 2
Config (Visual), Alarm Out 3 Config (3rd Party A), and
Alarm Out 4 Config (3rd Party B). Select the desired value
for each output menu option: Not enabled, Active until
acknowledged, Active until muted, or Timed one-shot
pulse.
• Recipients - For each user, select how the alarm will be
communicated. The first column shows the list of users
while the second column shows the combo box. The
combo box will have 4 selections: Disabled (blank),
Email, SMS (Text), and Email + SMS. The default value will
be “Disabled”.
• Input/Output Status - The Input/Output Status tab of
every application will appear as a new tab on the details
summary screen to view all the necessary properties to
troubleshoot any issues more effectively.
Step 3: Click Save
• Click Save in the upper right side of the screen. When all
fields for the new alarm notice are completed, a
confirmation pop-up screen will appear.
Figure 6-7 - Alarm Comm Page - Create New Alarm Notice
NOTE
NOTE: This screen will not be
accessible if you are not logged into
the controller.
Figure 6-8 - Alarm Communications Tabs
Figure 6-9 - Recipients Tab
Figure 6-10 - Input/Output Status Tab
NOTE
NOTE: Only 20 notices can be
created. To edit the current notice, a
specific role is required in this
function.