1. Open the front cover and secure it with the latch.
Locate the shear valve in the center of the
analyzer.
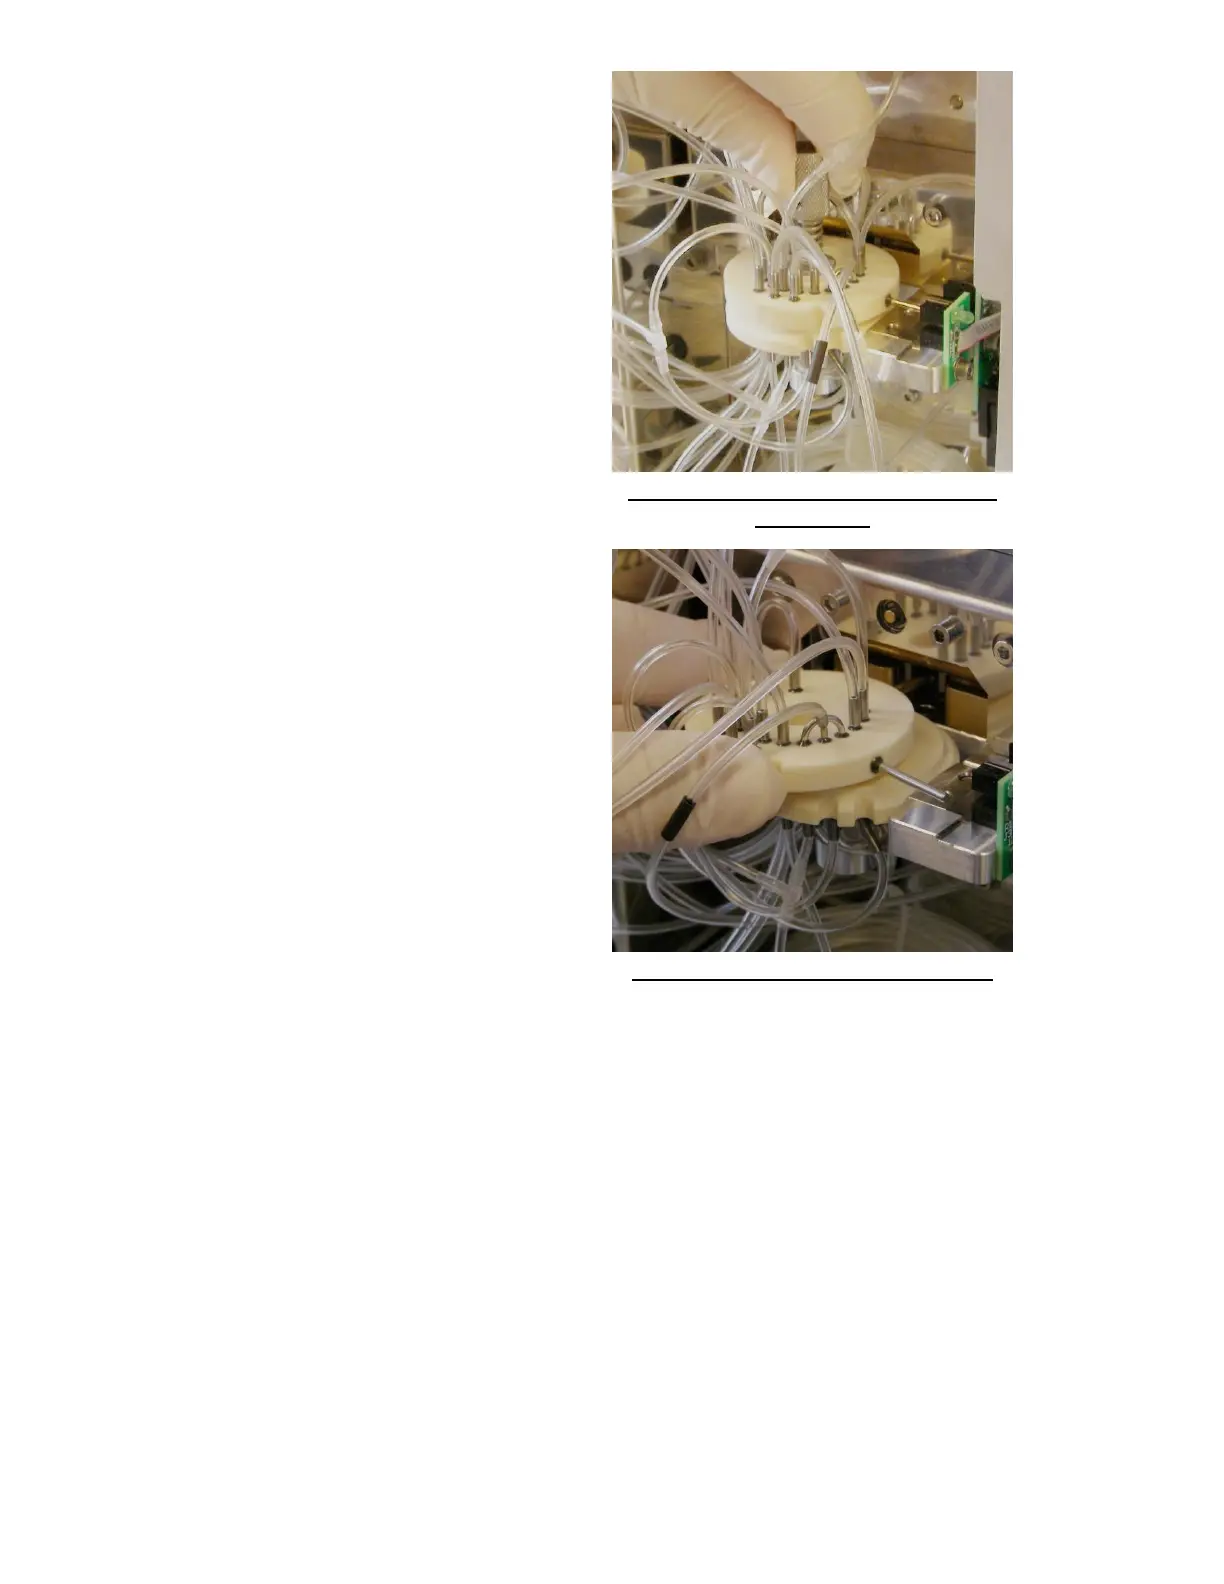
2. Unscrew and remove the axis thumbscrew that
secures the shear valve. Clean the axis
thumbscrew with water and wipe it dry.
3. Slide off the upper disk of the shear valve. Due to
the extremely smooth surface of the ceramic
discs the may stick together somewhat. If the
shear valve was not in use for a few days, then
apply a few drops of water to the contact are
between the upper and lower disks. The salts will
dissolve in a short time and release the upper
disk.