59
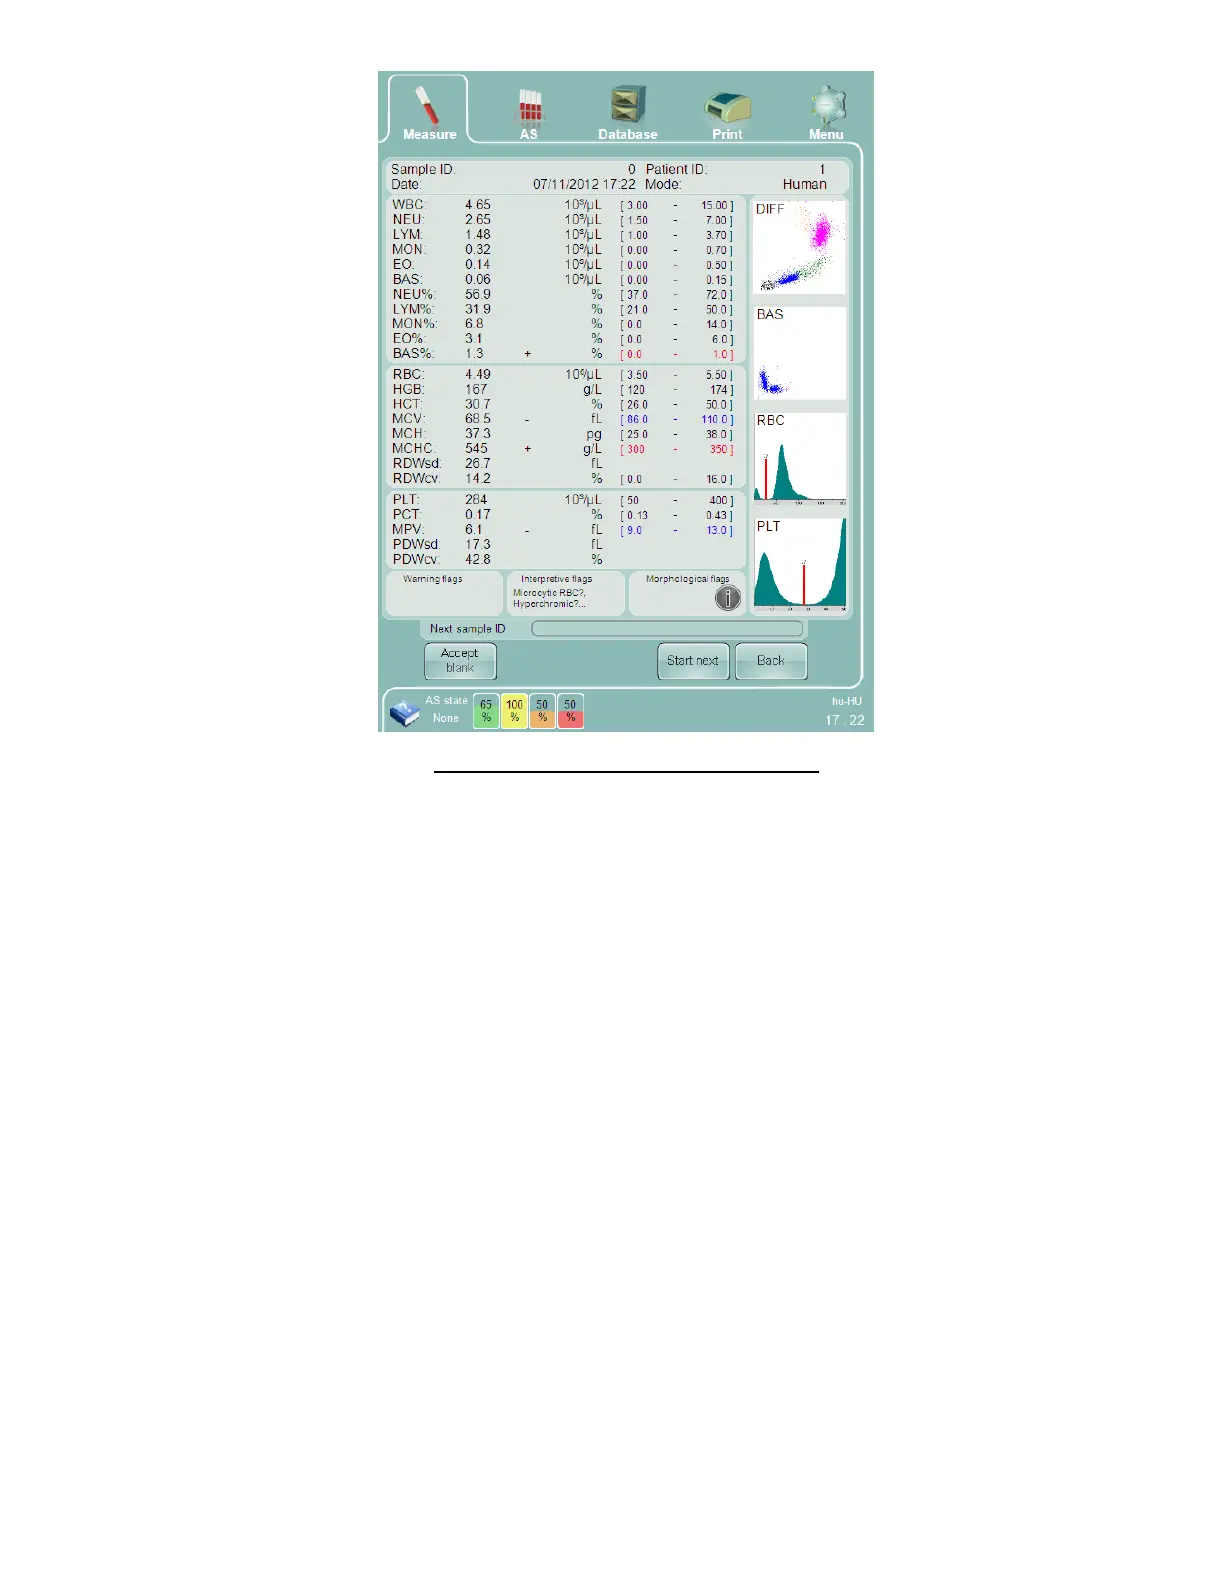
Figure 32. Sample Processing Result Screen
The ‘Abacus 5’ analyzer will be ready to take the next sample after it has finished cleaning and preparing for the next
sample. The Start button will change to green indicating it is ready to start the next sample measurement.
On the result screen you have the following options:
You can print the results by clicking/ tapping on the ‘Print’ quick link at the top of the screen. Please note that
the printing is a feature that is always available. See section 6.6.1 for more details about printing.
Return to the measurement panel by clicking or tapping the using the ‘Back’ button.
Run the next sample in routine mode by:
o Editing the ‘Next sample ID’ just below the actual results
o Accepting the auto-generated sample ID
o Starting the next measurement by clicking/ tapping the ‘Start’ button on the screen or by pressing
the physical ‘Start’ button on the front panel of the ‘Abacus 5’.
o Please note that in this mode the patient and sample mode will be carried over from the previous
sample unless they are changed.
8.4.2 Automatic Mode
Only human samples in closed sample tubes can be processed in automatic mode from the Autosampler. QC samples
and open tubes must be processed in manual mode.
After starting up the ‘Abacus 5’, select the ‘Measure’ quick link. Process a new blank must be processed if this is the
first time a new measurement panel is opened since starting up, or if an earlier blank has expired due to inactivity. An
accepted blank measurement is required before starting automatic sample processing.