Chapter 2
2-4
2.1.3 Input Screen - The Standard View ......................................
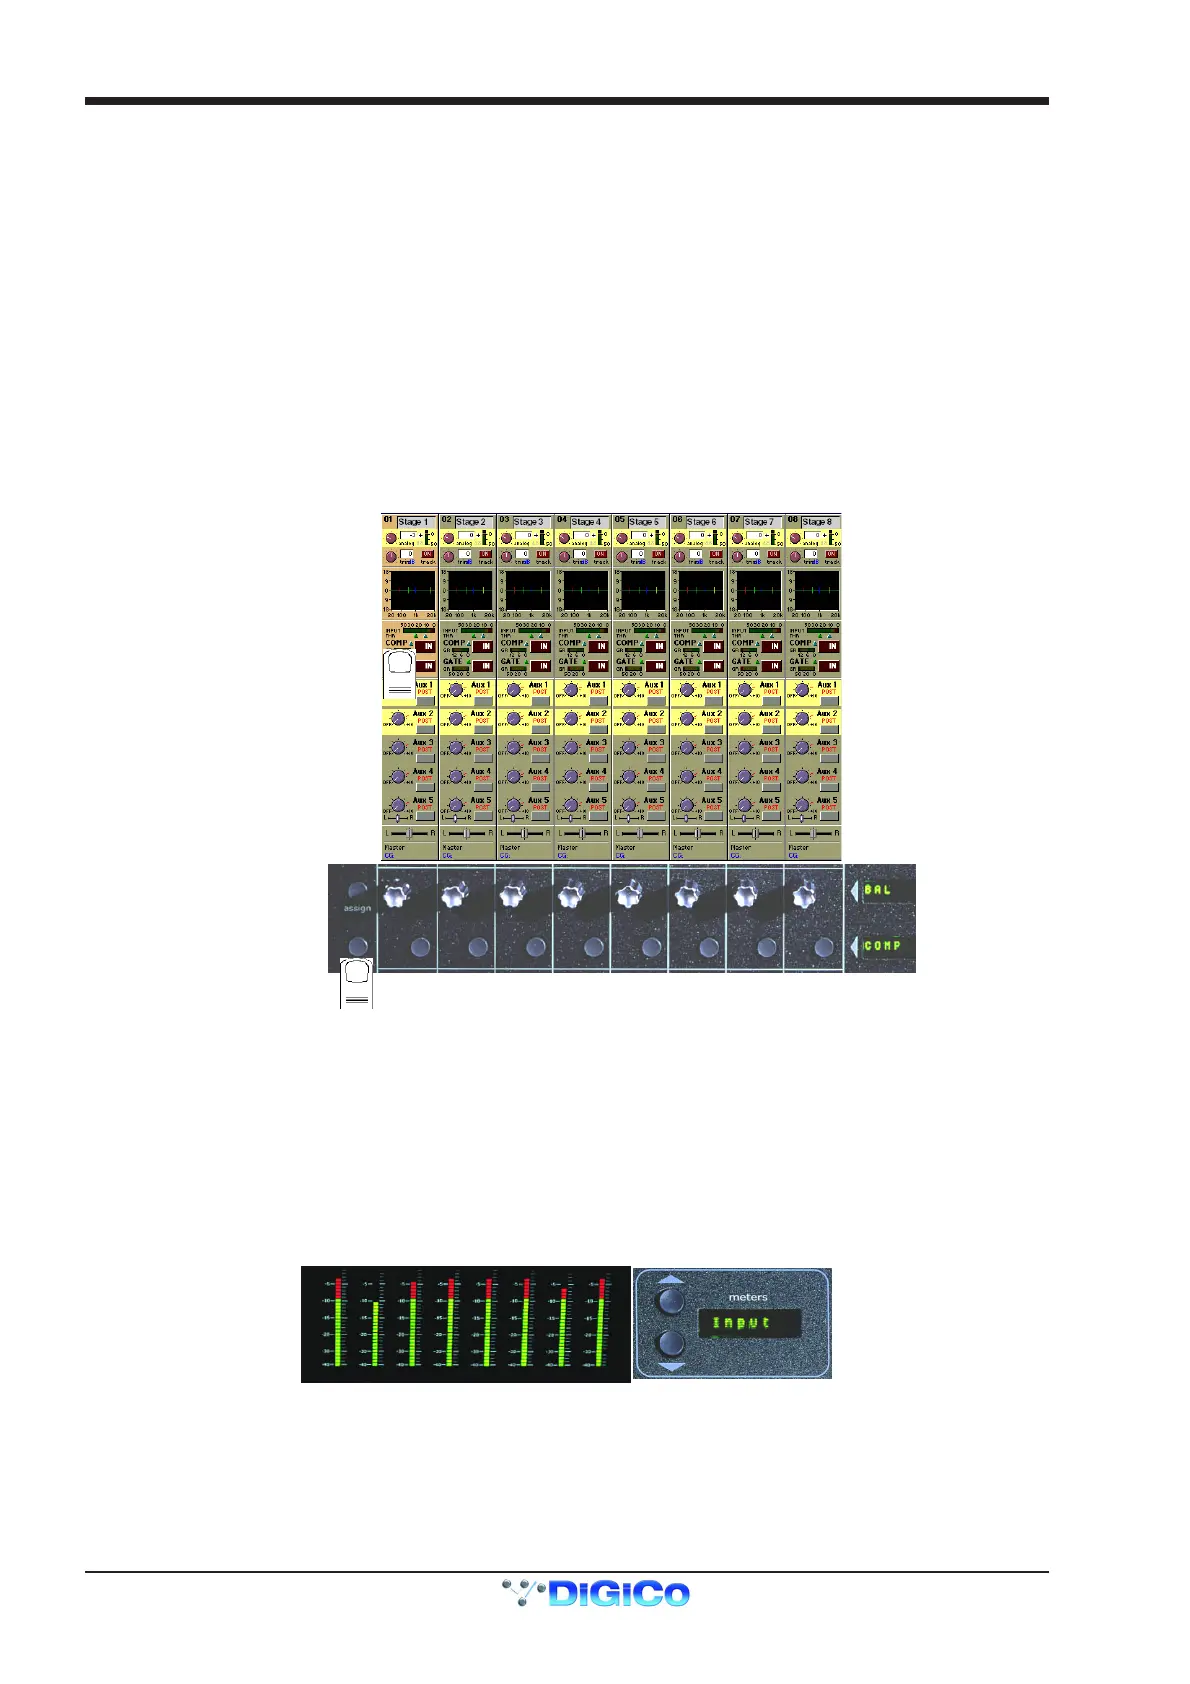
In the screen's Standard View, each on-screen channel is shown in abbreviated form.
The controls around the screen operate as follows: detailed information about each particular control is given later in this chapter.
Upper row - Channel Input Gain and Phase.
Lower row - the first two rows of controls below the screen are used to adjust the channel's Pan position, Auxiliary sends and Dynamics
parameters.
The third row of controls can be assigned to any of the following functions by holding down the Assign button and touching the chosen
control on the Input screen.
Assignable Switch Assignable Rotary
Set channel delay to zero Channel delay time
EQ In/Out Aux level
Compressor or Gate In/Out Stereo panning
Aux On/Off Direct Output Gain
Set Pan position Insert Send Gain
Insert In/Out
Direct Output PreM/Pre/Post
ssign Rotary
Assign Switch
Status
Display
The on-screen channel strip is normally coloured grey, but one or two of the Aux/Pan controls are highlighted in a different colour,
indicating that these controls are currently assigned.
You can scroll the assignment up and down the list of Aux/Pan controls using the two Screen Scroll buttons on the left hand side of the
section or by touching the control on the screen. Surround panning is operated using both rotaries, but is easier to adjust by selecting the
channel and using the joystick.
2.1.4 Input Meters ..........................................................................
Note that the meter above the channel display will show the input signal level for that channel but if the Meter Buttons to the right of the
Input screen are pressed the meter can show any of the following:
Input / Gate GR / Compressor GR / Direct Out / Insert Send
The meter display buttons allow you to scroll through the options.