Chapter 2
2-17
2.2.6 The ALL Button ....................................................................
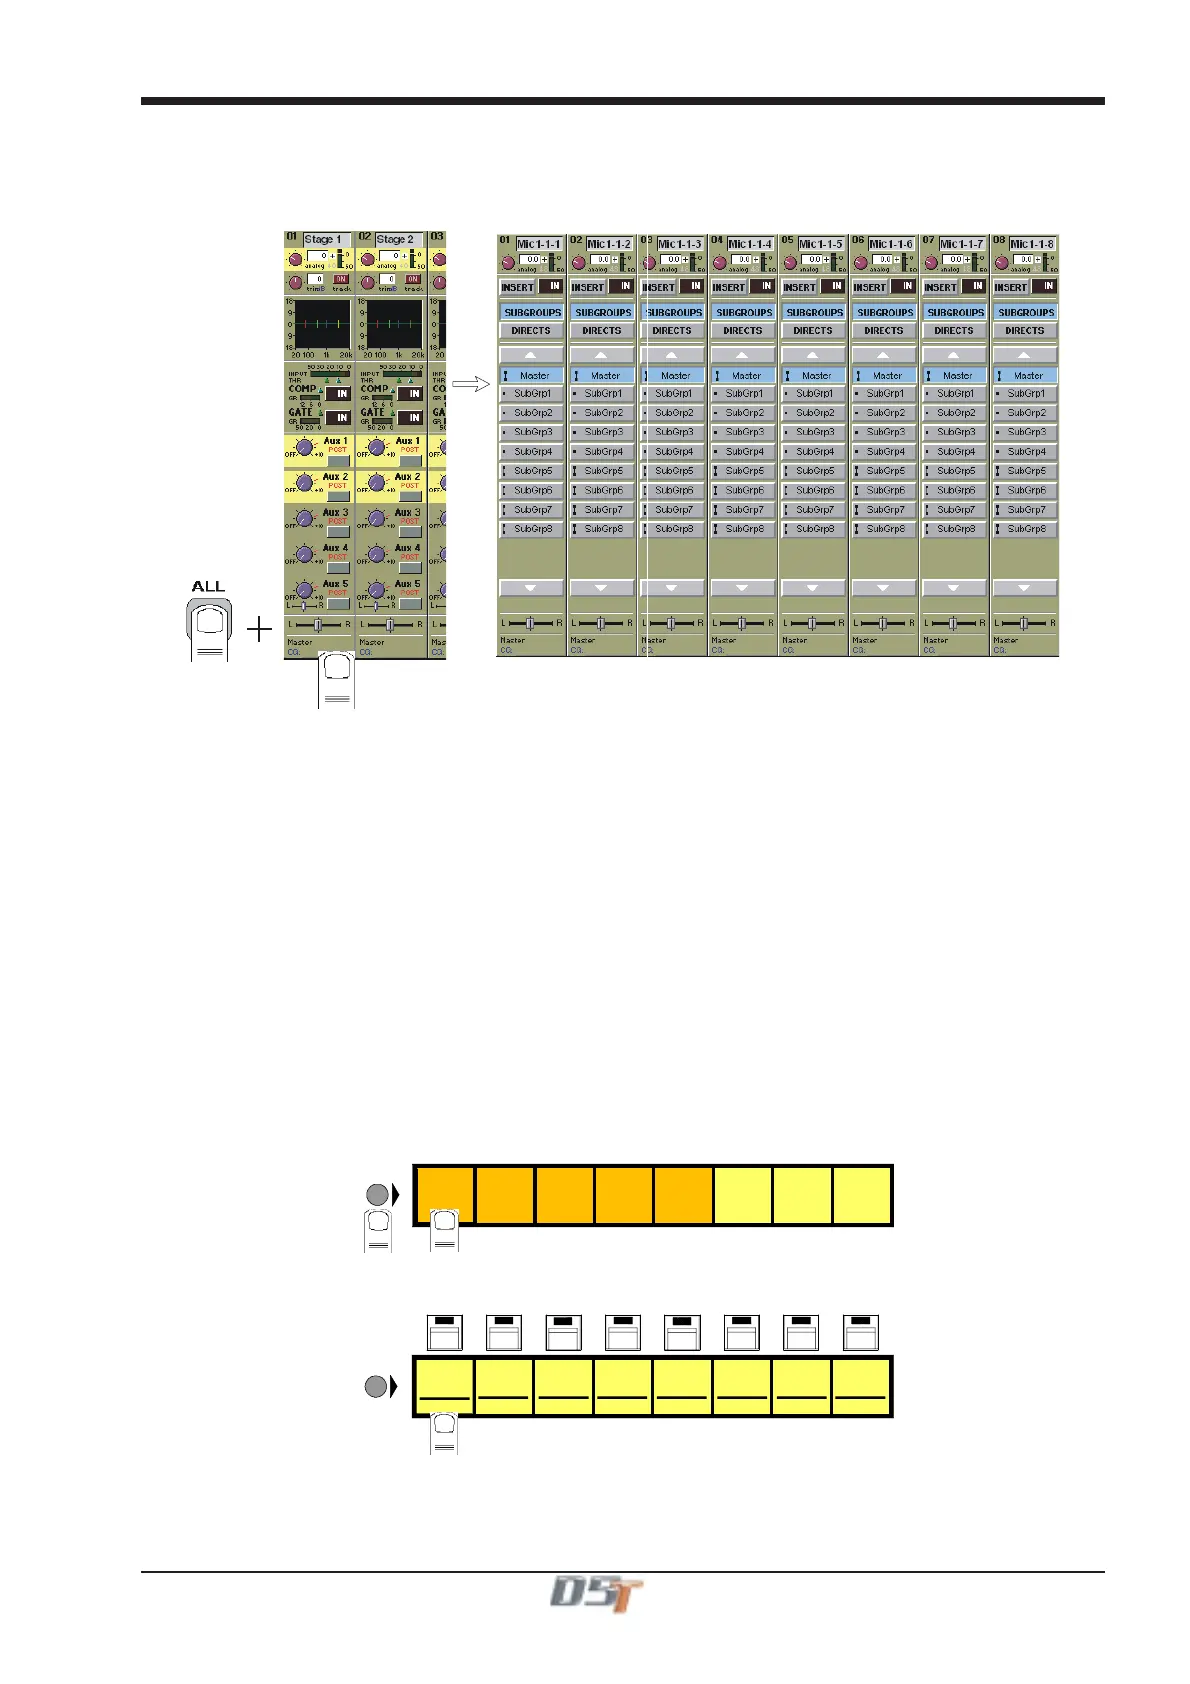
The All button provides a quick way of displaying all the Input, Aux or Routing modules for a bank of eight channels. If you hold down the
All button while touching the Input, Routing or Aux modules, the expanded view of the relevant module is displayed for all the visible
channels.
You can also scroll through lists using the All button. For example, if you wanted to select several input sources from the same group,
holding All and pressing the scroll arrow on one channel would scroll the adjacent channels as well.
In the Routing window holding the All button will also allow you to perform the following tasks:
1) Selecting Group or Direct routing for all the channels in the bank.
2) Scrolling Up and Down through lists.
3) Routing Input sources to consecutive channels without making them part of a gang.
4) Routing all channels in a bank to the same group by holding all and routing the first one.
5) Routing all the channels in a bank to consecutive direct outputs by holding all and routing the first one.
6) Routing all the channels in a bank to consecutive insert sends/returns by holding all and routing the first one.
NOTE: In examples 3, 4, 5 and 6 the functions are limited to consecutive channels in the same view mode.
2.2.7 Undo / Redo Button .............................................................
While a channel is assigned to the EQ/Dynamics/Joystick controls, the Undo/Redo LED comes on when a control is changed and
pressing the button toggles between the new state and the state when assigned.
The controls affected by the undo function are input gain, phase and delay, all EQ and dynamics, all aux send levels, on/off buttons and
pans, the insert and the main pan for the channel. It does not include any routing buttons.
2.2.8 Channel LCD Function Buttons .........................................
Pressing the Channel LCD Function button on the left hand side of the Input Section allows you to select the function that the individual
Channel LCD Buttons are currently assigned to.
SOLO SAFE
AUX SEND
>FADERS
BUILD
GANGS
FADER
ASSIGNS
CHANNEL
SOLO
ASSIGNS
CHANNEL
LCD
FUNCTION
1
2
SOLO
1OR2
ONLY
DISPLAY
NAME
The default function is Solo.
To Solo a channel use the Channel LCD Buttons just below the mute buttons in the channel strip.
mu
emu
e mu
emu
e mu
e mu
e mu
e mu
e
PFL
MIC 1
01 Mo
LCD
FUNCTION
PFL
MIC 2
02 Mo
PFL
MIC 3
03 Mo
PFL
MIC 4
04 Mo
PFL
MIC 5
05 Mo
PFL
MIC 6
06 Mo
PFL
MIC 7
07 Mo
PFL
MIC 8
08 Mo
Note: The console has the option of two Solo busses - See Monitoring in Chapter 4 for more details.