Chapter 5
5-8
Fader banks currently assigned to input surfaces but not the names of these banks.
Which channel on each surface is assigned to EQ/Dynamics/Joystick controls.
Which rows of pans or auxes are assigned to rotaries.
The Master Fader Banks assignment.
Note: Banks are not intended to reproduce the exact screen states. Channel views and other panels’ visibilities are not stored
or recalled.
MIDI - Fires the MIDI Patch associated with the cue.
Relays - The sixteen red indicators below the Relay scope button represent the state of the relays which will be output when the cue is
fired (not the current state). It is stored at the time the cue is recorded and can be edited by clicking on individual indicators with the
trackball.
Restrictions
Important Note: The following features are not included in cues:
The input channel stereo switch.
Dynamics stereo link.
Talkback.
Channel Bank names.
Choice of Solo 1 or Solo 2.
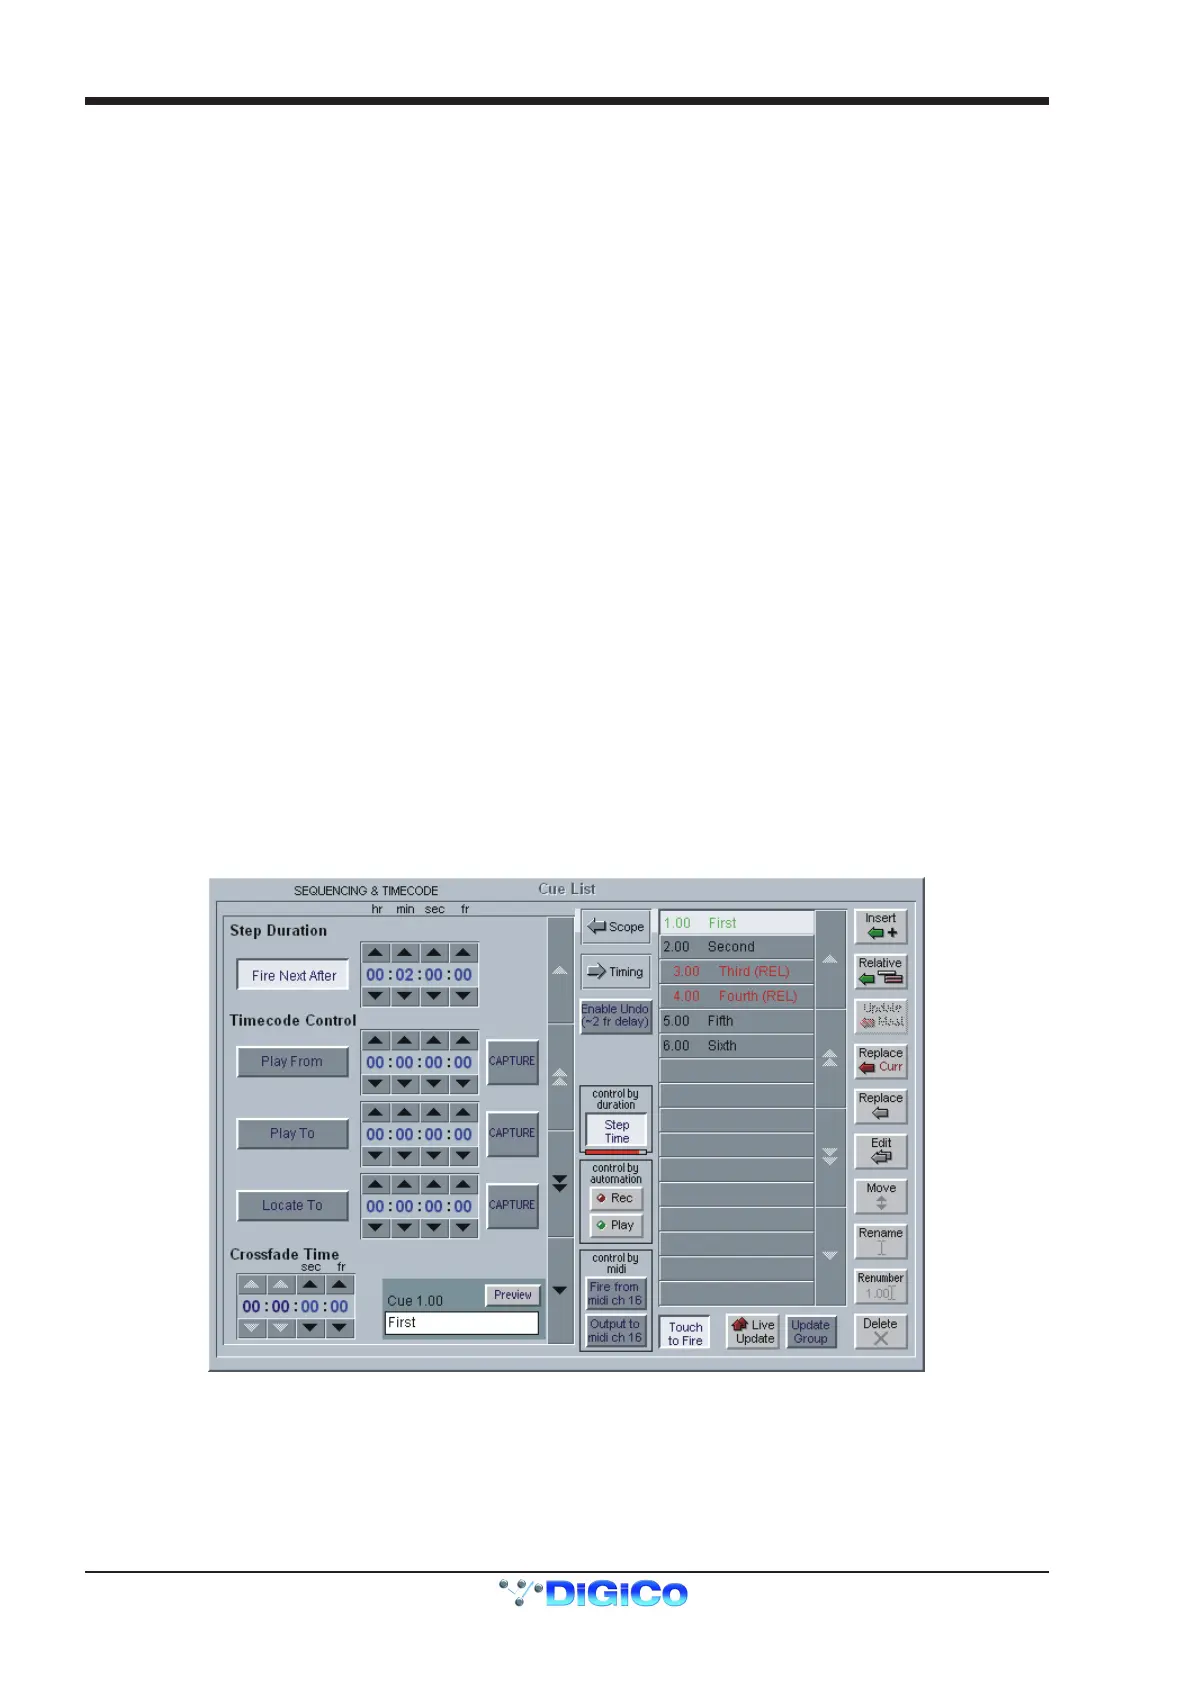
5.1.15 Cue Timing .........................................................................
To automatically sequence the firing of cues:
1) Select the cue using the up/down arrows in the centre of the panel.
2) Press the Fire Next After button on the left hand side and enter a time in the boxes next to this button.
3) Activate the function by firing the cue or pressing the Step Time button.
When this cue is fired, the next cue in the list will automatically be fired after the set time has elapsed and a red progress bar will show the
time remaining until the cue is fired. Pressing the Step Time button while the progress bar is moving wil halt the process.
Each cue may also trigger Play From, Play To and Locate To timecode commands.
Select the required cue and enter a timecode value in the relevant box. Then activate the function by pressing the required button(s).
Play From does a Locate then presses Transport Play if not already playing.
Play To presses Transport Play if not already playing, and sets up an automatic Transport Stop when the Play To time is reached.
If Play To and Locate To are specified together in one cue, when the PlayTo time is reached, a Locate will be generated after the
Transport Stop.
If Locate To is specified on its own, it simply does the Locate.
Any manual transport control cancels any pending Stops or Locates.
Crossfades
A crossfade time which is measured in frames can be applied to a cue by adjusting the Crossfade Time in the Timing panel. Either use
the Up/Down arrows or type a value into the box. The x fade light on the worksurface will be illuminated when the currently assigned cue
has crossfading enabled. The button next to it may be pressed to temporarily disable crossfading while recalling this cue but it does not
change the crossfade time itself.
The Crossfade time is applied to faders, matrix sends and pans only (including sub level and divergence). A value of zero switches it off.