A
B
C
D
E
F
G
H
L
M
N
P
Impianto di alimentazione / Scarico
Fuel system / Exhaust system
sezione / section
L 8
33 SuperSport 800 - M.Y. 2006 - edizione/edition 00
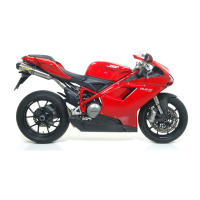
Rimontaggio sistema di
scarico
Importante
Sostituire sempre le guarnizioni
(1).
Nell'ordine,rimontare per primo il
tubo di scarico testa verticale (5).
Prima di rimontarlo verificare che sia
presente la guarnizione (1), montare
la semiboccola (2) con la ghiera (3).
Serrare i dadi (4) alla coppia prescritta
(Sez. C 3).
Posizionare il tubo di scarico testa
orizzontale (7) con la guarnizione (1),
la semiboccola (2) e la ghiera (3) nella
testa orizzontale.
Applicare pasta sigillante nel punto di
giunzione tra i tubi (5) e (7).
Fissare con la fascetta (6) il tubo di
scarico (7) e il tubo di scarico (5) e
serrare la fascetta (6) alla coppia
prescritta (Sez. C 3).
Serrare i dadi (4) sulla testa
orizzontale alla coppia prescritta (Sez.
C 3).
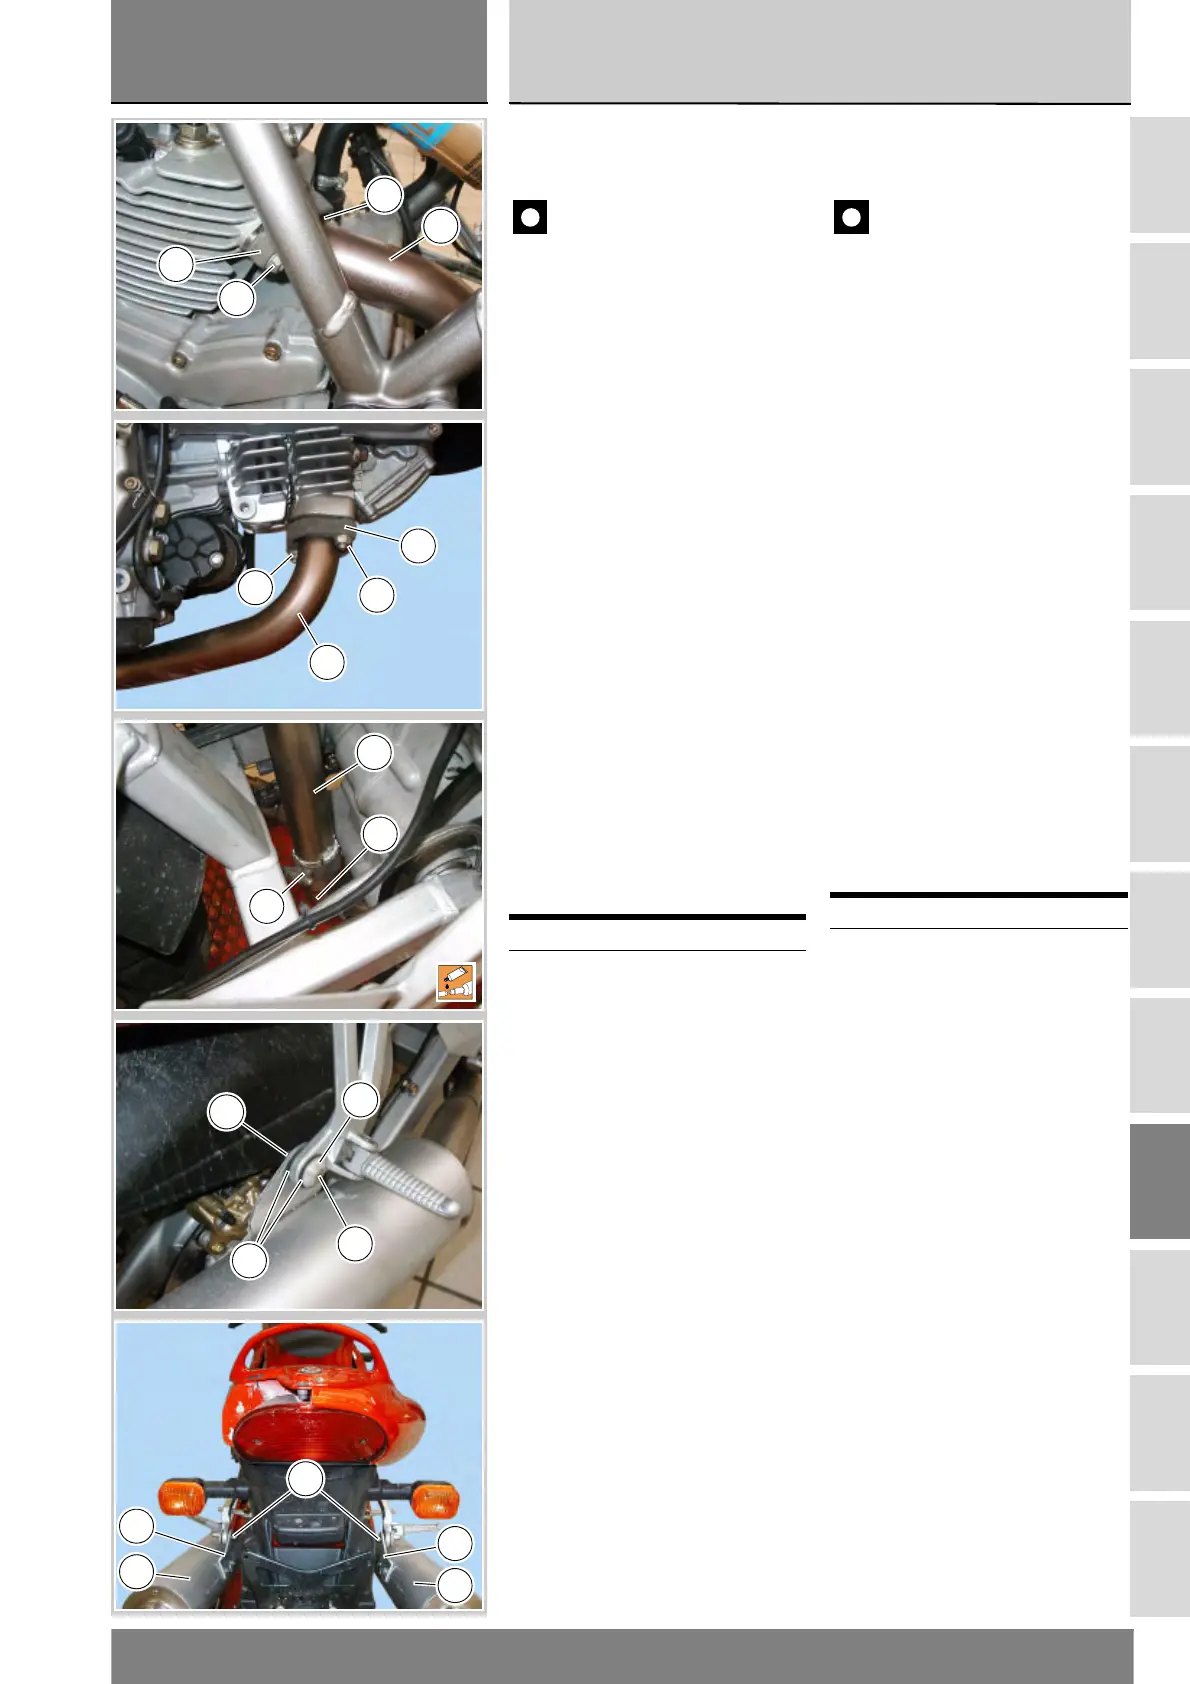
Inserire i silenziatori (11) e (18) nel
tubo di scarico (7).
Per fissare le staffe (12) e (19) alle
piastre pedane posteriori, posizionare
le rosette (20), i gommini (15), le
rosette (16) e i dadi (10) e serrare le
viti (17) alla coppia prescritta (Sez. C
3), contrastando i dadi (10).
Operazioni Rif. Sez.
Rimontare le carene
(per le versioni
carenate)
E 2
Reassembling the
exhaust system
Caution
Always renew the seals (1).
First refit the vertical head exhaust
pipe (5).
Before refitting it, ensure that the
gasket (1) is in place, fit the split bush
(2) and ring nut (3).
Tighten the nuts (4) to the specified
torque (Sect. C 3).
Position the horizontal head exhaust
pipe (7) with gasket (1), split bush (2)
and ring nut (3) onto horizontal head.
Apply some sealant in the jointing
area between pipes (5) and (7).
Secure the exhaust pipe (7) and
exhaust pipe (5) with clamp (6) and
tighten clamp (6) to the specified
torque (Sect. C 3).
Tighten the nuts (4) on horizontal
head to the specified torque (Sect. C
3).
Fit silencers (11) and (18) in the
exhaust pipe (7).
To secure the brackets (12) and (19)
to rear footpeg plates, position
washers (20), rubber blocks (15),
washers (16) and nuts (10) and
tighten the screws (17) to the
specified torque (Sect. C 3), while
holding nuts (10).
Operations See Sect.
Refit the fairings (for
faired versions)
E 2
4
4
3
5
4
4
3
7
6
5
7
17
16
15
10
10
12
11
19
18