Prerequisites
Enable the Custom Pattern option when defining the flange. See Section 7.6.2 for more
information.
Procedure
1.
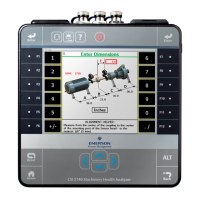
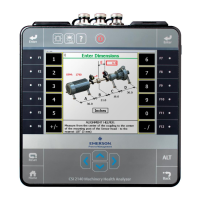
From the Define Flange screen, press Enter.
This displays the Custom Pattern screen.
2. Use the up or down arrow keys on the analyzer to select an item (shaft center or
bolt) to edit, or press F9 Item to Edit to select an item to edit and press Enter.
A selected bolt is circled in red. A selected shaft center is indicated by a red cross.
3. Press F4 Insert Bolt to add a bolt at the selected bolt location.
This moves the bolt from the original location to the flange center.
This key is active only when the item selected in step 2 is a bolt.
4. Press F5 Delete Bolt to delete the selected bolt.
This key is active only when the item selected in step 2 is a bolt and when the
remaining bolts meet the minimum number of bolts required for the flange type.
5. Press F8 Method to select Angle/Radius or X/Y Offset.
Choose Angle/Radius to define the location of the selected bolt or shaft center based
on a polar coordinate system, with the origin at the center of the flange. Choose X/Y
Offset to define the location of the selected bolt or shaft center based on an X, Y
coordinate system, with the origin located at the bottom left hand corner of the
image of the flange.
6. If you selected Angle/Radius in step 5, you can do the following:
a. Press F10 Angle to define the angle in degrees for the selected bolt or shaft center
and press Enter.
b. Press F11 Radius to define the radius for the selected bolt or shaft center and
press Enter.
The maximum value is half the flange width that was previously entered when
defining the flange.
7. If you selected X/Y Offset in step 5, you can do the following:
a. Press F10 X Offset to define the offset in the X direction for the selected bolt or
shaft center and press Enter.
b. Press F11 Y Offset to define the offset in the Y direction for the selected bolt or
shaft center and press Enter.
8. Press Enter to proceed to acquiring alignment data.
Advanced Laser Alignment
MHM-97432 Rev 7 233
 Loading...
