3. Use the up and down arrow keys to select Impact.
4.
Press Enter.
The Analyze Setup screen appears.
5. Set the following options as necessary.
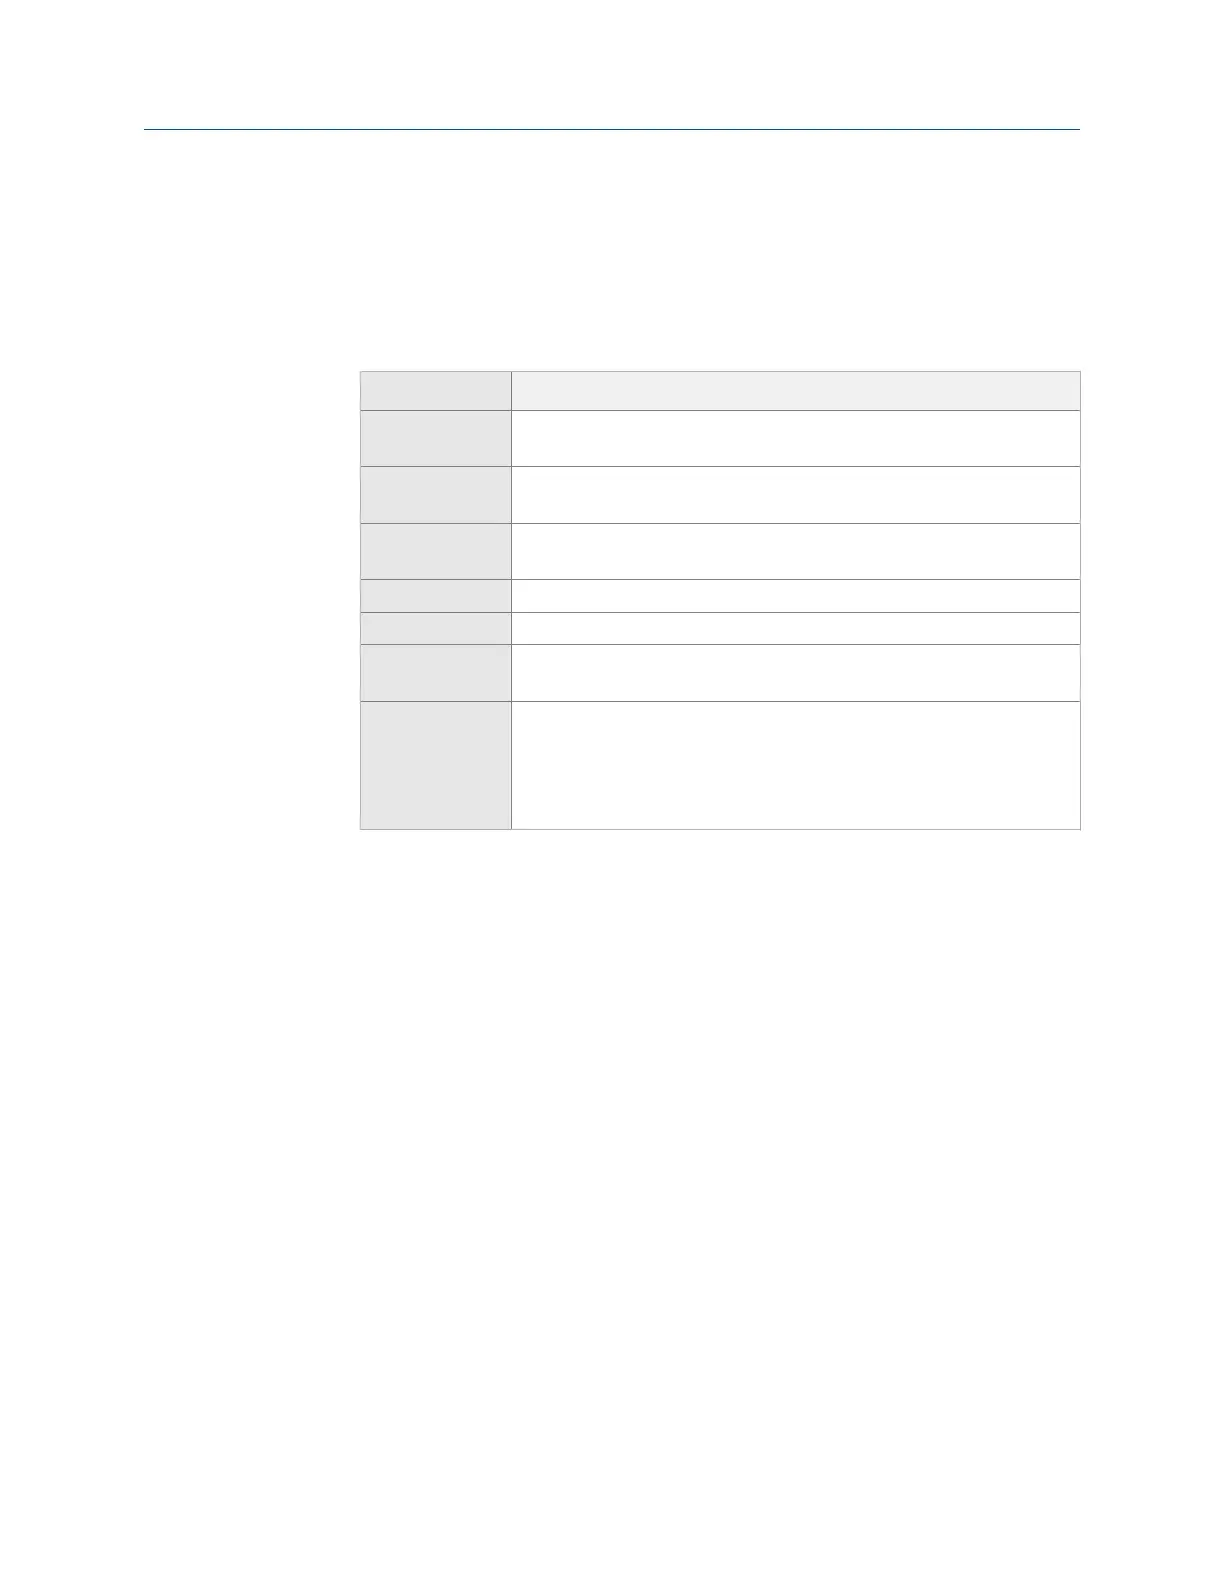
Option Description
F2 Set Spectra
Params
Set the Fmax, Fmin, and lines of resolution. See Section 6.7.1 and
Section 6.7.2.
F3 Set Average
Count
Set the number of averages. These indicate the number of times you
impact the machine. The default is 4.
F4 Set Window Select Force/Exponential or Uniform. Force/Exponential is recommended. See
Section 6.7.3. The default values are 7%, 10%, 10%, and 20%.
F6 Plot Setup Set the type of plots to display during and after data collection.
F7 Tach Setup Set up the tachometer parameters. See Section 6.6.1.
F9 Set Trigger Select the type of trigger to use to start the measurement. See
Section 6.7.6.
F12 Input Setup Configure the impact hammer and accelerometer. The hammer is not
set up by default. The analyzer lists the hammers by their part numbers,
but you can select Generic to define the configuration manually. If you
use the triaxial accelerometer, the hammer is on input D. For the impact
hammer, turn Sensor Power on for the hammer and set the data units.
6. Press Enter to start the measurement.
The blue LED on the front of the analyzer flashes, and the analyzer beeps until you
impact the machine.
7.
When prompted by the analyzer, strike the equipment with the impact hammer 2 to
4 feet away from the sensor.
The analyzer automatically checks and adjusts the scaling.
8. Review the waveform data and accept or reject the data.
9. Continue to strike the equipment when prompted, until the last average is
collected.
The data plot displays when all data is collected.
6.10 Listen to live vibration data in Analyze
After you pair and connect to a Bluetooth device, you can listen to live vibration data with
headphones. See Section 2.16.4. Use the Listen To Live Data option from Analyze main menu
or from one of the following Analysis Experts:
• High Frequency Analysis
Analyze and Advanced Analyze
156 MHM-97432 Rev 7