195
DE
18.2 Notes on Speedlifter
and All-Up systems
Important: Observe the associated
manufacturer's instructions for your
Speedlifter or All-Up system. Have
work on Speedlifter and All-Up sys-
tems performed exclusively by a
FLYER specialist dealer.
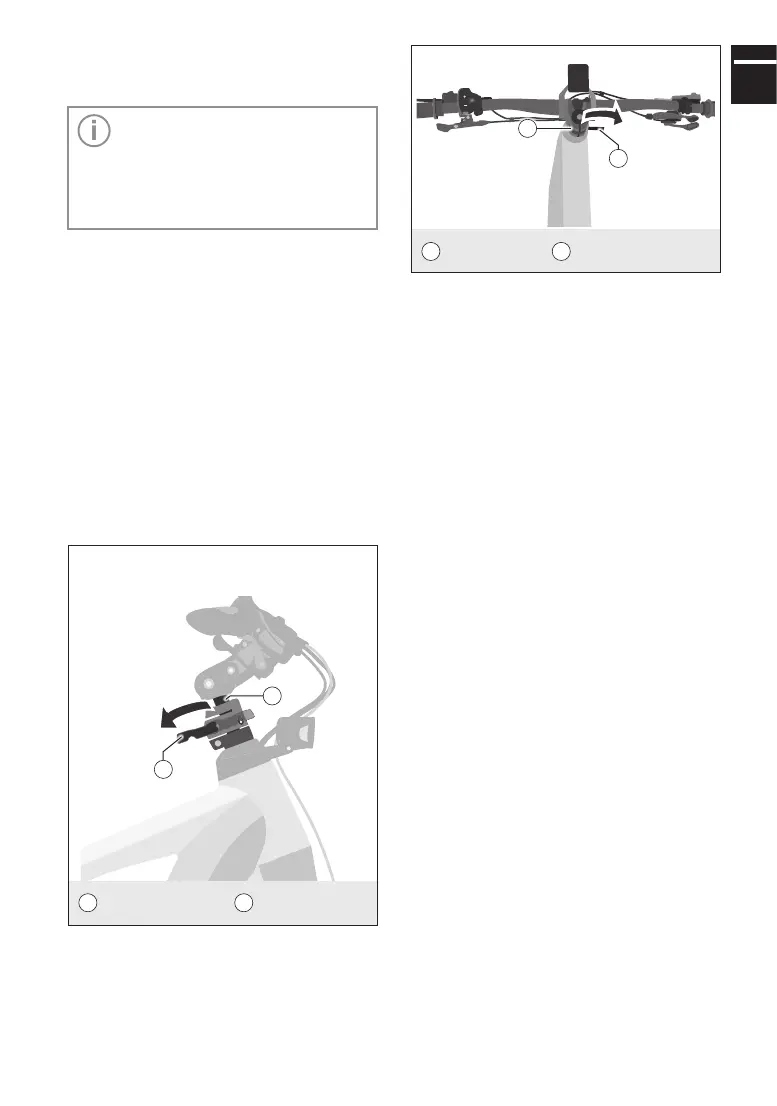
18.2.1 Changing the handlebar height
Speedlifter and All-Up systems allow you
to quickly and safely change the handlebar
height while maintaining the headset setting.
1. Open the associated quick-release lever
for height adjustment.
2. Bring the handlebar to the desired height.
3. Then close the quick-release lever again.
The quick-release lever must be tight
or at the maximum level on the fork tube
so that the clamp is securely fixed.
For information on the correct and
safe use of quick-release levers, refer to
chapter 21 “Quick releases”.
53
54
53
Speedlifter
54
Quick-release
lever (Speedlifter)
Fig.27: Changing the handlebar height with a Speedlifter
system
55
56
55
All-Up system
56
Quick-release lever
(All-Up system)
Fig.28: Changing handlebar height with an All-Up system
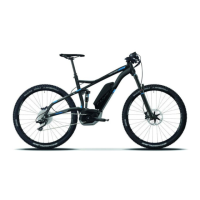
18.2.2 Changing the handlebar
alignment
Speedlifter and All-Up systems also allow
you to change the handlebar alignment. By
twisting the handlebar by 90°, you can store
or transport your e-bike in a space-saving
way.
1. Both systems: To change the handle-
bar alignment, first open the associated
quick-release lever.
2. Speedlifter system only: Slide the lock-
ing bolt upwards.
All-Up system only: Pull the handlebar
upwards as far as it will go.
3. Both systems: Twist the handlebar by
90°.
The safety bolt on the Speedlifter sys-
tem engages.
4. All-Up system only: Lower the handle-
bars again.
5. Both systems: Close the quick-release
lever again.
The quick-release lever must be tight
or at the maximum level on the fork tube
so that the clamp is securely fixed.
For information on the correct and
safe use of quick-release levers, refer to
chapter 21 “Quick releases”.
6. Both systems: To return the handlebar
to its original alignment, also proceed as
described in steps 1-5.
Make sure that the locking bolt
engages properly.