FortiGate Version 3.0 MR4 Administration Guide
196 01-30004-0203-20070102
OSPF Router Dynamic
6 If you need to adjust the default settings of an OSPF-enabled interface, select
Create New under Interfaces.
7 Select the OSPF operating parameters for the interface. See “Selecting operating
parameters for an OSPF interface” on page 201.
8 Repeat Steps 6 and 7 if required for additional OSPF-enabled interfaces.
9 Optionally select advanced OSPF options for the OSPF AS. See “Selecting
advanced OSPF options” on page 198.
10 Select Apply.
Viewing and editing basic OSPF settings
When you configure OSPF settings, you have to define the AS in which OSPF is
enabled and specify which of the FortiGate interfaces participate in the AS. As
part of the AS definition, you specify the AS areas and specify which networks to
include those areas. You may optionally adjust the settings associated with OSPF
operation on the FortiGate interfaces.
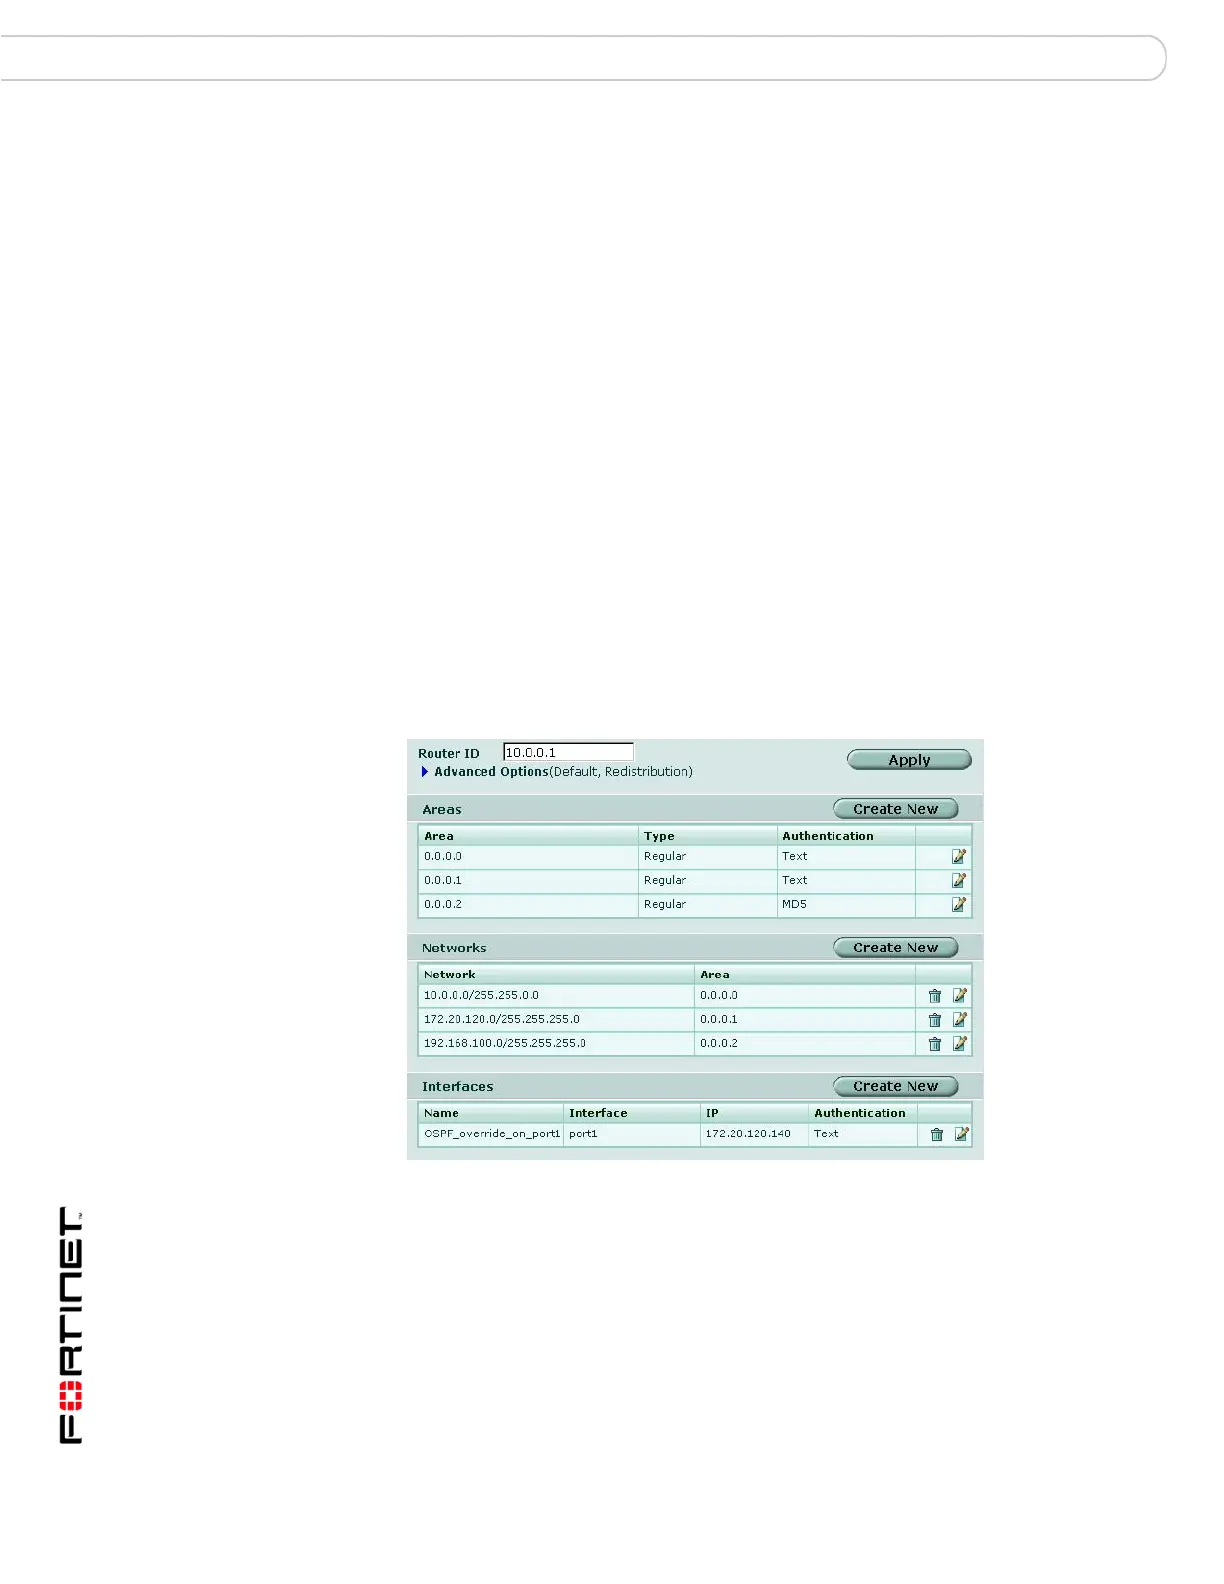
To view and edit OSPF settings, go to Router > Dynamic > OSPF.
Figure 108 shows the basic OSPF settings on a FortiGate unit that has an
interface named “port1”. The names of the interfaces on your FortiGate unit may
be different.
Figure 108:Basic OSPF settings
Router ID Enter a unique router ID to identify the FortiGate unit to other OSPF routers.
By convention, the router ID is the numerically highest IP address assigned
to any of the FortiGate interfaces in the OSPF AS. Do not change the router
ID while OSPF is running.
Advanced
Options
Select advanced OSPF settings. See “Selecting advanced OSPF options” on
page 198.
Areas Information about the areas making up an OSPF AS. The header of an
OSPF packet contains an area ID, which helps to identify the origination of a
packet inside the AS.
Create New Select to define an OSPF area and add the new area to the
Areas list. See “Defining OSPF areas” on page 199.
 Loading...