Fax Procedure
131
Fax
4
4
Press the <Start> button.
If you have more documents, repeat Steps 3 and 4.
5
When all documents have been scanned,
select [Last Original].
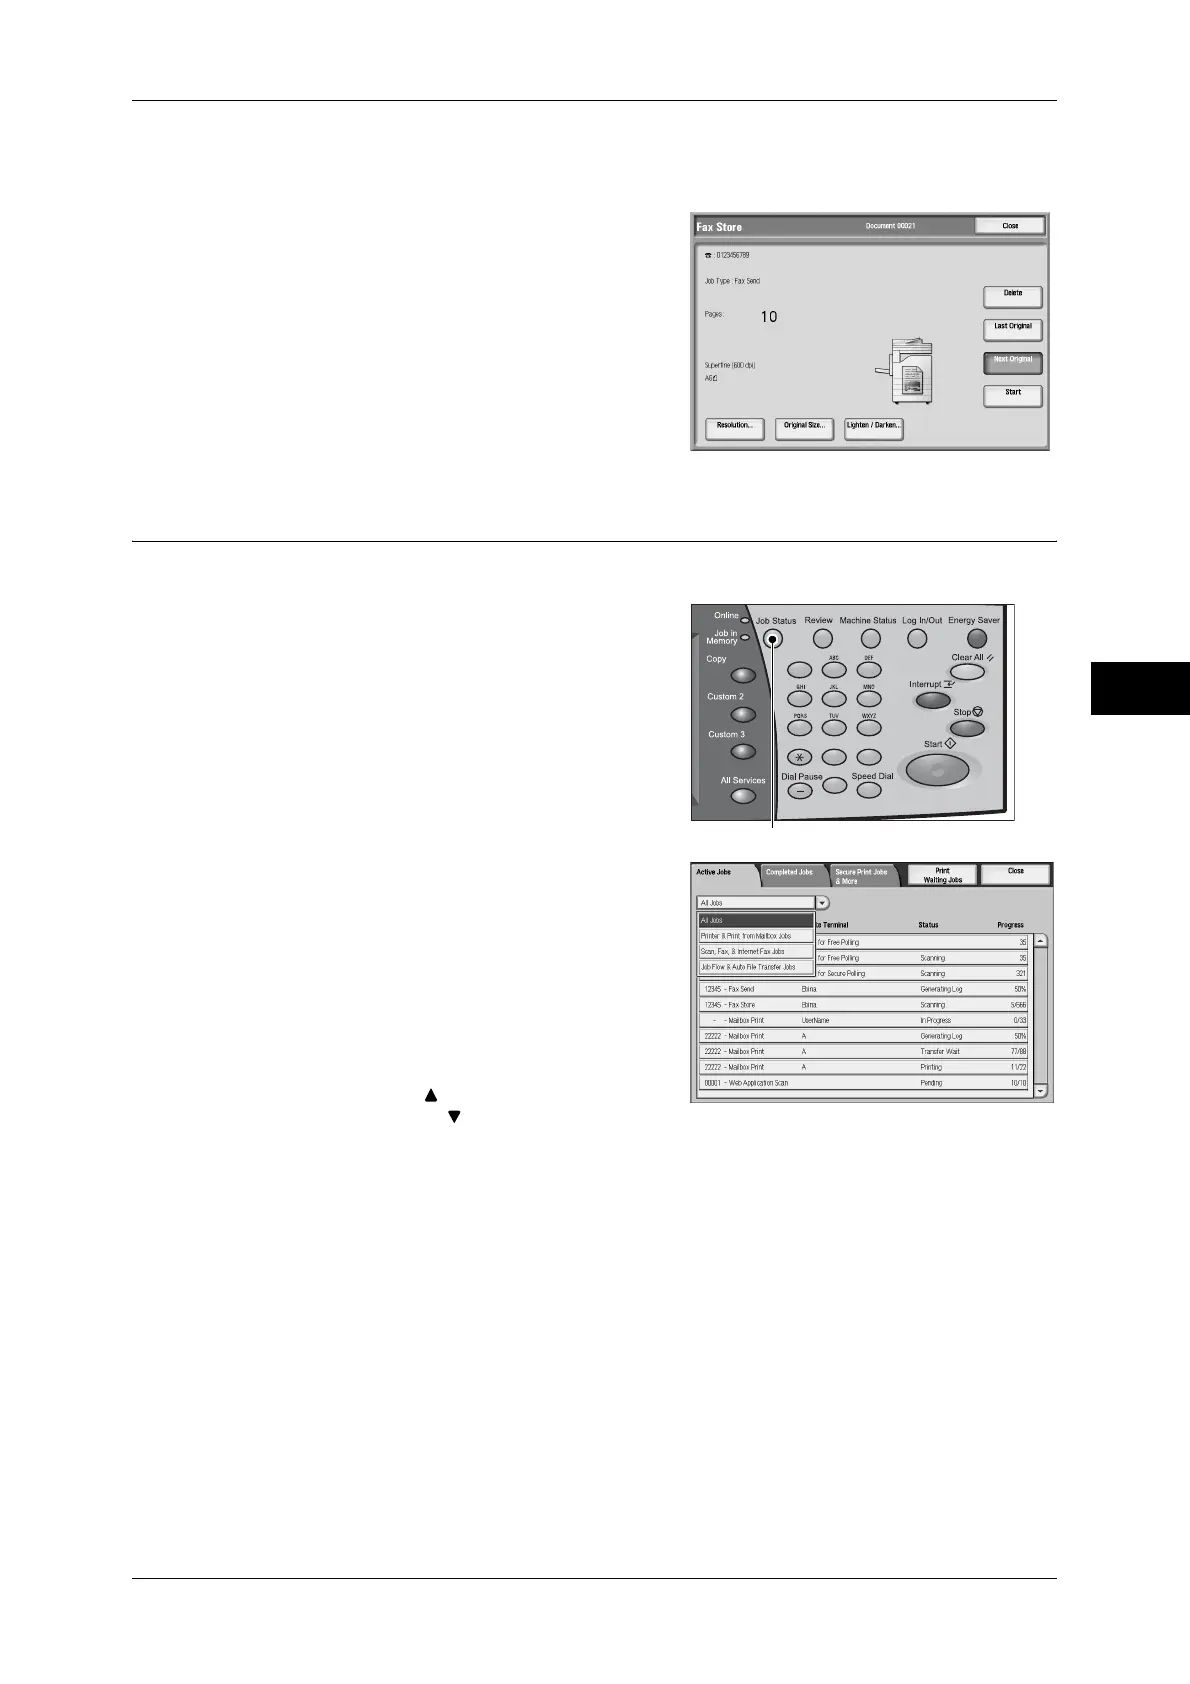
Step 5 Confirming the Fax Job in Job Status
The following explains the procedure to confirm the status of the faxed job.
1
Press the <Job Status> button.
2
Confirm the job status.
From the pull-down menu, you can select and
display the types of jobs ([All Jobs], [Printer &
Print from Mailbox Jobs], [Scan, Fax, &
Internet Fax Jobs], [Job Flow & Auto File
Transfer Jobs]).
Note • Select [ ] to return to the previous
screen or [ ] to move to the next screen.
If undelivered documents exist
You can confirm undelivered documents in the [Job Status] screen or [Job Status/
Activity Report] screen.
For information on how to send or delete undelivered documents, refer to "Undelivered Faxes" (P.301).
123
456
789
0#
C
<Job Status> button
 Loading...