Network Scanning
209
Scan
5
Network Scanning
The following describes the procedure to select features on the Network Scanning
screen. On the Network Scanning screen, you can scan documents after specifying a
file (job template) saving scanning conditions, information on the forwarding destination
server and others.
This feature creates job templates on a computer using CentreWare Internet Services.
Scanned data is converted to the format specified in a job template, and is
automatically sent to a server. The machine allows you to automatically retrieve job
templates stored in a server. The following explains the [Network Scanning] screen.
Note • If characters not supported by the machine are used in names or description of job flow
sheets, the characters will not be displayed or will be garbled on the screen. For information
on characters available for use, refer to "15 Appendix" > "Notes and Restrictions" > "Notes
and Restrictions on the Use of the Machine" in the Administrator Guide.
• This feature is supported only by the ApeosPort series.
When Scan to Home is enabled, and when the Access Remote feature is available, the
scanned document can be transferred to a different destination based on an
authenticated user.
Important • When using the Scan to Home feature in computer environment earlier than Windows 98
NT, a destination user name in the earlier format (domain name\user name) will not be
determined automatically.
Before scanning, change the user name with which you can log in correctly.
Note • You can configure Scan to Home from CentreWare Internet Services.
For information on how to use CentreWare Internet Services, refer to the online help of CentreWare
Internet Services.
1
Select [Network Scanning] on the [All
Services] screen.
2
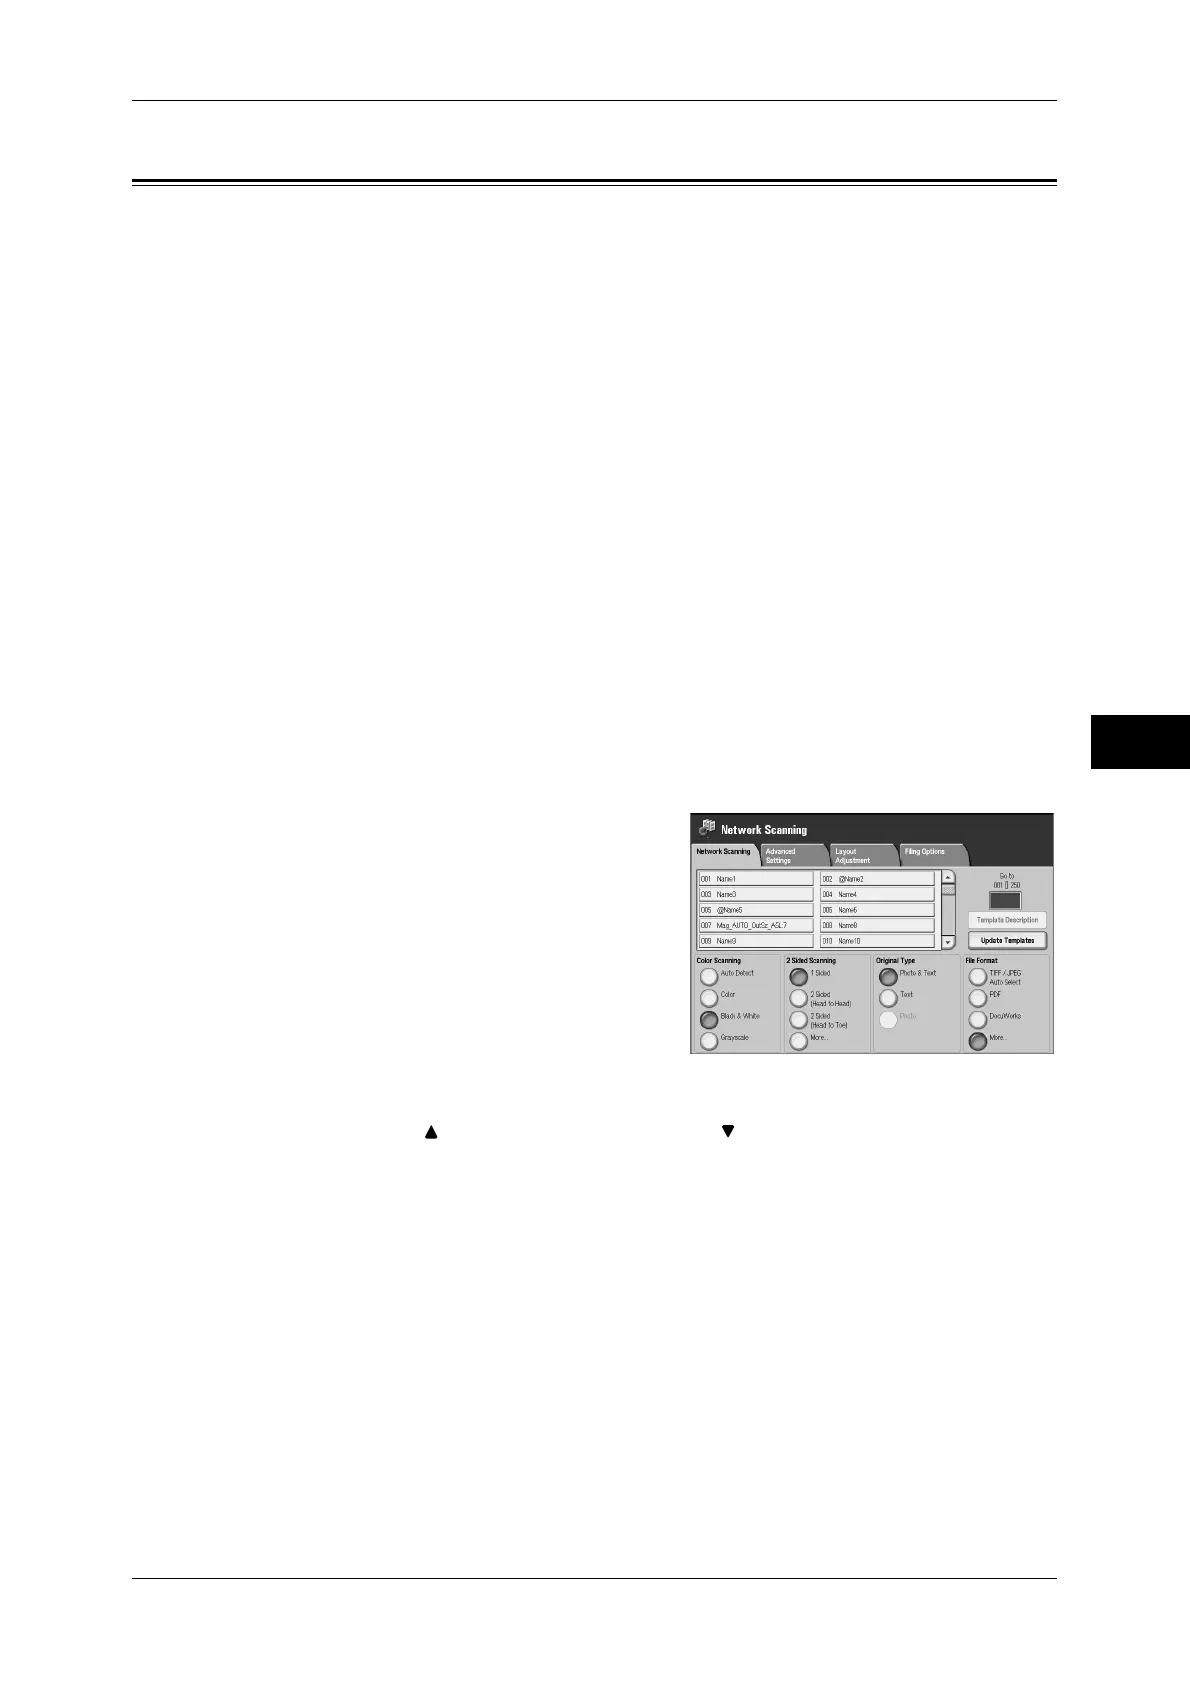
Select a job template.
Job Template
Select a job template that has the scan conditions you want.
Note • Select [ ] to return to the previous screen or [ ] to move to the next screen.
Go to
Use the numeric keypad to enter a 3-digit job template number. The job template then
appears at the top of the list.
Template Description
Displays the [Template Description] screen. The screen displays the description of the
job template. This applies only when the description has been added to a job template.
Update Templates
Refreshes the information. If a created job template has not been displayed, selecting
[Refresh] will display the job template.
 Loading...