11 Job Status
296
Job Status
11
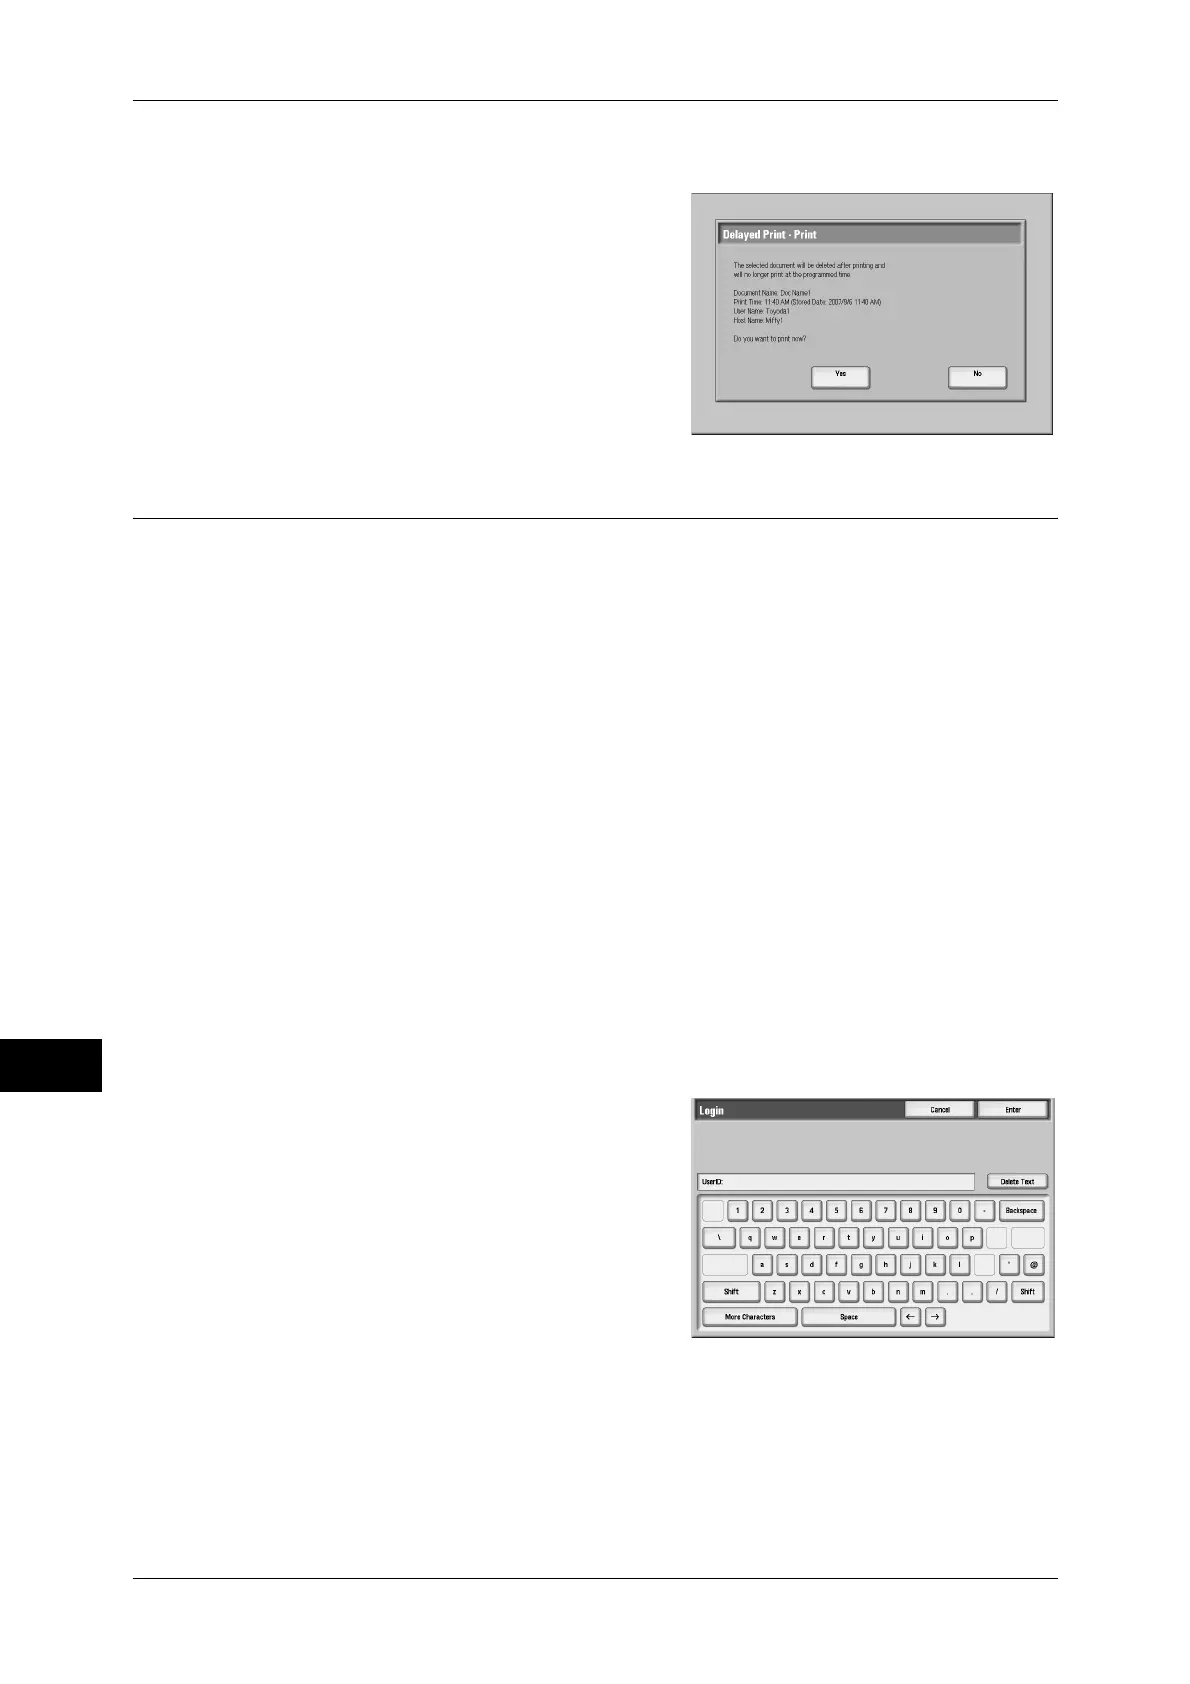
When [Print] is Selected
1
Select [Yes].
Yes
Starts printing the document. After printing,
deletes the document.
No
Cancels printing the document.
Charge Print
This feature prevents unauthorized users from operating print jobs by authenticating
the users on the machine. When this feature is set, the machine prints only the jobs of
authenticated users. You can also set the machine to store print jobs temporarily, and
print them from the machine’s control panel.
When you set to use the Charge Print feature under [Tools] > [Authentication/Security
Settings] > [Authentication] > [Charge/Private Print Settings] > [Receive Control],
received print jobs are saved for each Billing ID. Any jobs that were not given a Billing
ID on the print driver are saved in [No User ID].
For more information, refer to "5 Tools" > "Accounting" > "Create/View User Accounts" in the
Administrator Guide.
Note • This item is displayed when you have set to save in Charge Print. To set to save in Charge
Print, perform one of the following settings in the System Administration mode:
• Set [Receive Control] to [Save in Charge Print].
• Set [Receive Control] to [According to Print Account], and [Job Login Failure] to [Save in
Charge Print].
• S e t [ R e c e i v e C o n t r o l ] t o [ A c c o r d i n g t o P r i n t A c c o u n t ] o r [ P r i v a t e C h a r g e P r i n t ] , a n d [ J o b
without User ID] to [Save in Charge Print].
For more information, refer to "5 Tools" > "Authentication/Security Settings" > "Authentication" >
"Charge/Private Print Settings" in the Administrator Guide.
The following describes how to print or delete documents stored in Charge Print.
1
Press the <Log In/Out> button.
2
Enter the user ID using the numeric keypad
or the keyboard displayed, and select
[Enter].
3
Select [Charge Print].
 Loading...