Scanning Procedure
197
Scan
5
Step 4 Confirming the Scan Job in Job Status
The following describes how to confirm the status of a scan job.
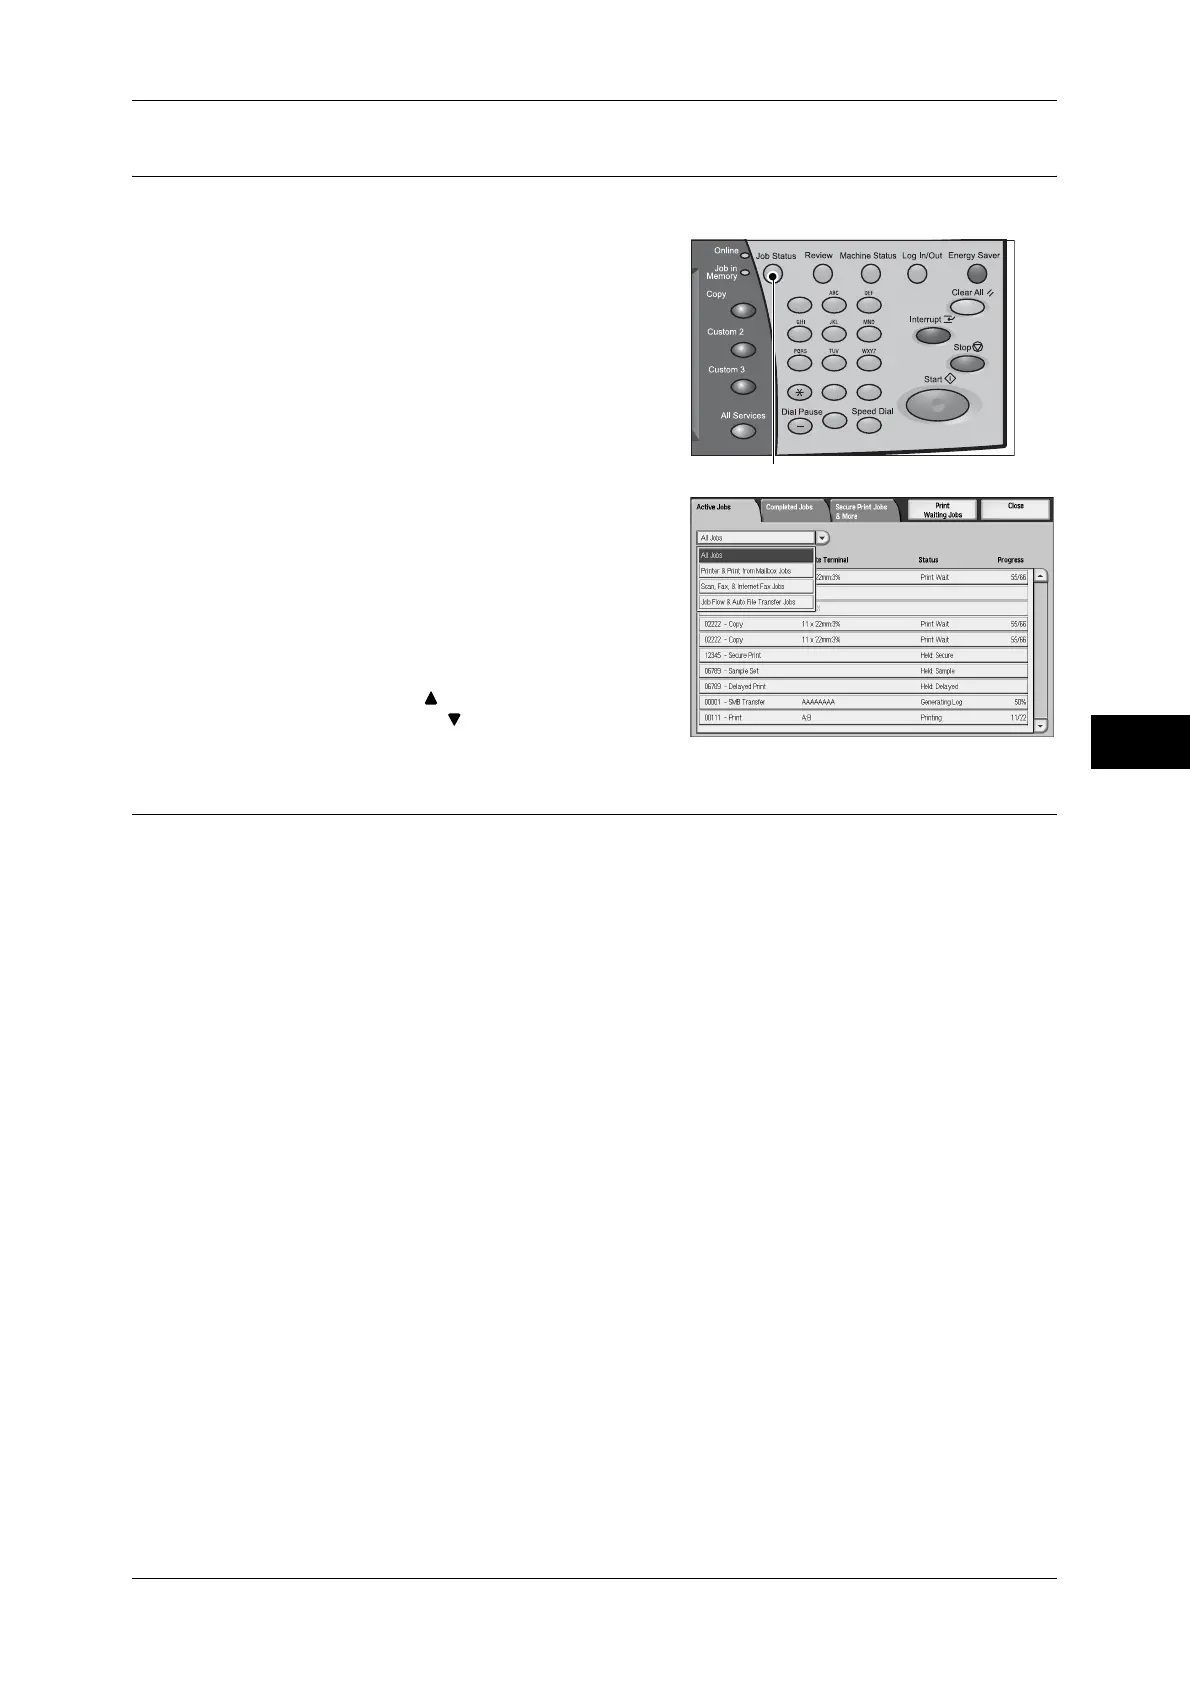
1
Press the <Job Status> button.
2
Confirm the job status.
From the pull-down menu, you can select and
display the types of jobs ([All Jobs], [Printer &
Print from Mailbox Jobs], [Scan, Fax, &
Internet Fax Jobs], [Job Flow & Auto File
Transfer Jobs]).
Note • Select [ ] to return to the previous
screen or [ ] to move to the next screen.
Step 5 Saving the Scanned Data
When you used the Scan-to-Mailbox feature, the document stored in a mailbox of the
machine can be imported into your computer using the following:
Import using an application
Use a network scan driver.
Refer to "Importing to a TWAIN Compatible Application" (P.314).
Import using Mailbox Viewer 3
Use Mailbox Viewer 3 (Fuji Xerox application software).
Refer to "Importing Using Mailbox Viewer 3" (P.316).
Import using CentreWare Internet Services
Use CentreWare Internet Services.
Refer to "Importing Using CentreWare Internet Services" (P.318).
Import using EasyOperator
Use EasyOperator.
Refer to "Importing Using EasyOperator" (P.320).
123
456
789
0#
C
<Job Status> button
 Loading...