Checking/Operating Documents in a Mailbox
243
Send from Mailbox
6
Checking/Operating Documents in a Mailbox
You can confirm or operate documents stored in a mailbox.
1
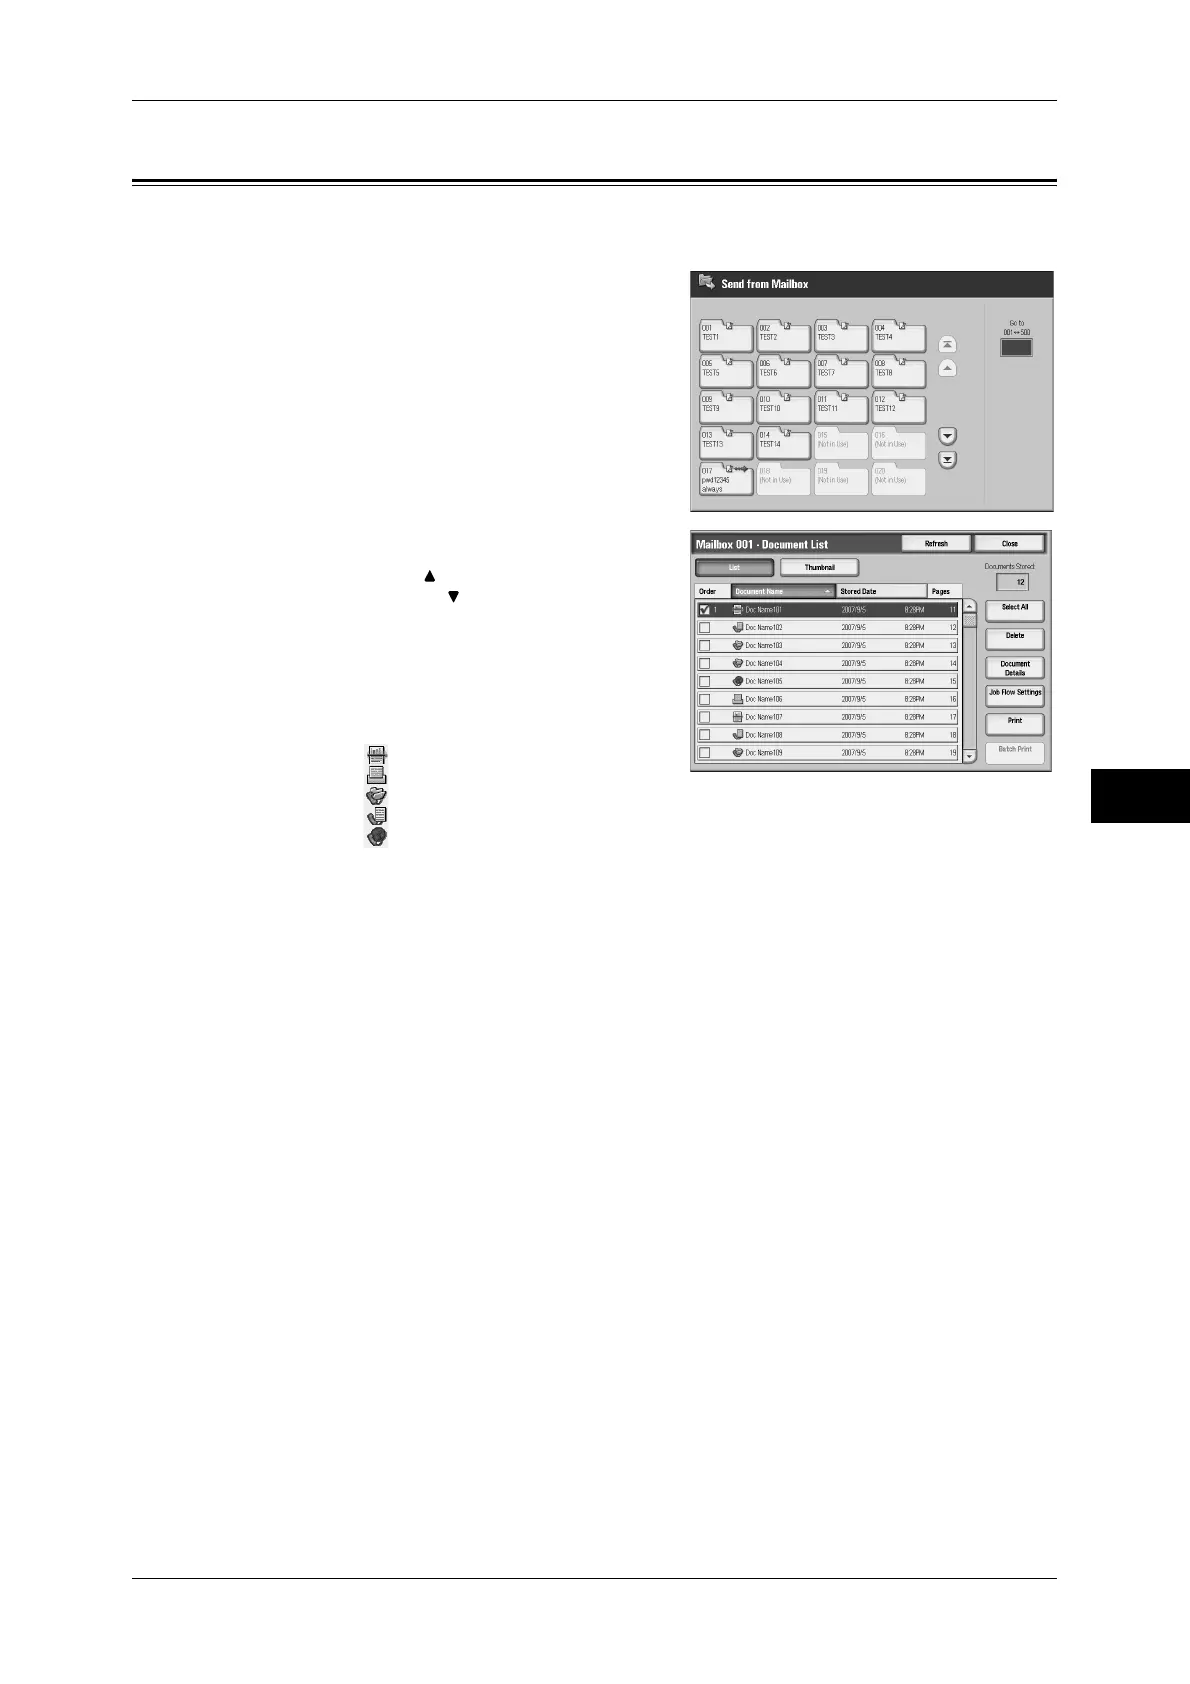
On the [Send from Mailbox] screen, select a
mailbox.
2
Select a document.
Note • Select [ ] to return to the previous
screen or [ ] to move to the next screen.
• You can sort documents in ascending or
descending order by selecting either
[Document Name] or [Stored Date].
• At the left of each document name, an
icon is displayed to show the document
type.
: Scanned document
: Print document
: Document for Store for Polling (Private Mailbox)
: Fax document
: Internet Fax document
• Up to 100 documents can be selected separately. You can also select all documents. If you
select documents separately, a number appears to the left of the document icon indicating
the order in which it was selected. Documents are processed in this order.
3
Select any item.
Refresh
Displays the refreshed information.
List
Lists the documents stored in the mailbox, with their stored dates and pages.
Thumbnail
Displays the images and names of the documents stored in the mailbox
Important • If power supply is cut off immediately after a scanned document is stored in a mailbox, or if
the hard disk space is insufficient to display thumbnails, documents in the mailbox may not
be displayed in thumbnail view. In that case, display them in list view.
• The thumbnail view may not available for long documents. If a long document is not
displayed in thumbnail view, display it in list view.
• Characters and images in thumbnail view may not be correctly displayed because they are
scaled down from the actual sizes.
Note • The orientation of an image displayed in thumbnail view depends on which orientation the
document was stored in.
• This feature may not be displayed depending on the machine configuration. Some models
require an optional package to use this feature. For more information, contact our Customer
Support Center.
 Loading...