Using a Scanner on the Network
133
Scan
7
1 Create a folder in the desired directory on your computer (Example of folder name:
MyShare).
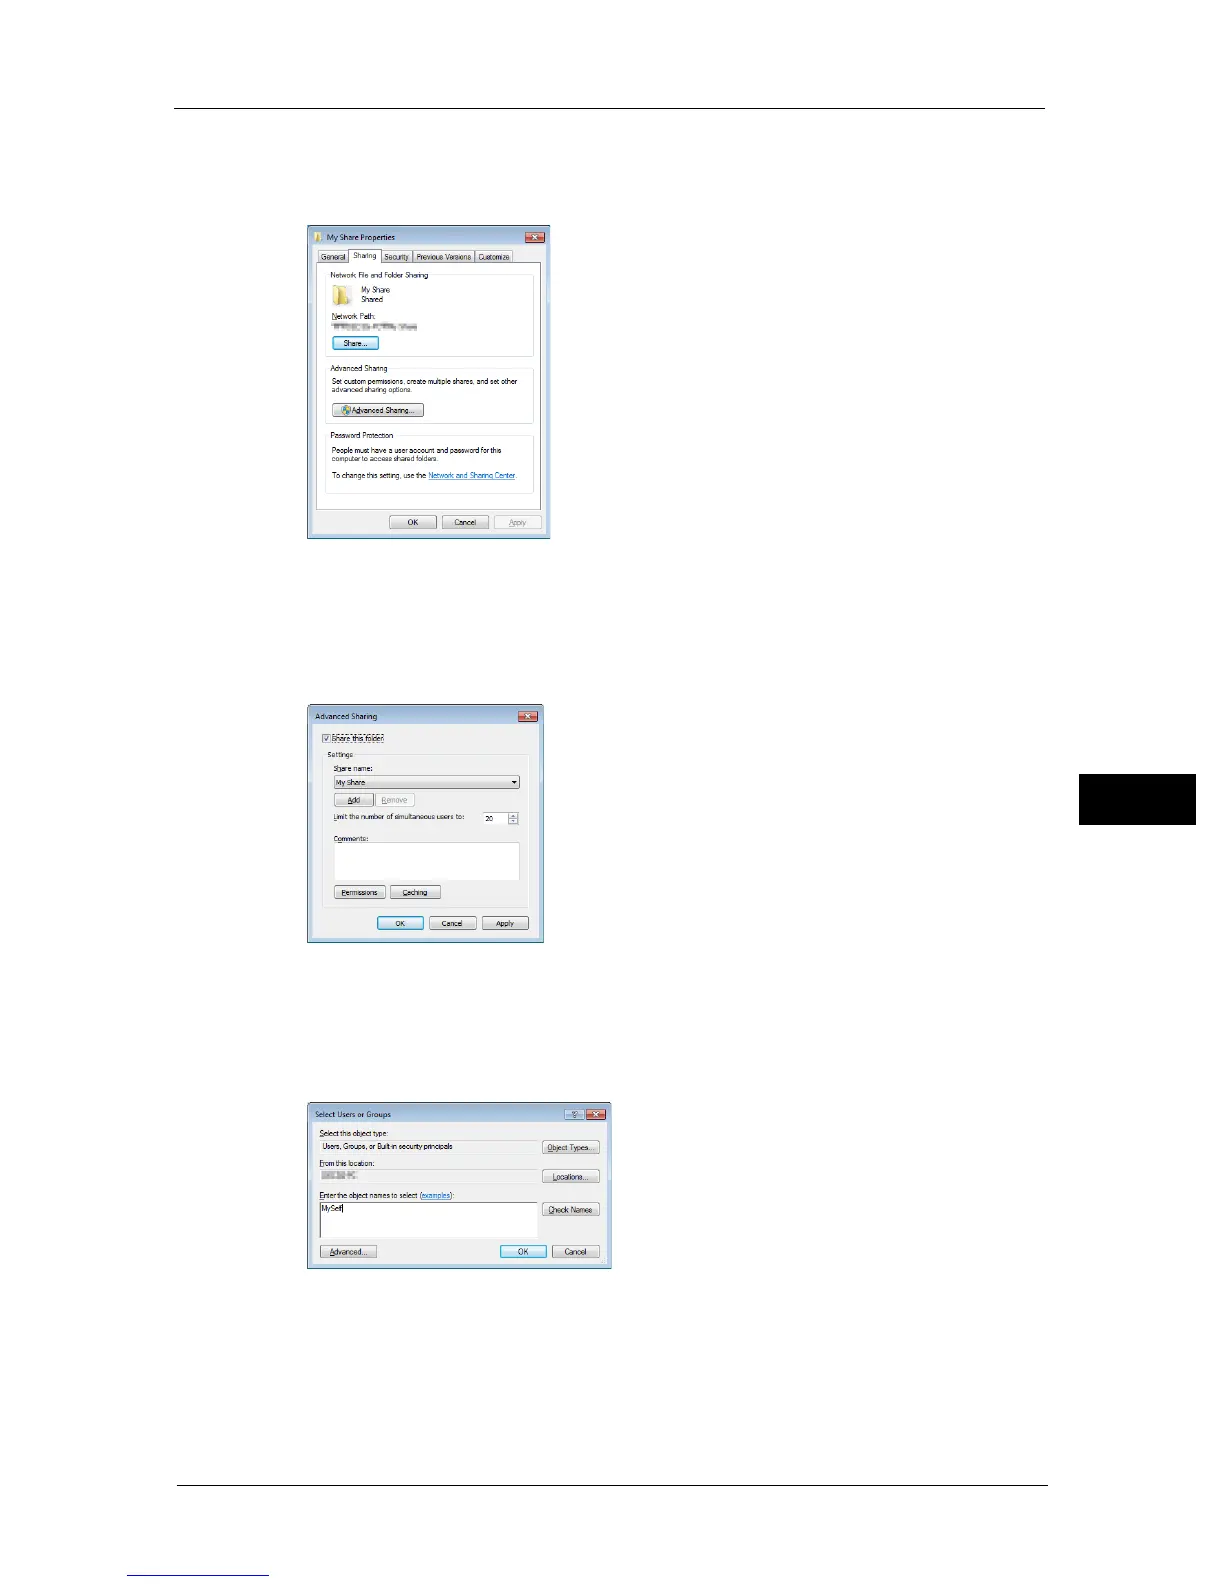
2 Right-click the folder, and then select [Properties].
3 Click the [Sharing] tab, and then click [Advanced Sharing].
For Windows Vista, when the [User Account Control] dialog box appears, click [Continue].
4 Select the [Share this folder] check box.
5 Enter a shared name in the [Share name] box.
Note • Write down this shared name because you will use this name in the next setting procedure.
6 Click [Permissions] to create a write permission for this folder.
7 Click [Add].
8 Search user login name by clicking [Advanced], or enter the user login name in the [Enter
the object names to select] box and click [Check Names] to confirm (Example of user login
name: MySelf).
9 Click [OK].
10 Click the user login name that you have just entered. Select the [Full Control] check box.
This will grant you permission to send the document into this folder.

 Loading...


