7 Scan
134
Scan
7
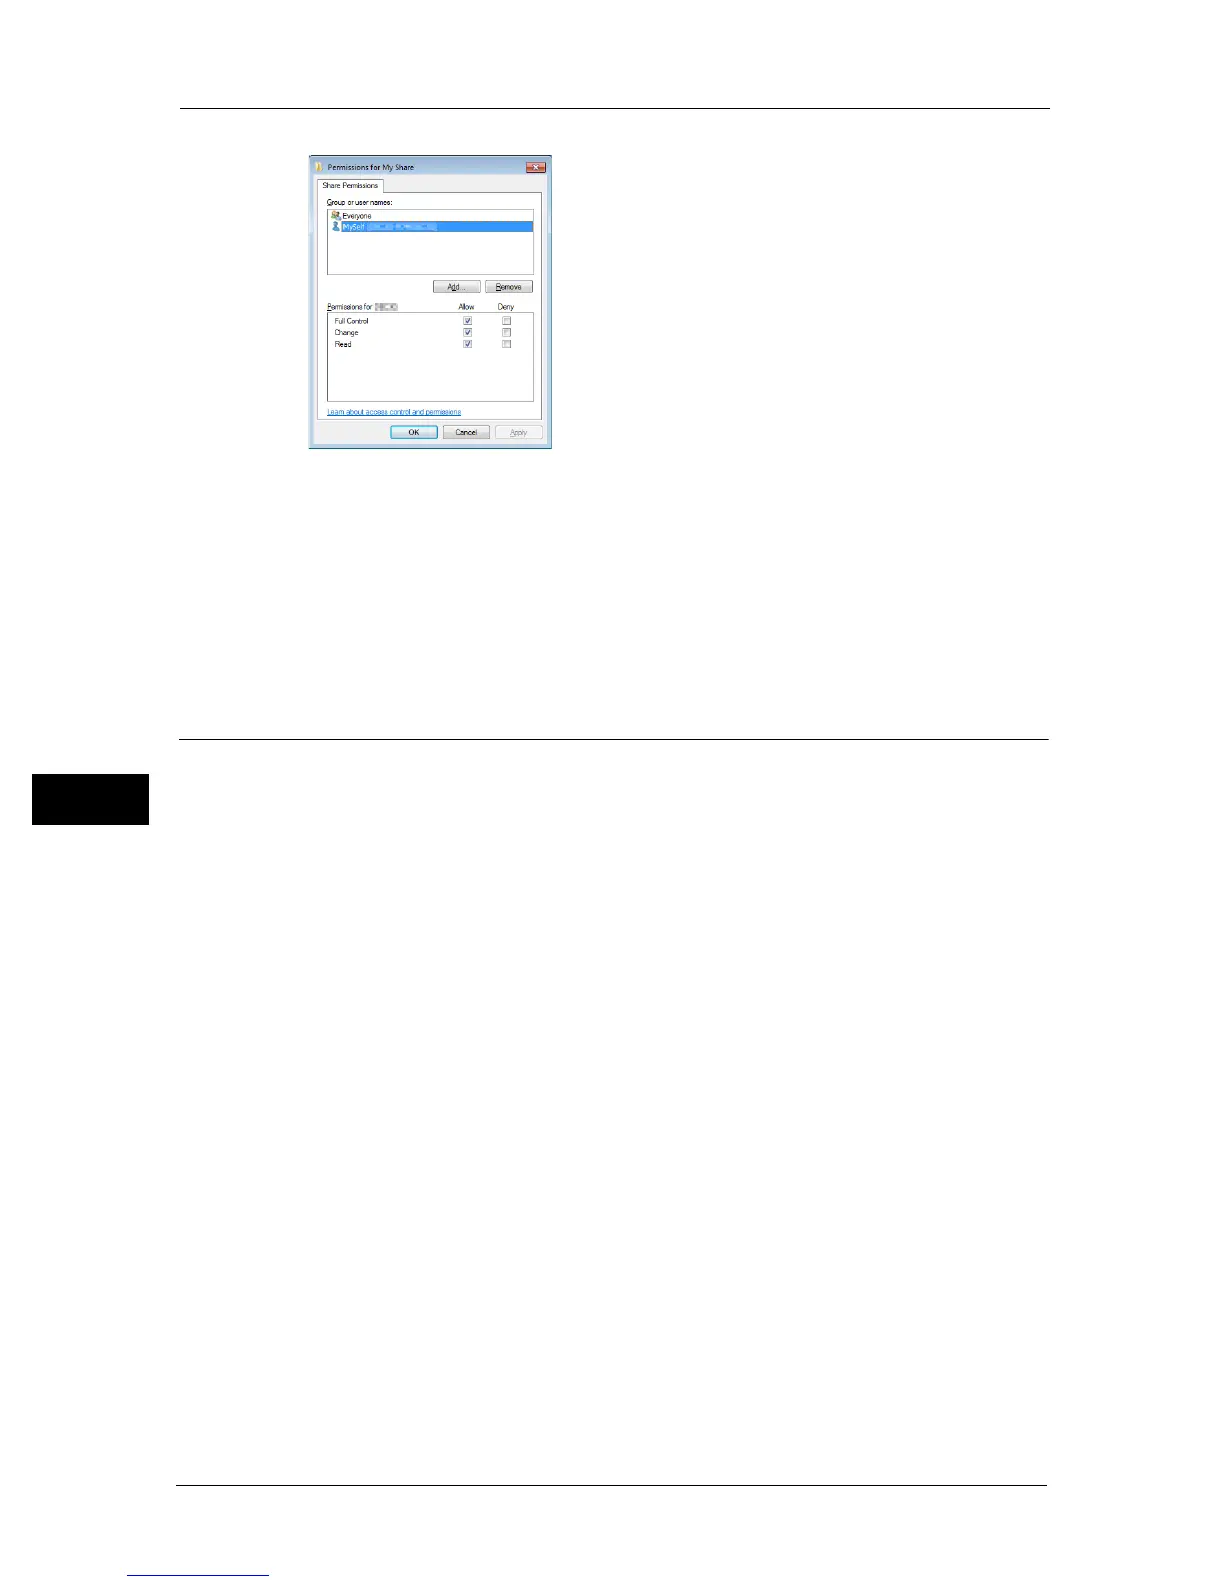
Note • Do not use [Everyone] as the user login name.
11 Click [OK].
12 Click [OK] to exit the [Advanced Sharing] dialog box.
13 Click [Close].
Note • To add sub-folders, create new folders in the shared folder you have created.
Example: Folder name: MyShare, Second-level folder name: MyPic, Third-level folder name: John
You should now see MyShare\MyPic\John in your directory.
After you created a folder, go to "Setting a Destination Using an Address Book" (P.134).
Setting a Destination Using an Address Book
You can configure the machine settings to use the Scan to Server/Computer feature with the
CentreWare Internet Services or Address Book Editor.
The following procedure uses Windows 7 as an example. The procedure differs depending
on the OS.
Before beginning to setup a destination, make sure you have the IP addresses you need such
as machine and computer.
Using CentreWare Internet Services
1 Launch your web browser.
2 Enter the IP address of the machine in the address bar, and then press the <Enter> key.
The machine's web page appears.
3 Click the [Address Book] tab.
If user name and password are required, enter the correct user name and password.

 Loading...


