four self-adhesive feet on the bottom of the device. Place your device on a solid,
level base.
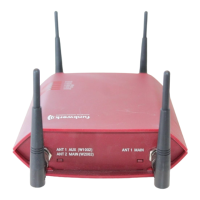
(3) LAN
For the standard configuration of your device via Ethernet, connect port ETH1 or
ETH2 of your device to your LAN using the Ethernet cable supplied. The device
automatically detects whether it is connected to a switch or directly to a PC.
Use just one of the ports ETH1 and ETH2, the second port is used to cascade a
number of devices. If you use both Ethernet connections on the same switch, loops
may be formed.
The standard patch cable (RJ45-RJ45) is symmetrical. It is therefore not possible to
mix up the cable ends.
(4) Power connection
Connect the device to a mains socket using the mains adaptor supplied.
Use the power cord supplied (or the screw strip terminal in the case of the WI
series) and insert it in the appropriate socket on your device. Now plug the power
cord into a power socket (100–240 V). The status LEDs signal that your device is
correctly connected to the power supply.
Note
To limit power in the event of a fault, the 24-V DC supply for bintec WIx040 and
bintec WIx065 must be protected with an externally fitted 2-A fuse.
Note
If the bintec WIx065 is installed outdoors, the lines laid outside the building are to be
categorised as TNV1 electric circuits in accordance with EN60950, as their SELV level
can also be overridden by transient overvoltage (e.g. during storms) during operation
in line with the regulations. When wiring the connections, it is therefore necessary to
make sure that protective measures against overvoltage are carried out where the
cable enters the building, to ensure that the limit values of a SELV electric circuit are
maintained in the building.
You can set up further connections as required:
• Setting up a serial connection: For alternative configuration possibilities, connect the seri-
al interface of your PC (COM1 or COM2) to the serial interface of the gateway (console).
However, configuration via the serial interface is not provided by default.
The device is now ready for configuration.
Funkwerk Enterprise Communications GmbH
3 Installation
bintec W1002/W1002n/W2002/WIx040/WIx065 11