CONFIGURING MAXPRO NVR
Configuring the Cameras
100 MAXPRO NVR 3.1 Operator’s Guide
4
To configure analog cameras
1. Click the Configurator tab. The System page displays by default.
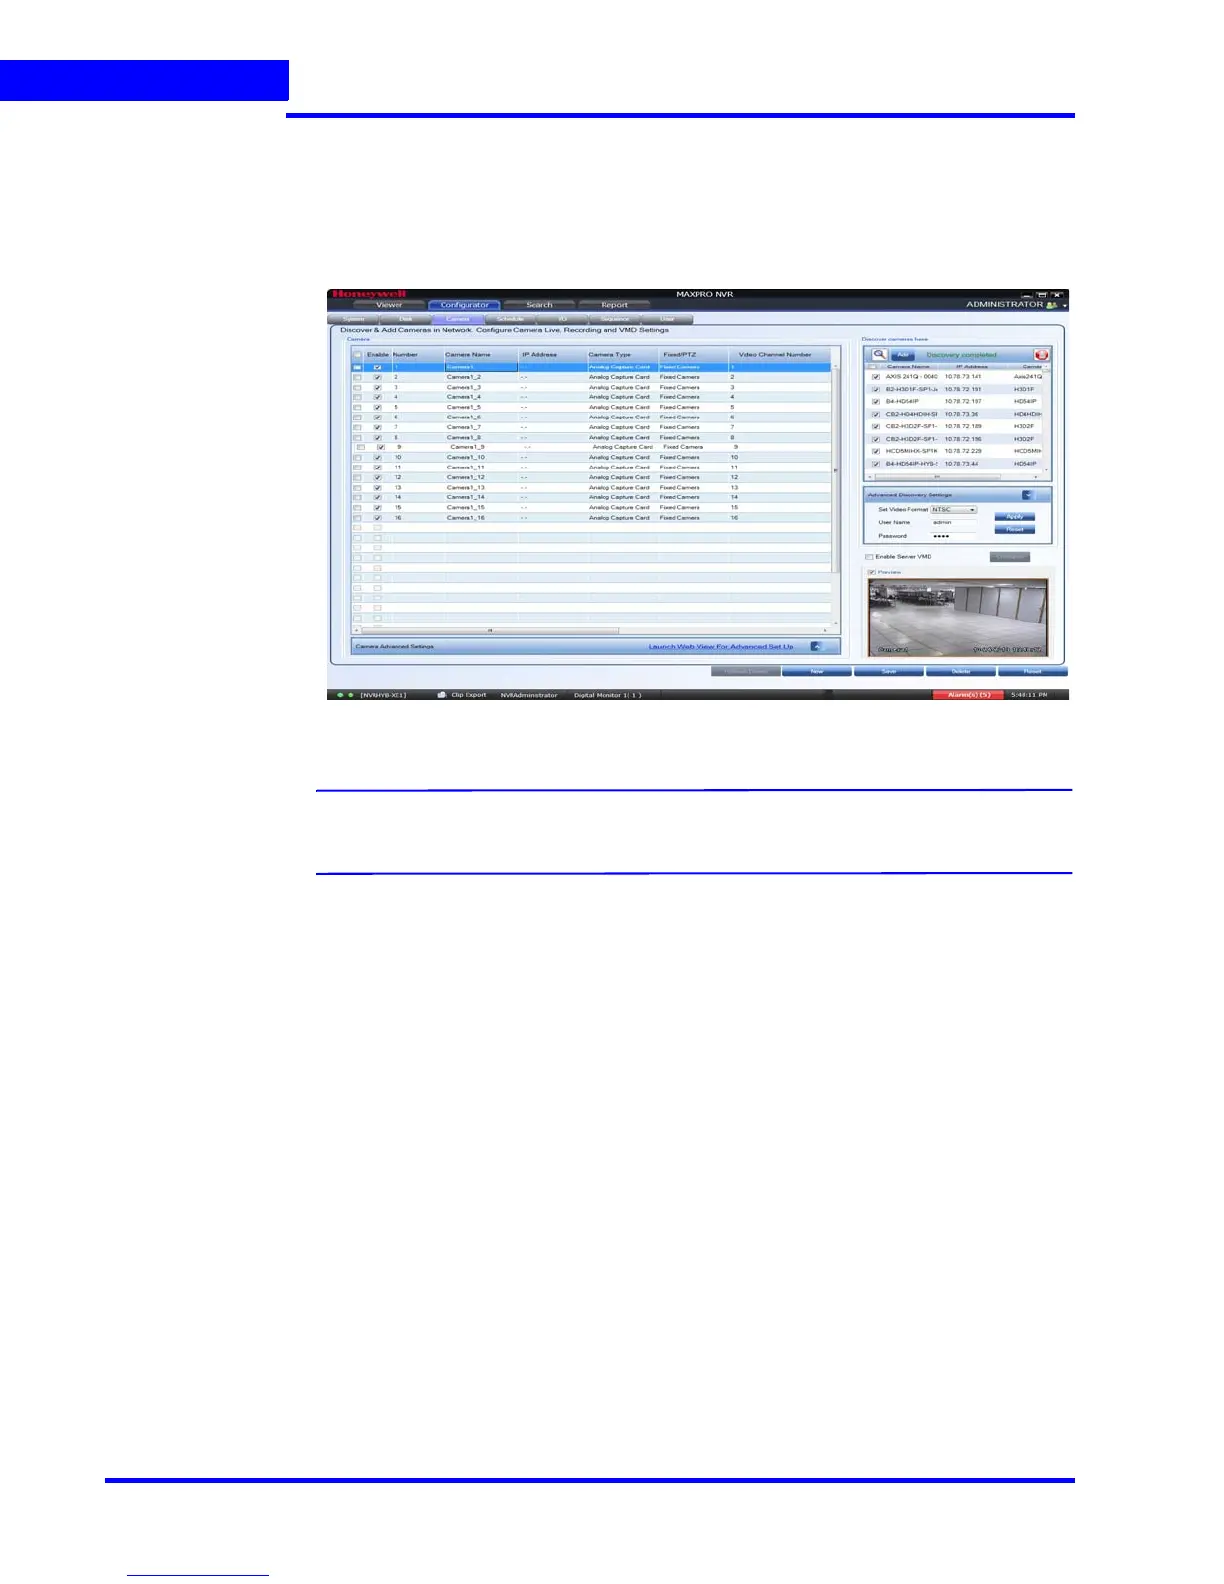
2. Click the Camera tab to open the Camera page.
Figure 4-25 Camera page
Note: All analog cameras that are pre-configured in the factory image appear in the
Camera page when you first open it.
3. Under the Camera pane, select a camera to change the default parameters for the
following settings.
• Enable/Disable - Enables or disables a camera for recording and live video. By
default the check box corresponding to a camera to enable live video preview is
selected. To disable live video preview, clear the check box corresponding to a
camera. The live video appears under Video Preview at the bottom right corner of
the Camera page.
• Number - Displays the camera number. You cannot modify the camera number.
• Camera Name - Displays the camera name. You can type a new camera name
limited to a maximum of 50 alphanumeric characters.
• IP Address - This is -.- by default for analog cameras. You can provide any valid IP if
required.
• Camera Type - Displays the type of camera. Select the Analog Capture Card option
to add analog cameras.
• Fixed/PTZ - Indicates whether the camera is a PTZ or fixed.
• Continuous Recording - All cameras added are defaulted to “24/7” recording. You
can choose a different option from the drop-down list.
• Event Based Recording - This is “None” by default. Select an option from the
drop-down if you want to do motion based recording.