. . . . .
LOGGING ON AND FAMILIARIZATION
Logging on Using Profiles
MAXPRO NVR 3.1 Operator’s Guide 43
5. If there is no profile set as default, then select the Profile corresponding to the MAXPRO
NVR server to which you want to connect.
Note: Set profiles if you have multiple MAXPRO NVRs and use the drop-down to
choose which NVR you would like to connect to.
6. Select the Display Video on Alarm check box to display the viewer as an alarm monitor.
7. Press ENTER or click . The Viewer tab appears.
Saving a Server Address in a Profile
To save a server address
1. In the client workstation, double-click the icon on the desktop to display the Log On
dialog box.
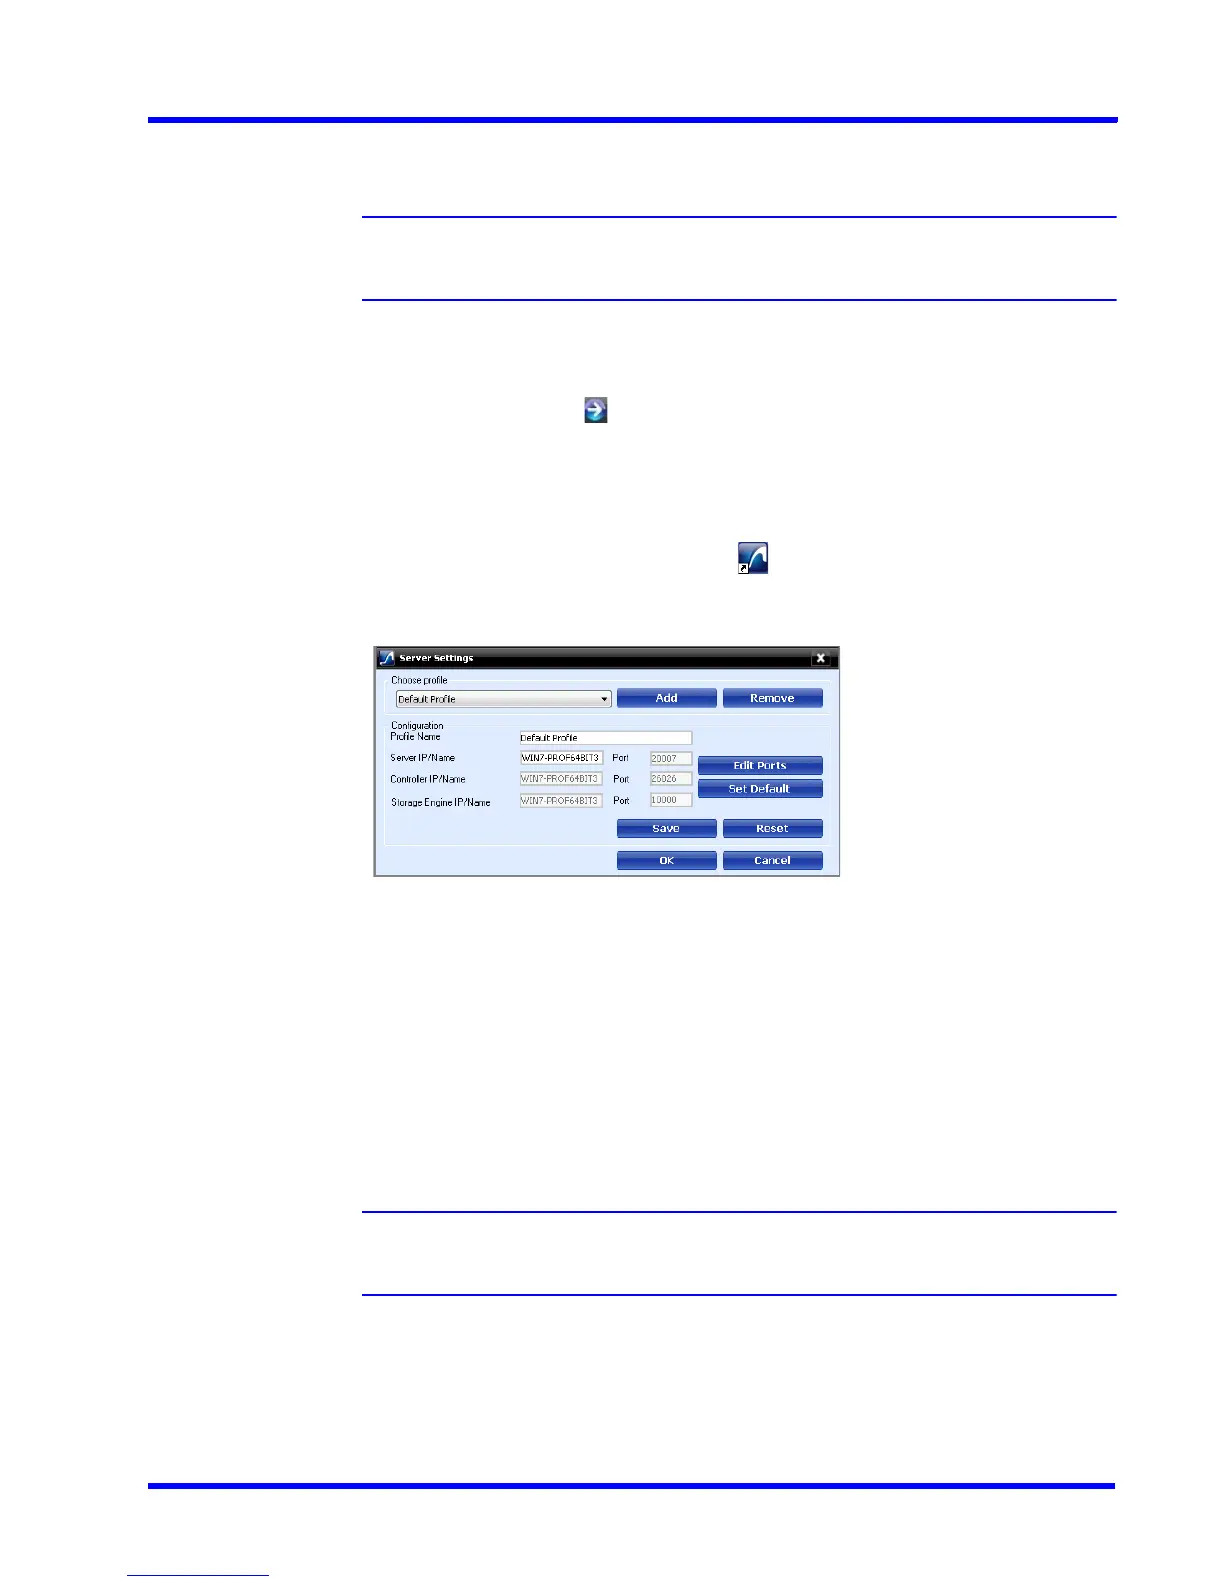
2. Click Server Settings. The Server Settings dialog box appears.
Figure 3-2 Server Settings dialog box
3. Click Add.
4. Type the Profile Name to identify the profile.
5. Type the Server IP/Name (numerical IP address or the network name of the MAXPRO
NVR server).
6. Click Save.
7. Click OK. The server address is saved in the profile.
Note: You can click Set Default in the server settings dialog box to set the profile as the
default profile.
Setting the Default Profile
To set the default profile
1. Select the profile you want to set as default before logging on to MAXPRO NVR.