38 User’s Manual INNOMAR Parametric Sub-Bottom Profilers / SESWIN
38 Innomar Technologie GmbH (2023-01)
5.2 Starting the Innomar SESWIN Software
5.2.1 Innomar SBPs with external PC (“smart, “compact”, “-usv”, “-rov”)
Make sure topside unit and control computer are connected to the same network. If the topside
unit is connected directly to the control computer (without network hardware like hubs, switches
etc.), then preferably use a crosslink cable. Although network adapters usually cross the lines
automatically if two devices are directly connected, this sometimes fails. Using a cable with
crossed lines helps to avoid this pitfall.
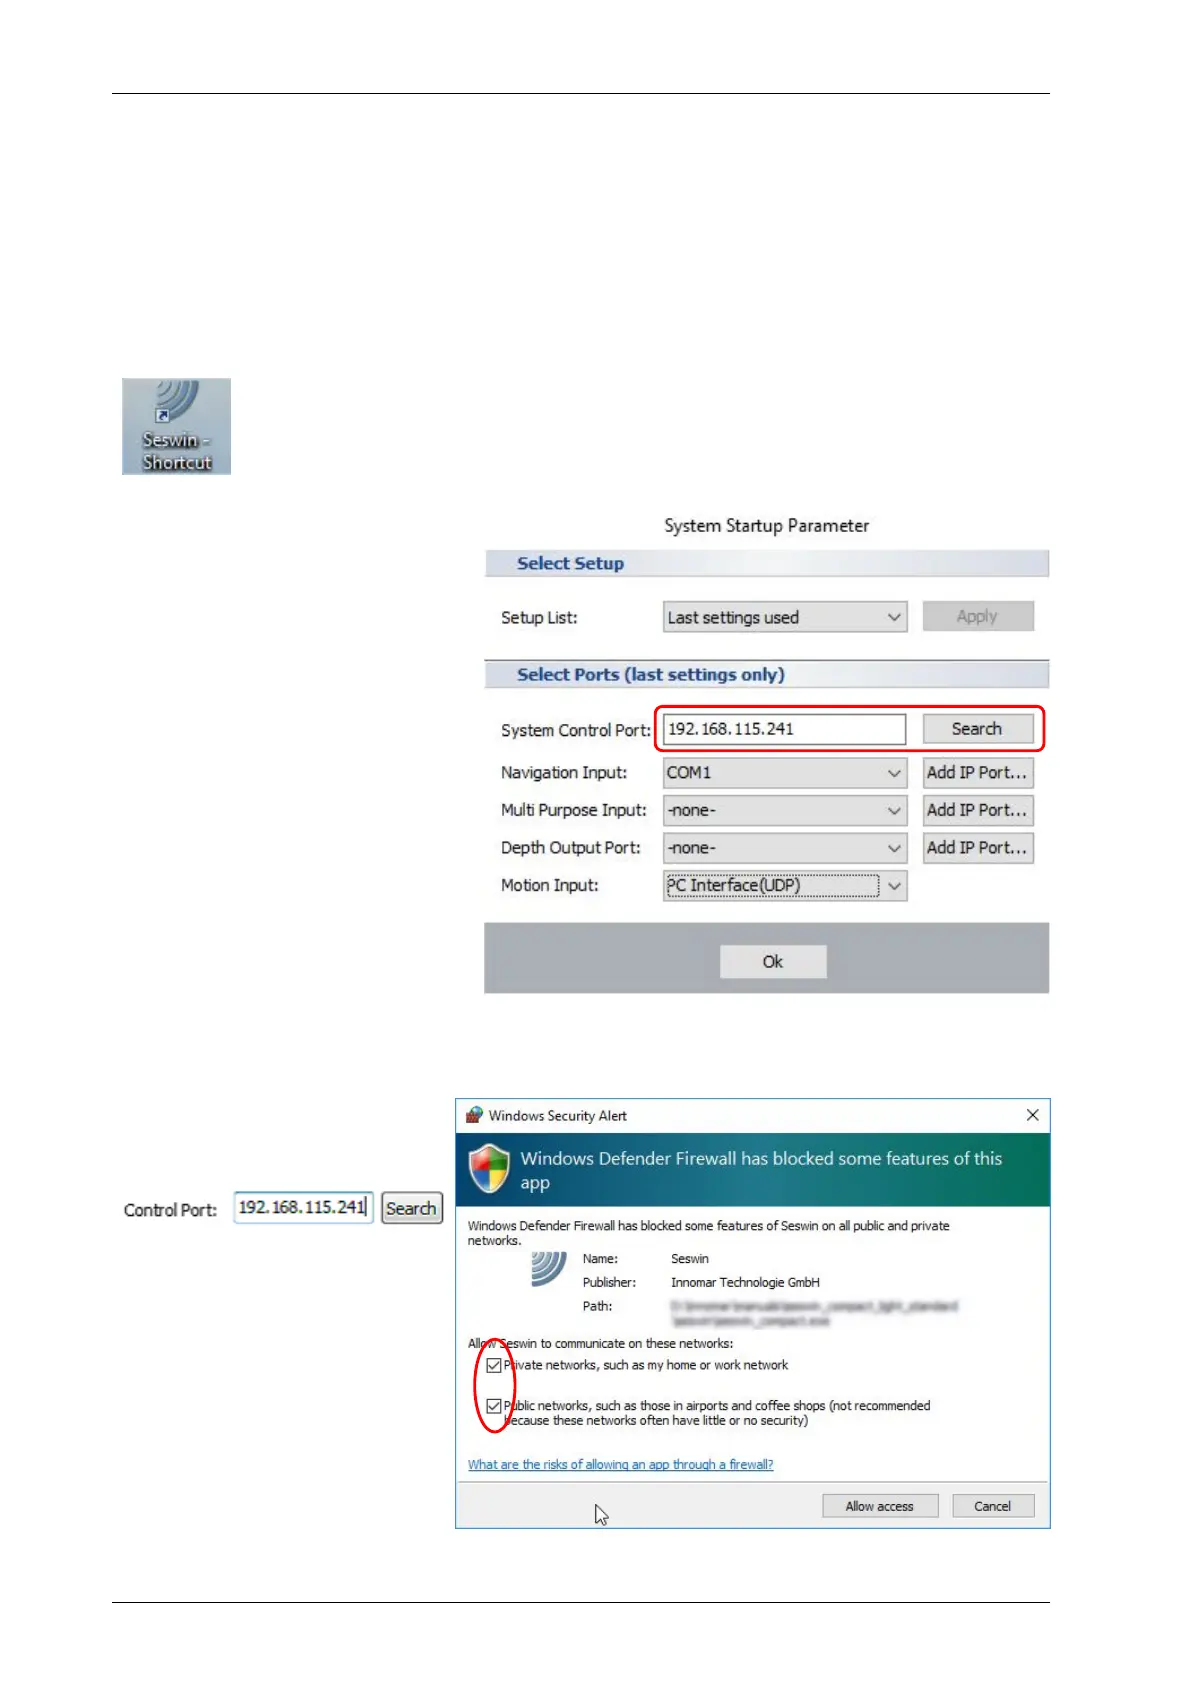
Usually, there is a SESWIN shortcut placed on the Windows desktop. To start the
software, just double-click the icon.
There might be a Windows message box popping up and asking if the application
is allowed to make changes to the system; simply press the “Yes” button.
After starting SESWIN, the
“System Start-up Parameter”
dialog is shown where the
System Control Port (topside
unit’s IP address) and all other
interface port settings are listed.
You should check if these
settings are correct. It is also
possible to assign other COM or
IP (TCP or UDP) ports.
These settings cannot be
changed later; this is possible at
the program’s start only.
For IP port settings see 5.2.5 on
page 40.
It is important to set the topside unit’s IP address correctly. It is good practice to note a changed
IP address on the topside unit itself.
If the current address is not
known, you can try to find it by
using the “Search” button:
For details see next page.
If SESWIN accesses the network
for the first time (like searching
for the topside unit), the Windows
firewall asks if SESWIN network
access is allowed.
Tick both check boxes and
press “Allow access” button.