GAPS - User Guide
4.2.2.1 Configuring GAPS Network Interface
Connect GAPS powered on to a computer, launch the Web-based User Interface on the
computer and edit the network parameters. Make GAPS compatible to your local Ethernet
network.
Every GAPS has its own IP address and net mask. In order to insert GAPS in your local
network, edit the network parameters.
Important
Restrictions on the choice of GAPS IP address and mask are detailed in annex B.
Gateway IP address is the address of the workstation connected to other networks of the
vessel.
Turn GAPS OFF and ON after every IP address edition.
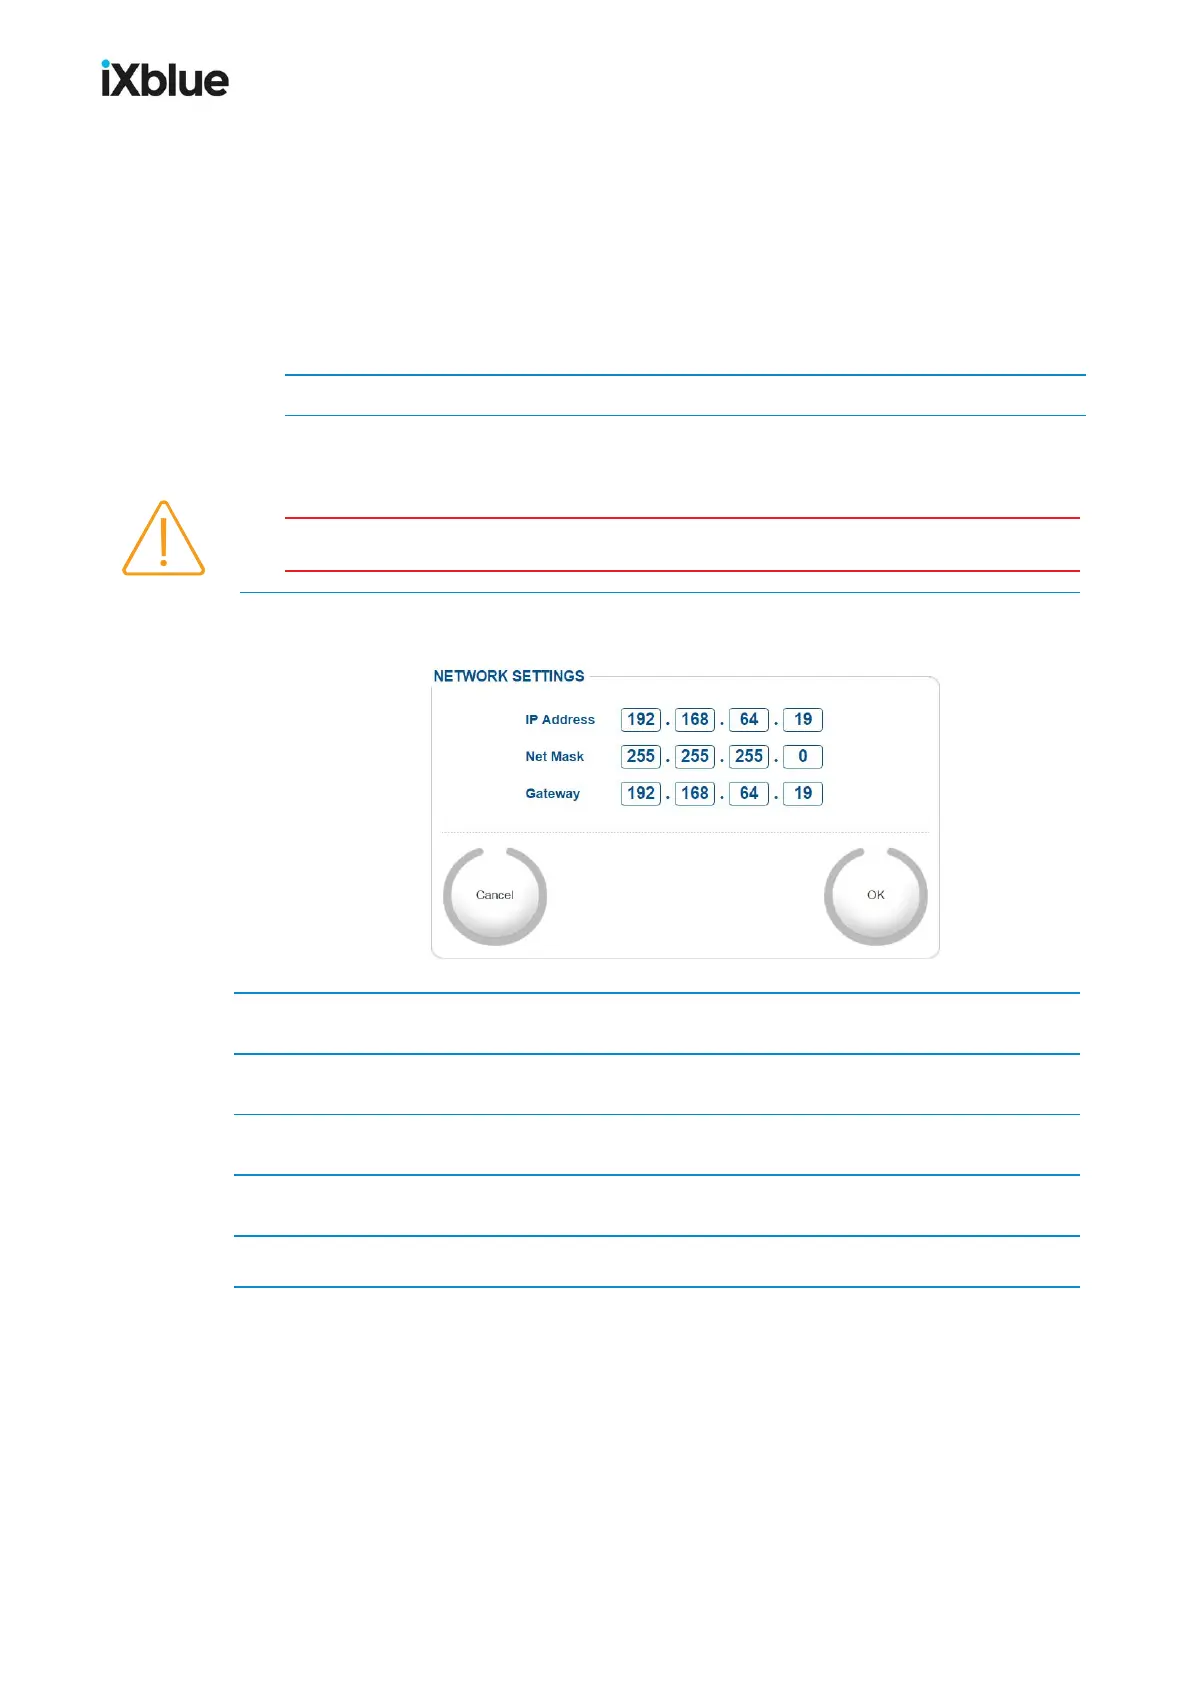
1. Click on INSTALLATION in the menu and select NETWORK.
The NETWORK SETTINGS window opens.
2. Edit the IP Address by clicking in the fields and entering new values.
3. Edit the Net Mask by clicking in the fields and entering new values.
4. Edit the Gateway by clicking in the fields and entering new values.
5. Click on OK to validate the input of the values.
6. Turn the system OFF and then ON.
60 MU-GAPS-AN-005-H - November 2019