GAPS - User Guide
4.2.1.2 Configuring the Computer
IP Address
Assuming that the system IP address is 192.168.36.19, and the subnet mask is
255.255.255.0. Before configuring the computer, choose the computer IP address. This
address must be taken from the same subset as the address configured in the system. In this
example, 192.168.36.20 is used for the computer IP address.
Subnet Mask
The subnet mask must be the same between GAPS and the computer.
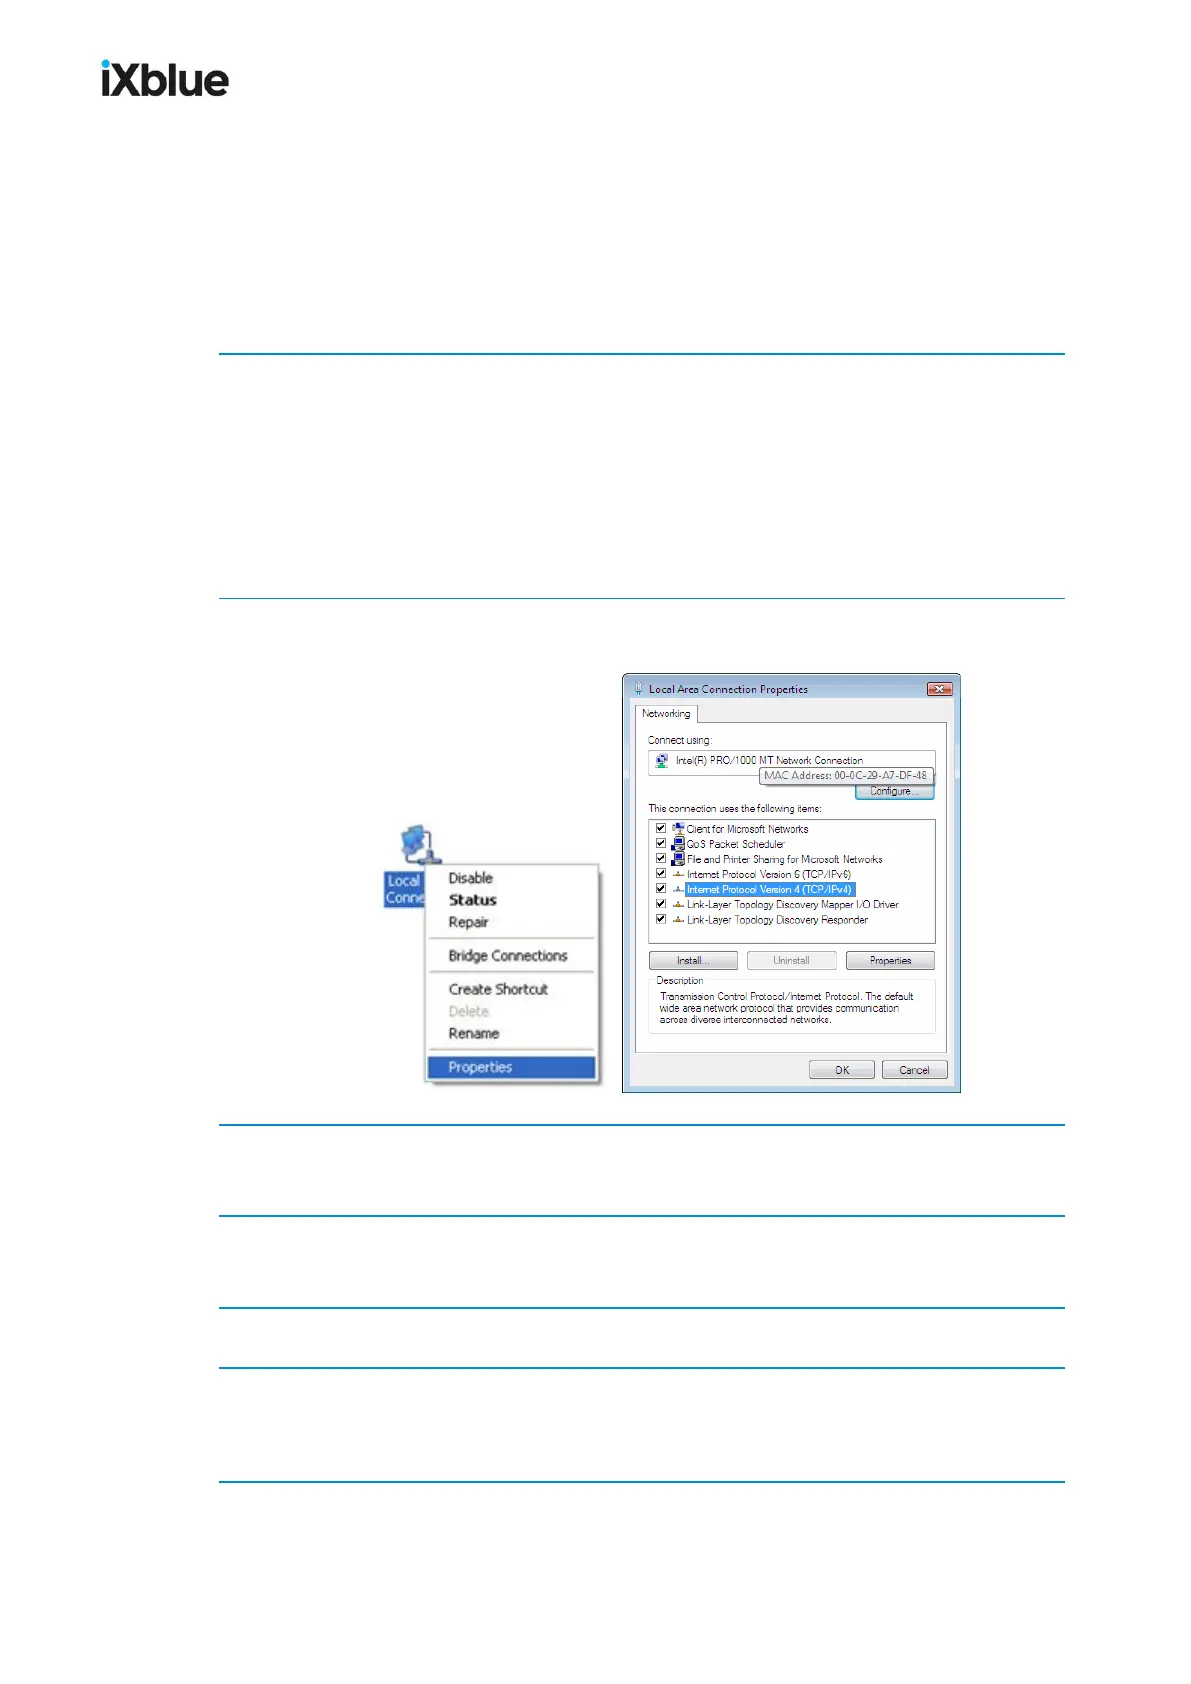
1. Access on the computer to the Network Connections Window:
● Locate the icon “My Network Places” on the desktop screen of the computer, right click
on the icon then select Properties
● If you cannot locate this icon, you can still proceed by selecting Start menu > Connect
To > Show all connections.
● Select Start menu > Settings > Control Panel, then double click on the icon Network
Connections.
2. Right click on Local Area Connection icon and select Properties:
The Local Area Connection Properties window opens:
3. Double click on Internet Protocol (TCP/IP) label text.
The Internet Protocol (TCP/IP) Properties window opens.
4. Select the option Use the following IP address and enter 192.168.36.20 for the IP address
field and 255.255.255.0 for the Subnet mask.
5. Leave the Default gateway and DNS server addresses blank.
6. Click on OK button to validate the modifications.
You have set up the computer configuration to enable the Ethernet communication between
the computer and GAPS.
MU-GAPS-AN-005-H - November 2019 57