Keysight N9010A EXA Service Guide 549
Assembly Replacement Procedures
Disk Drive
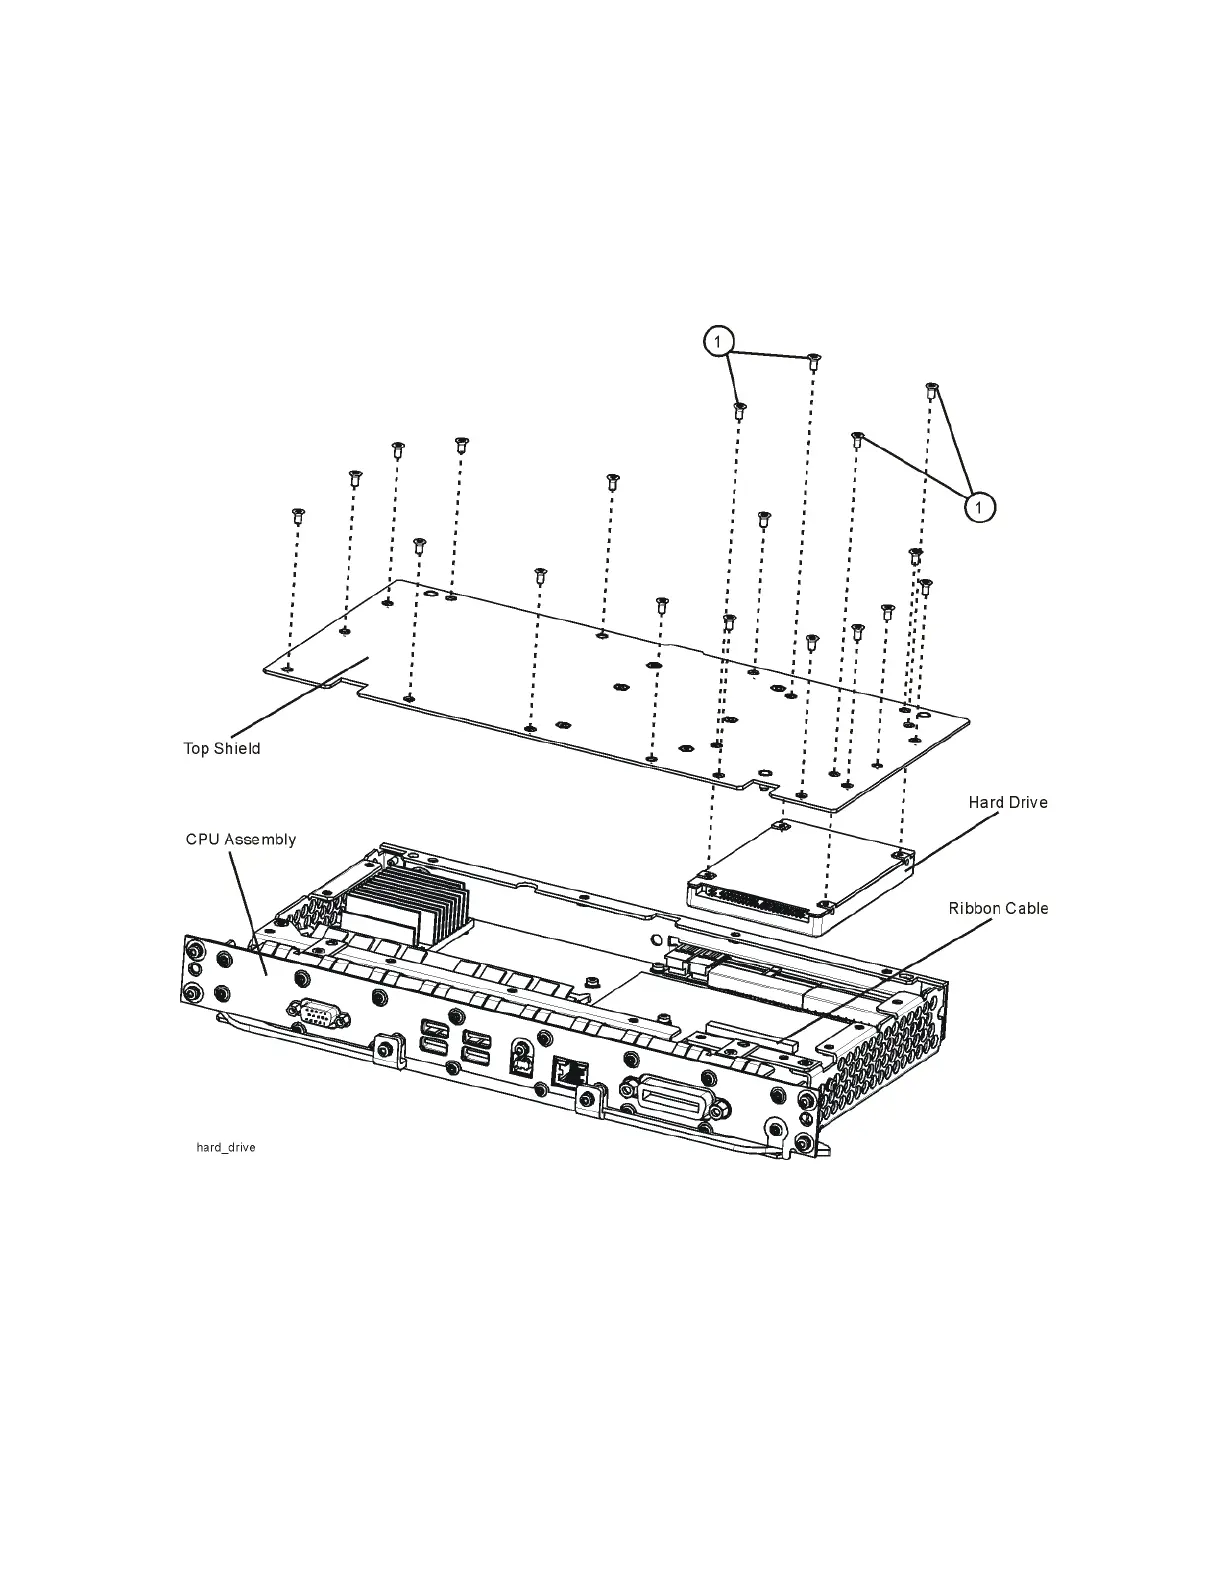
6. Refer to Figure 15-69. Uninstall the existing Hard Drive from the Top
Shield by removing and discarding the 4 machine screws (1) from the
CPU assembly. Screws need to be discarded because dried precoated
screws can cause cross threading.
Figure 15-69 CPU/Hard Drive Parts
7. Remove the ribbon cable from the Hard Disk Drive and set the ribbon
cable aside. Discard the defective Hard Disk Drive.
8. Locate the Programmed Hard Disk Drive.
9. Connect the Hard Drive ribbon cable to the Programmed Hard Disk Drive.

 Loading...


