Sampling
P0
P1 P2 P3 P4 P8
83
In order to sample with the maximum dynamic range,
use the rear panel [LEVEL] knob to adjust the level as
high as possible without making “ADC OVERLOAD!!”
appear. Then set “Level” (0–2a) to 127, and adjust
“Recording Level” (0–1d, 0–2c) as high as possible
without making the “CLIP!!” indication appear.
In the sampling standby condition after you press the
[REC/WRITE] key, the sound that is output from the
AUDIO OUTPUT L/MONO, R and from the head-
phones will be adjusted by the “Recording Level” slider,
but when you cancel sampling standby condition or can-
cel sampling, the sound will be output at the 0 dB level.
If you have lowered the “Recording Level” below 0 dB,
please be careful of sudden changes in volume.
If the sound is still distorted even if you lower the
“Recording Level,” it is possible that distortion is
occurring in the input stage of the AUDIO INPUT, or
that distortion is being caused by the settings of the
internal effect.
Excessive signal levels in the input stage of the AUDIO
INPUT can be verified in the P0: Input Setup tab. If an
indication of “ADC OVERLOAD!!” appears above the
“Recording Level” bar display, the distortion is due to
excessive levels in the input stage of the AUDIO
INPUT. Adjust the rear panel [LEVEL] knob until the
"ADC OVERLOAD!!" display no longer appears.
If there is still distortion even after [LEVEL] has been
lowered, it is possible that the distortion is being caused
by the settings of the internal effect. Lower the “(Input
1, 2) Level” (0–2a), or adjust the effect settings.
If you have sampled at a low input level, you can exe-
cute Normalize in “Normalize/Level Adj.” (1–1I) to
amplify the level to the maximum possible without
clipping.
▼ 0–1: Page Menu Command
0–1A: Delete Sample
This command deletes all samples, the currently selected
sample, or samples that are not mapped to a multisample
(i.e., unused samples).
1 Select this command to open the following dialog box.
2 Use the radio buttons to specify which samples will be
deleted.
Selected: The currently selected sample will be deleted.
The sample assignment for “Index” (0–1a) will change to
---No Assign---.
Unmapped Samples: All samples that are not mapped
(used) in a multisample will be deleted.
All Samples: All samples in memory will be deleted. The
sample assignments of all multisamples will change to ---
No Assign---.
3 To execute the Delete Sample command, press the OK
button. To cancel, press the Cancel button.
If the sample data (waveform data) of the sample you
delete is being used by another sample, the sample data
itself will not be deleted. Only the sample will be deleted.
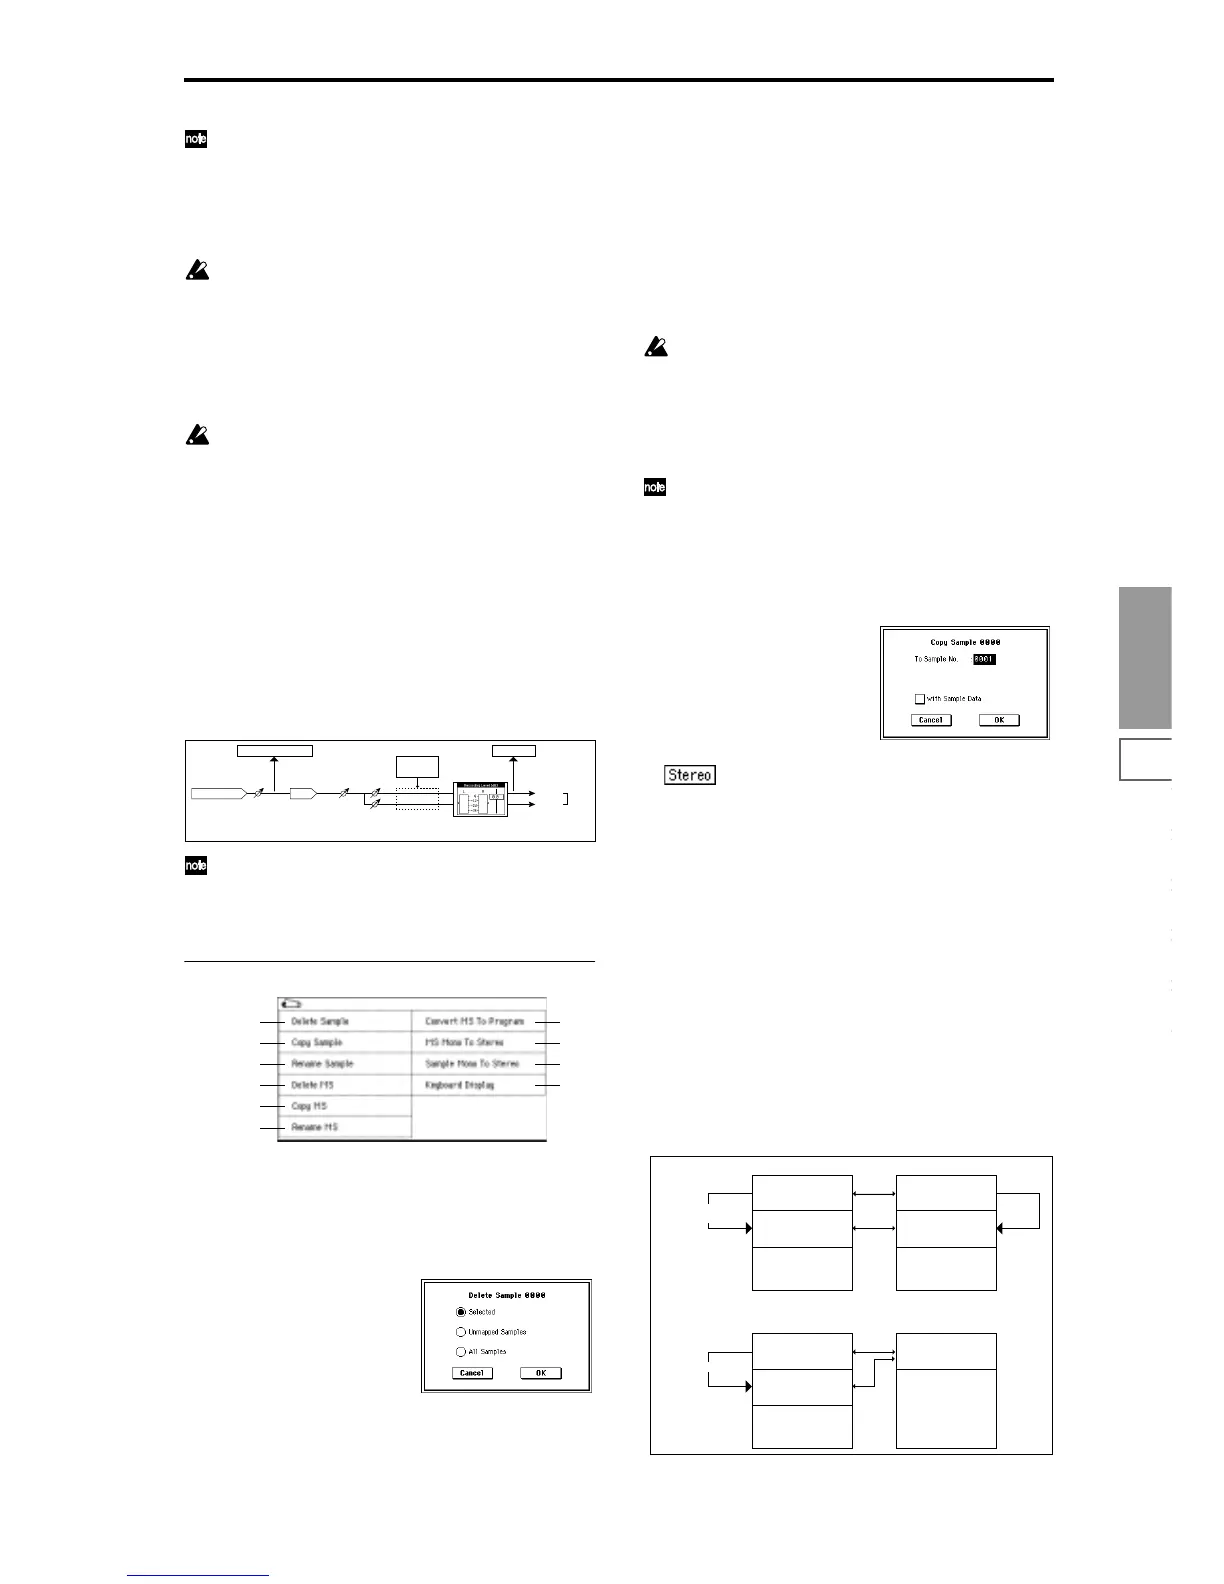
0–1B: Copy Sample
This command copies the currently selected sample to
another sample.
The copy destination sample number will automati-
cally be included in the sample name of the copy desti-
nation. If necessary, use “Rename Sample” (0–C) to
rename it. When doing so, make sure that the name is
not identical to any other sample name. (The sample
name is used to distinguish stereo samples.
☞p.81)
1 Select this command to open the following dialog box.
2 Specify the sample number of the copy destination.
When copying a stereo sample, specify both the
L and R channels for the copy destination sample num-
ber.
3 If you check “with Sample Data”: Executing the copy
will simultaneously copy the sample data (waveform
data) as well. The copy source and copy destination sam-
ples will exist as completely independent samples. For
example, you would use this when you wish to start with
the same sample data, and edit it separately in P1: Sam-
ple Edit to create two or more different types of sample.
If you do not check “with Sample Data”: Executing the
copy will not copy the sample data (waveform data). The
newly created sample will share the sample data of the
copy source sample. For example, you would use this
when you wish to use P2: Loop Edit to create two or
more versions of the same sample data with different
loop addresses. Sample memory area will not be con-
sumed by this type of copy. If you use P1: Sample Edit to
edit the sample data, the results will affect all samples
that share this sample data.
AUDIO INPUT
ADC
Analog to Digital
Converter
LEVEL
(MIN...MAX)
"Level" (0–2a)
[127=0dB]
"Pan" (0–2a)
ADC OVERLOAD !!
L-Mono
R-Mono
Stereo
"Sample Mode" (0–1c)
Insert
Effects
CLIP !!
"Recording Level" (0–1d)
[–inf ... 0.0dB ... +18.0dB]
0–1A
0–1B
0–1C
0–1D
0–1E
0–1G
0–1H
0–1I
0–1J
0–1F
0000: NewSample_0000
0001: NewSample_0001
"Copy Sample"
with Sample Data
Sample Data
Sample Memory
Sample Data
0000: NewSample_0000
0001: NewSample_0001
"Copy Sample"
Sample Data
Sample Memory
 Loading...


